
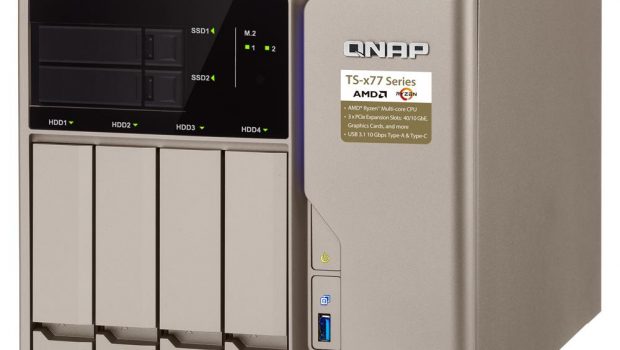
QNAP TS-677 NAS: Upgrade and setup – Review
This is a look at a real-world setup of the TS-677 as an migration and upgrade from a previous QNAP model.
QNAP pride themselves as being able to take a working RAID set from a previous model and be able to transfer it to another equal or latter model.
The requirements are straightforward; the disks need only to be inserted into the replacement NAS in the same physical order. The NAS should then self-configure and boot up normally. The process followed was;
- Install the Hard Disks into the TS-677 in the same order and power on the NAS
- Establish network and Administration access and perform updates
- Configure network and basic settings
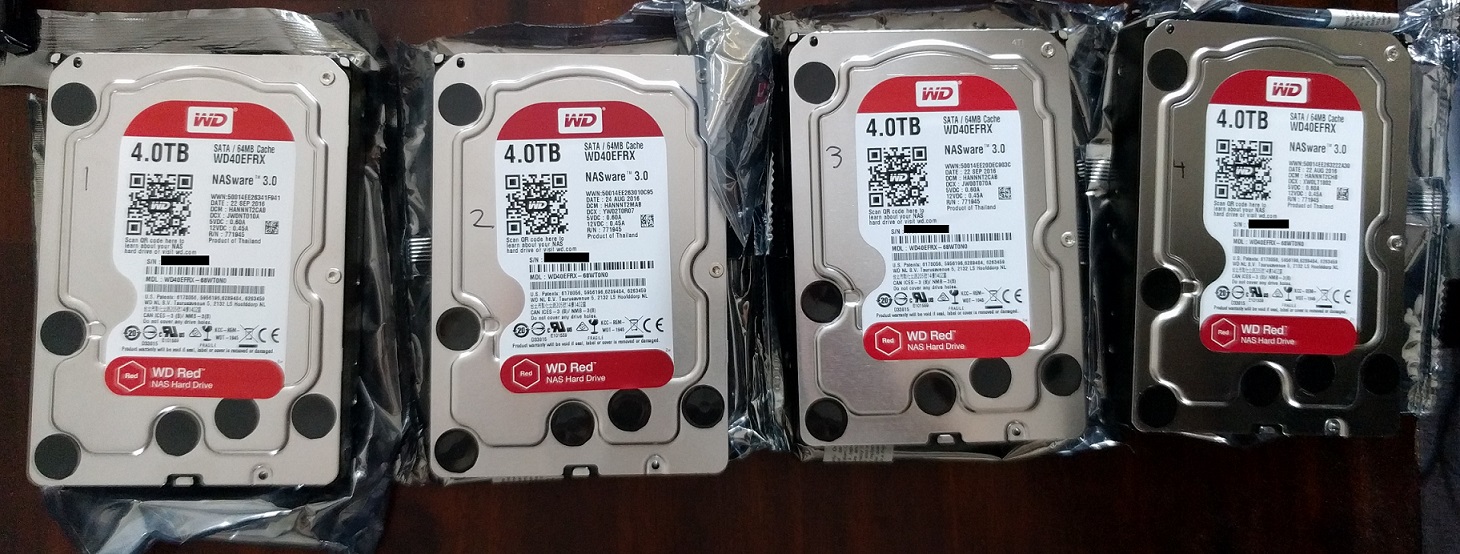
In this case, a RAID 5 set of 4x4TB Western digital RED NAS disks were used, each pre-numbered 1 through 4 to ensure there was no confusion. These were removed from a failed QNAP TS-453 PRO series, which is an Intel based QNAP. These were installed into the disk trays and inserted into the new TS-677 AMD Ryzen based NAS.
Powering on the NAS was very rewarding with the instant whirl of all four of the disks, but at this moment it is purely a leap of faith. The TS-677 does not have an LCD screen or any other way to communicate to the user what it is doing. Somewhere in the order of 10 minutes of waiting, until the NAS actually beeped and the start-up was complete!
The next remaining task was to configure the network connectivity. Previously, on the earlier model, the network was configured with a NIC team directly to the desktop and a USB wireless adapter to the internet. It’s therefor perhaps unreasonable to expect this configuration to automatically work, especially if you are changing from a NAS with a different number of NIC ports. In this case, it actually would have likely worked; if the NIC team configuration was not already removed from the PC it was connected to originally. The QTS network configuration is retained on a migration and if possible, it is restored.
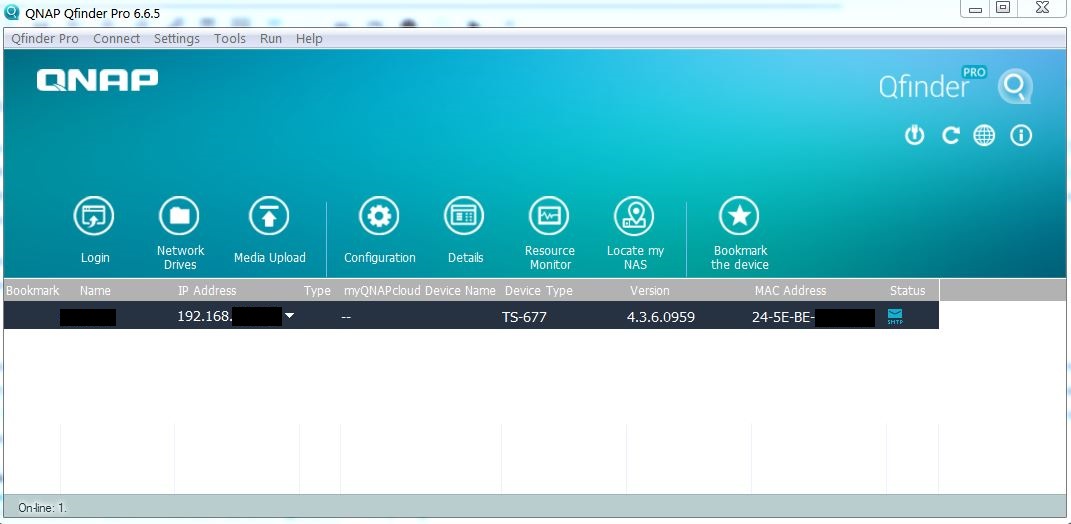
For fast access, the NAS was connected to the LAN and identified using the Qfinder utility. This utility is indeed quite powerful, enabling the NAS to be restarted and partially administrated outside of the web interface.
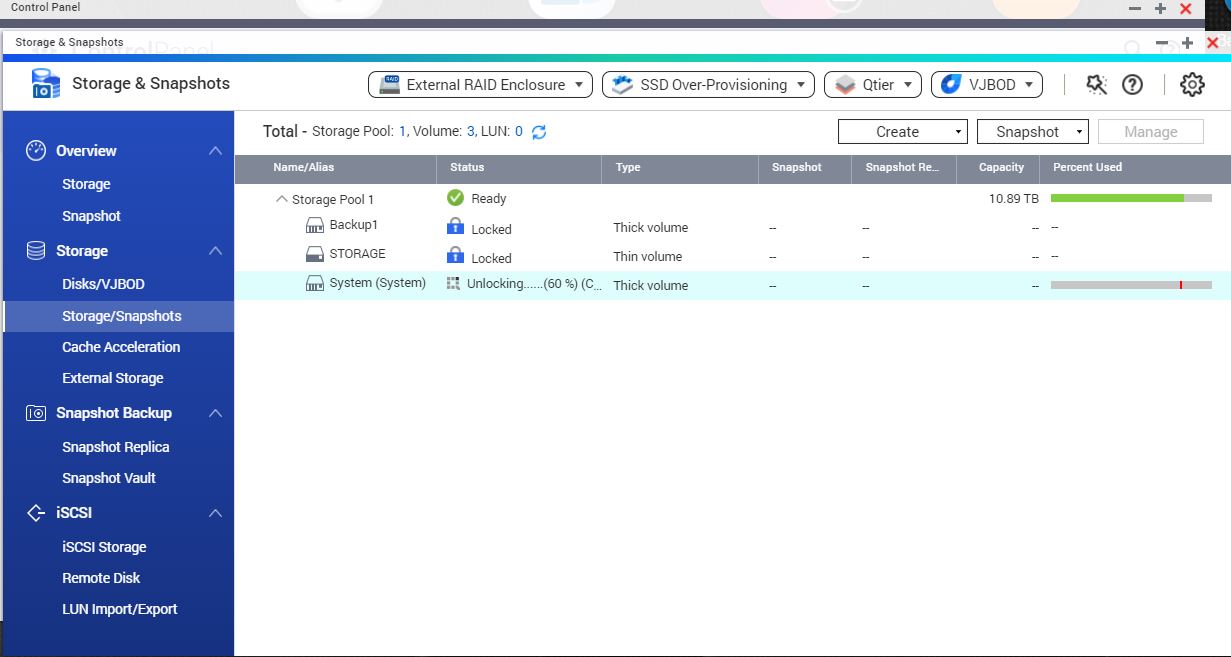
As the previous QNAP was running a much older version of QTS, perhaps around 4.2.x, it certainly needed an update. QTS prompted for firmware and multiple app updates, however the storage pools were all encrypted and therefor locked. It is important to stress that if you did not know your encryption password, then you would have absolutely no chance accessing your data. You would however be able to format your disks and create a new RAID and storage pool. Unlocking the encrypted drives is straightforward, but unfortunately, it’s a one-at-a-time process for each volume and it takes several minutes each, depending upon the amount of data.
Once the system volume was decrypted, we could start to download the firmware and application updates. It is preferable to apply the firmware update first and this was very straightforward, the download and installation process is an overlay on the administration screen and you are then prompted for a reboot.

Upon the reboot, there was some considerable time as the update was applying, but once completed the NAS spoke, a voice actually said that the start-up was complete.
Configuring the NIC team using adaptors 3 & 4 was a simple tick and click and it was indeed faultless. With a NIC team, the maximum physical speed between the desktop PC and the NAS can be obtained, which is perfect for backups.
Replacing disks and rebuild speed
Sometime between the downtime from the previous QNAP, to installation and setup of the TS-677, Disk 3 had developed a SMART warning.
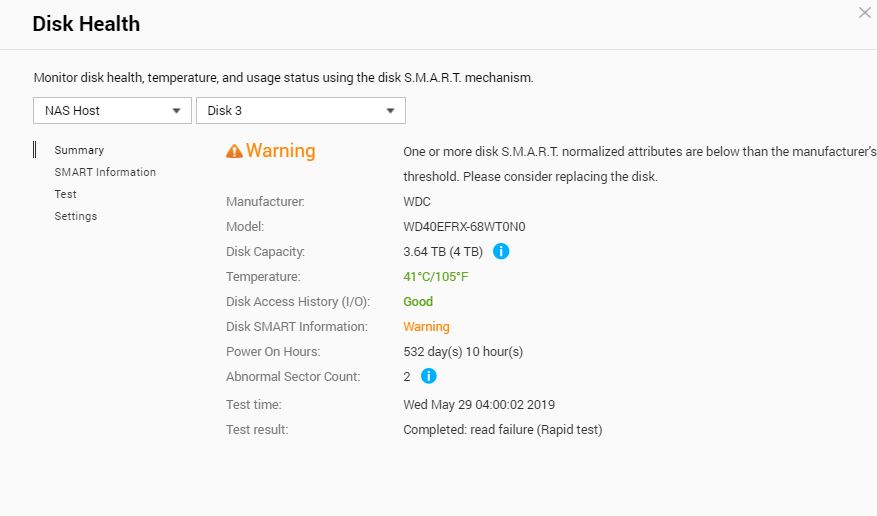
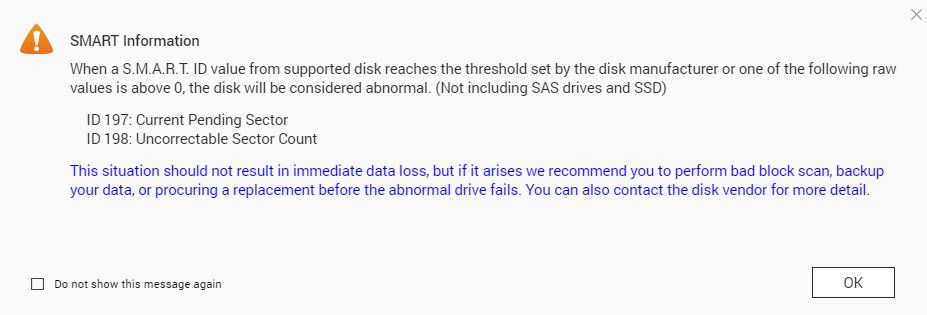
Although not a fatal error, it was covered under warranty, so after a quick process with Western Digital a replacement disk was sent and it was time to test the QNAP’s ability to rebuild a RAID 5 array.
The process used was:
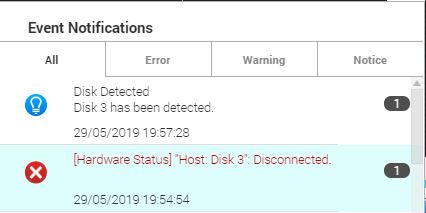
- Remove Disk 3, forcing the RAID into degraded mode
- Install the replacement disk and wait.
And in a nutshell, this is exactly the case. There was no inbuilt “replace disk” option in the storage manager to do a ‘soft-swap’. It took only a few minutes for the NAS to report that the RAID array was “rebuilding”.

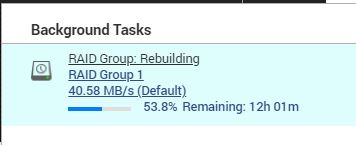
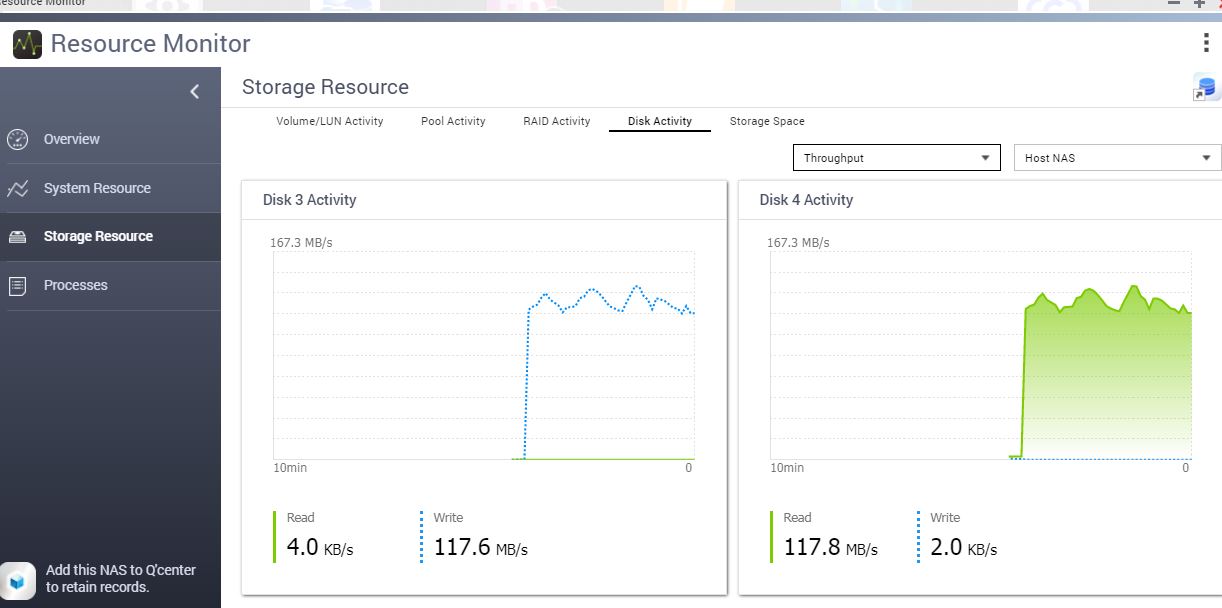
Monitoring the resource monitor, the NAS CPU never exceeded the 10% mark; even then it was a momentary spike. The uncomfortable feeling that should another disk fail, you have lost everything is never absent from your mind; especially as the hours progress. It wasn’t until a few hours into the process when the estimated time read 12 hours that it was clear, something was forgotten. That something was the backup tasks being pushed from the PC, they had kicked in and reduced the speed of the process by at least 50%.

Nevertheless, the initial task the NAS performs appears to involve only the disk in question and it’s safe to assume this is a format or disk preparation. The disk throughput averaged consistently at 117.6 MB/s with a few spikes around 120 MB/s. It is fair to say however, the QNAP resource monitor can be a little confusing with multiple figures posted on top and bottom, so take the figures with a healthy grain of salt. The disk preparation was fast and then the entire RAID lit up. Disk read for disk 1, 2 and 4 respectively, each averaged at 117.8 MB/s whilst disk write again maintained 117.6 MB/s. Essentially, the disk write matched and maxed out with the degraded disk read performance of the NAS, which in all fairness is a pretty decent I/O performance all things considered, remembering also that there may be some encryption overhead involved.
As mentioned, at a certain point the drop in performance was noticed, upon investigation, we could see that for a period of time there was a ~50% reduction. This was due to the backups writing to the storage pool at the same time. What would seem an oversight for an experienced Systems engineer, (whom in all fairness was suffering from the flu!), was also a very good real world test, whereby you may not be able to disable backups or ‘normal use’ during a rebuild. Although, it’s highly recommended to do so! We can make some determinations about the inbuilt QoS in play, namely that it seems to give equal weight and priority to all I/O to the storage pool.
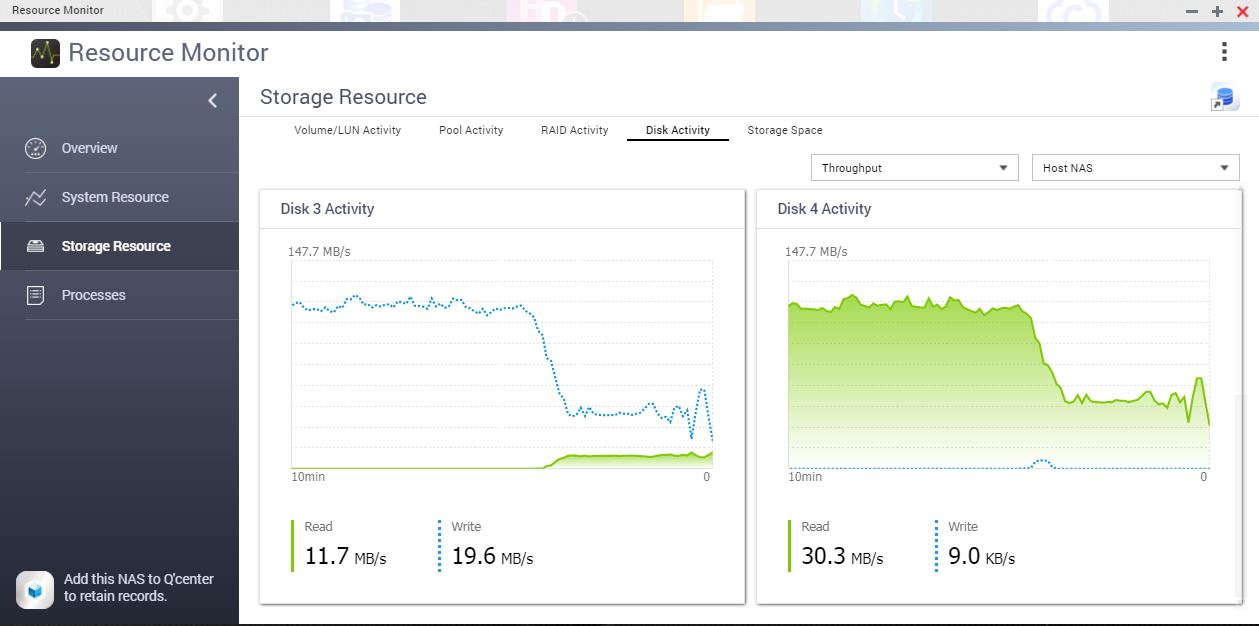
The slowest recorded drop during the rebuild.

So if the math holds out, the rebuild took 13 hrs, 49 minutes, with two backup jobs interrupting the I/O of the storage pool by 50% during a six hour period, but only for around 4.5 hrs in total (Based on backup logs). It is still a long process at just under 120 MB/s write speed, but factoring in the expected math and things seem to bode well for the QNAP.
To estimate the best-case rebuild time, the formula is to take the capacity of the disk which in this case is 4TB, divided by the average sequential write for your disks, hopefully of course you have a matching set. In this case, the performance was 117 MB/s.
((4,000,000 / 117)/60)/60)) = ~9.5 hrs
Considering the disk is around 50-70% utilised, and interruptions notwithstanding, the rebuild duration was close to as expected.
Conclusion
It is exceptionally easy to transplant your existing QNAP RAID into a newer model, the downtime is minimal and it is likely that the network settings will be retained. Transferring between an Intel or ARM to an AMD based NAS is of no consequence.
Rebuilding a hard disk in a RAID 5/6 array is a very easy process, but as disk sizes increase it is a considerable undertaking purely on the processing time. During that time the hard disks are under a lot of stress, if you have one failed disk from the same batch of hard disks then Murphy ’s Law dictates you are more likely to have another failure soon, you don’t want it half way through a 12-72 hour rebuild. It is of course highly recommended to back-up the data to another source when in degraded mode and additionally to reduce the heat built up, set the cooling fans to manual at 100% for the duration of your rebuild.
The speed of your rebuild will depend highly upon the speed, size and utilisation of the disks in your array; the QNAP processing speed of the TS-677 however, will not slow you down. CPU utilisation and Memory usage during the process remains near idle.
About the Author
Scott De Lacy Scott has a professional IT background spanning over 18 years, is an hobbyist electronics designer, talented musician, holds qualifications as a trainer and experience in emergency and community services sectors. He reviews Movies, PC and XBOX One games, and hardware.
Related Posts

MOZA Takes Flight at FSExpo 2026 →

Thrustmaster – FlightSimExpo 2026 Annoucement →

World Premiere: Official Ferrari x 24H LE MANS Simracing wheel →