
Better value with X570 & AMD Ryzen 7 3800X
Editor: Scott was tasked with a AMD Ryzen 7 CPU in order to re-build his current system and take us through the process of creating a new gaming system on a budget, including making the most of his current components and getting the best value money.
Contents
The situation
There are two camps of people with respect to PC’s, there are the enthusiasts who can and do upgrade their computer at the drop of a hat; and there is everyone else, who will build a computer and only after several years later will they build a new system.
This is typically due to the associated costs, but also because for the most part, the computer they build will typically be designed as such that it will be a capable machine for several years. Otherwise, what’s the point?
The latter is the situation here, where this existing system is an Intel based machine built in 2012 and has been a reliable workhorse for gaming, audio and video production, virtualisation and office applications.
The decision, Intel or AMD
Before building a PC, one must decide on Intel VS AMD. There are many factors that inform the decision and in-turn the decision informs and is informed by the choice of motherboard which tends to complicate the exercise somewhat.
Understanding the differences between AMD and Intel is a requirement to building a system that meets the specific requirements and expectations for its intended use.
The fundamental difference between Intel and AMD as of 2020
There are a number of differences that set Intel 10th Gen and AMD’s Ryzen series apart from each other from a design perspective; most notably are the number of PCI-E lanes available to the chipset and the configuration options presented on the Motherboard, specifically the type and number of storage ports for SATA and M.2 devices.
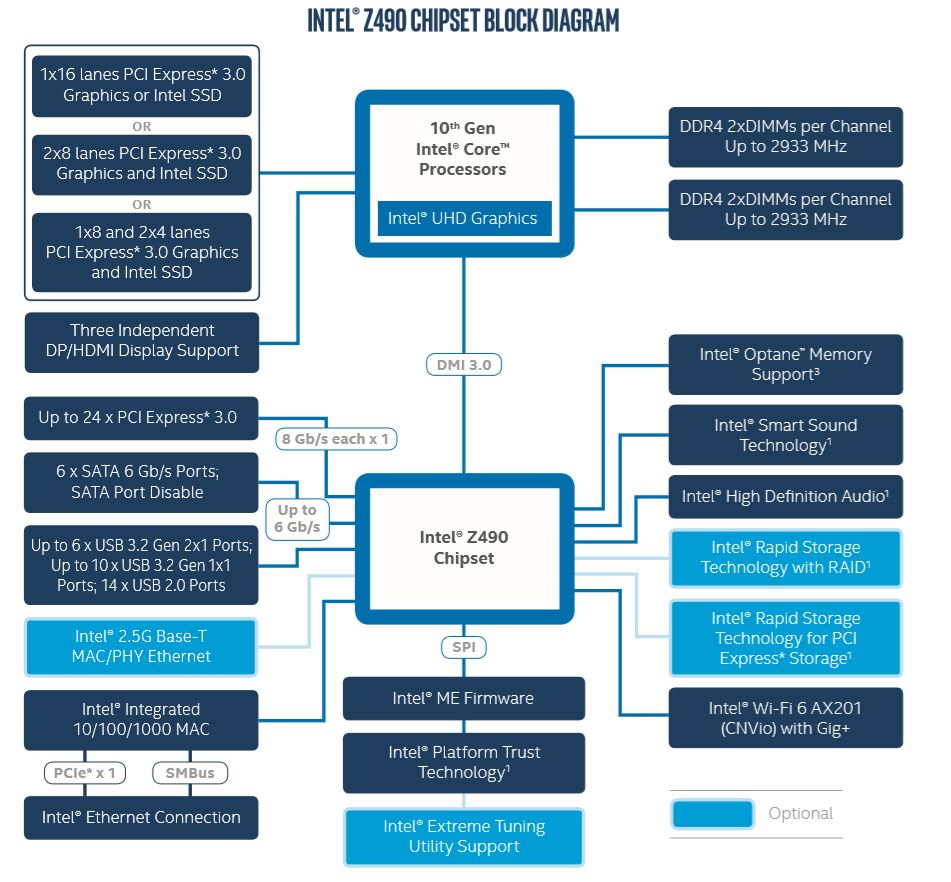
Here is a comparison between the two leading chipsets:

The astute and previously initiated may already see the difference, but it can be difficult to understand what is going on here.
The takeaway is:
| Intel 10th Gen with Z490 | AMD Ryzen 7 3rd Gen with the X570 Chipset |
| The Intel 10th gen processor will provide 16 PCI-E 3.0 lanes directly to the CPU.
The DMI 3.0 is actually 4 PCI-E 3.0 lanes between the Z490 and the processor, which allows shared communication of the chipset connected devices.
|
The AMD Ryzen 3rd Gen provides 20 PCI-E 4.0 lanes directly to the CPU and has 4 PCI-E 4.0 lanes between the Processor and the X570 Chipset to allow shared connection to the chipset connected devices. |
The AMD Ryzen 3rd Generation offers 4 more PCI-E lanes, running at PCI 4.0 speed in comparison to the Intel offering.
The AMD Ryzen 3rd Generation processor has PCI lanes that are twice as fast as the Intel 10th Generation processor and AMD provide 4 more direct lanes to the CPU. What this means in real-terms of the Motherboard, is your 16x PCI-E lanes are used for the video card or they are split between two PCI-E 16x slots running at 8x speed, AMD allows you to also have a high speed NVMe drive connected directly via the additional 4 PCI-E 4.0 CPU lanes, where this would not be possible on the intel 10th Generation.
It should also be of note, that the Intel 10th Generation processors excluding the F models do also contain the Intel UHD 630 embedded graphics, which do not consume additional PCI lanes nor reduce the available CPU cache.
There are some AMD Ryzen models with embedded graphics, however these do reduce the available cache and are intended for integrated graphics systems; which is not the intended application here.
Backwards and forwards compatibility: The AM4 socket vs Intel 1200
Before purchasing a motherboard and CPU, consideration to the ability to upgrade is important. Sure, you can always purchase a faster CPU in the same family and drop it in, but can use your existing board with the next generation of CPU? Or better yet, can you continue to use the CPU and swap your board out when new features become available?
Motherboards for both of these processor choices are expensive and we will cover that next. But if you are forced to spend more for a Motherboard today than you would have five or more years ago, then the argument of “I’ll probably just upgrade my board” is something that needs to be re-evaluated, especially depending upon the choice you make.
The ugly truth: Intel’s cross compatibility
Intel have changed their socket throughout the last several generations of the Core processor. Starting from LGA 1136 in 2008 to the LGA 1200 socket currently, you need two hands to count the changes.
There have also been some ‘gotcha’ moments with some processors that physically fit, but were not compatible with all boards. Just because the pinout is the same, the chipset may not accept the next generation of processor.
Currently, the belief is that Intel’s 11th Generation desktop processors will be compatible with the LGA 1200 socket and the current Z490 chipset. However, this is confirmed when you see it, pics or it never happened. At the time of writing, the Gigabyte Aorus leak is the best source of information on this.
However, do not consider the current Intel 10th generation Motherboards to be designed for the 11th generation processor in any meaningful way.
Simply put, you absolutely can’t put an older Intel Core processor into the latest Intel motherboard.
The gold standard: AMD’s cross compatibility
The current AMD motherboards support the previous 2000 series AMD processors, and AMD have officially announced that the AM4 socket and the X570 chipset will support the next generation 5000 AMD processor.
The AMD processor is the only choice for cross compatibility and satisfies all compatibility criteria.
PCI 4.0 Compatibility and what it means to you
Each version of PCI Express is a doubling of speed of the previous version:
| Version | Introduced | Transfer rate |
Throughput | ||||
| x1 | x2 | x4 | x8 | x16 | |||
| 1.0 | 2003 | 2.5 GT/s | 0.250 GB/s | 0.500 GB/s | 1.000 GB/s | 2.000 GB/s | 4.000 GB/s |
| 2.0 | 2007 | 5.0 GT/s | 0.500 GB/s | 1.000 GB/s | 2.000 GB/s | 4.000 GB/s | 8.000 GB/s |
| 3.0 | 2010 | 8.0 GT/s | 0.985 GB/s | 1.969 GB/s | 3.938 GB/s | 7.877 GB/s | 15.754 GB/s |
| 4.0 | 2017 | 16.0 GT/s | 1.969 GB/s | 3.938 GB/s | 7.877 GB/s | 15.754 GB/s | 31.508 GB/s |
| 5.0 | 2019 | 32.0 GT/s | 3.938 GB/s | 7.877 GB/s | 15.754 GB/s | 31.508 GB/s | 63.015 GB/s |
| 6.0 | 2021 | 64.0 GT/s | 7.877 GB/s | 15.754 GB/s | 31.508 GB/s | 63.015 GB/s | 126.031 GB/s |
GT/s = Giga-Transfers per second.
The faster the better and PCI-E 4.0 is better than PCI-E 3.0 as you can see. Ignore PCI-E 5.0 and PCI-E 6.0, because there are simply no devices out there that operate at those speeds nor is there any motherboards that will support PCI-E 5.0 available currently.
All new devices are backwards compatible with previous versions of the PCI-E standard, subject to the individual device bandwidth requirements. For example, a video card will work fine but the performance will typically be reduced when a PCI-E 3.0 card is installed in a PCI-E 2.0 slot. Likewise, a device cannot run above the standard it was made for, so a current video card that is PCI-E 3.0 cannot run at PCI-E 4.0 speeds, instead it will run at 3.0 speeds.
Conversely, video cards including the latest top tier offerings of Nvidia and AMD, will be PCI-E 4.0 16x capable devices and are still not significantly bottlenecked running at PCI-E 3.0 8x (7%), that means you can populate both PCI-E x16 slots on the motherboard and your video cards performance will not be impacted in any detrimental way for most games.
So why does it matter? Where does it matter?
- Storage:
The new M.2 NVMe drives are PCI-E 4.0 and offer excellent speeds compared to the standard SATA SSD counterparts. Where it matters in this case between the Intel Motherboard at PCI-E 3.0 and the AMD X570 Motherboards at PCI-E 4.0 is the read and write performance of the PCI-E 4.0 NVMe storage is much less on PCI-E 3.0 than PCI-E 4.0; and in terms of pricing, this technology is around the same price as SATA SSD 2.5” drives. - Processor to Chipset PCI-E Link bandwidth:
Sharing the 4-lane pipe to the processor is likely to be;- Ethernet port,
- Wi-Fi Controllers
- PCI-E 1x/4x slot(s),
- 2 slot(s),
- Audio chipset,
- Multiple USB 2.0, 3.0/3.1/3.2,
- Multiple USB-C, and
- Any other device a motherboard provides
Many Motherboards are fully stacked with all applicable options that the chipset can allow, including devices that include ‘this OR that’, such as SATA ports vs the M.2 ports where the use of one can disable the other. Careful consideration has to be given to the motherboard selection, especially in these circumstances and when the intended application requires these features.
One thing is certain, it is far better having as much bandwidth overhead as possible, and for that reason, PCI-E 4.0 is the way to go. Depending on the motherboard and the combination of peripherals in use including Wi-Fi/Ethernet, Intel’s DMI 3.0 (PCI-E 3.0) could possibly be a serious bottleneck and reduce overall performance.
Manufacturing requirements of PCI-E 4.0 will cost you
In order to achieve the required bandwidth increase of PCI-E 4.0, the motherboard needs to be designed with a higher weight of copper for the PCI-E 4.0 lanes, meaning the traces are thicker and denser. Because of this, additional PCB layers are needed to fit these bigger traces in the same ATX motherboard footprint, which increases the complexity and cost of manufacturing.
Some of the Motherboard manufactures have been developing the Intel Z470 based motherboards to be PCI-E 4.0 compliant with the required 6-8 PCB layers and denser copper. In fact, many of the high-end Intel boards will comply with some of those requirements, which do have strong benefits in overclocking, general stability, performance and signal quality especially in RAM performance. But you will be paying a premium for those features whilst not actually being able to utilise PCI-E 4.0 in those Z470 boards.
The AMD Rzyen 7 3rd gen processors with the X570 board will utilize the PCI-E 4.0 features immediately; you will take advantage of what you paid for in tested and proven combination.
Budget as a consideration
The most important decision is the limit of your budget. What are you willing to spend?
Generally speaking, this is the first factor that determines the decision-making process and places limits upon what you will ultimately build. But this final figure should also take into account the value vs cost and the expected life of the machine.
The argument here is that it may be far better to spend “an extra few hundred” for a computer that can be upgraded, or otherwise last the 5-8 years; or conversely it may also be better value to save a few hundred for a computer that you will knowingly replace within only two years. Horses for courses they say.
Although there are often price differences between Intel and AMD processors at the same core/thread count, also keep in mind that the corresponding motherboards will likely make up the difference, however AMD do tend to work out cheaper in most scenarios. In either case, keeping to the premium chipset is recommended. Unfortunately, PCI-E 4.0 has raised the cost of all motherboards including the lower end, which offer no appreciable value in their features compared to models that are just “$1-200 more.”
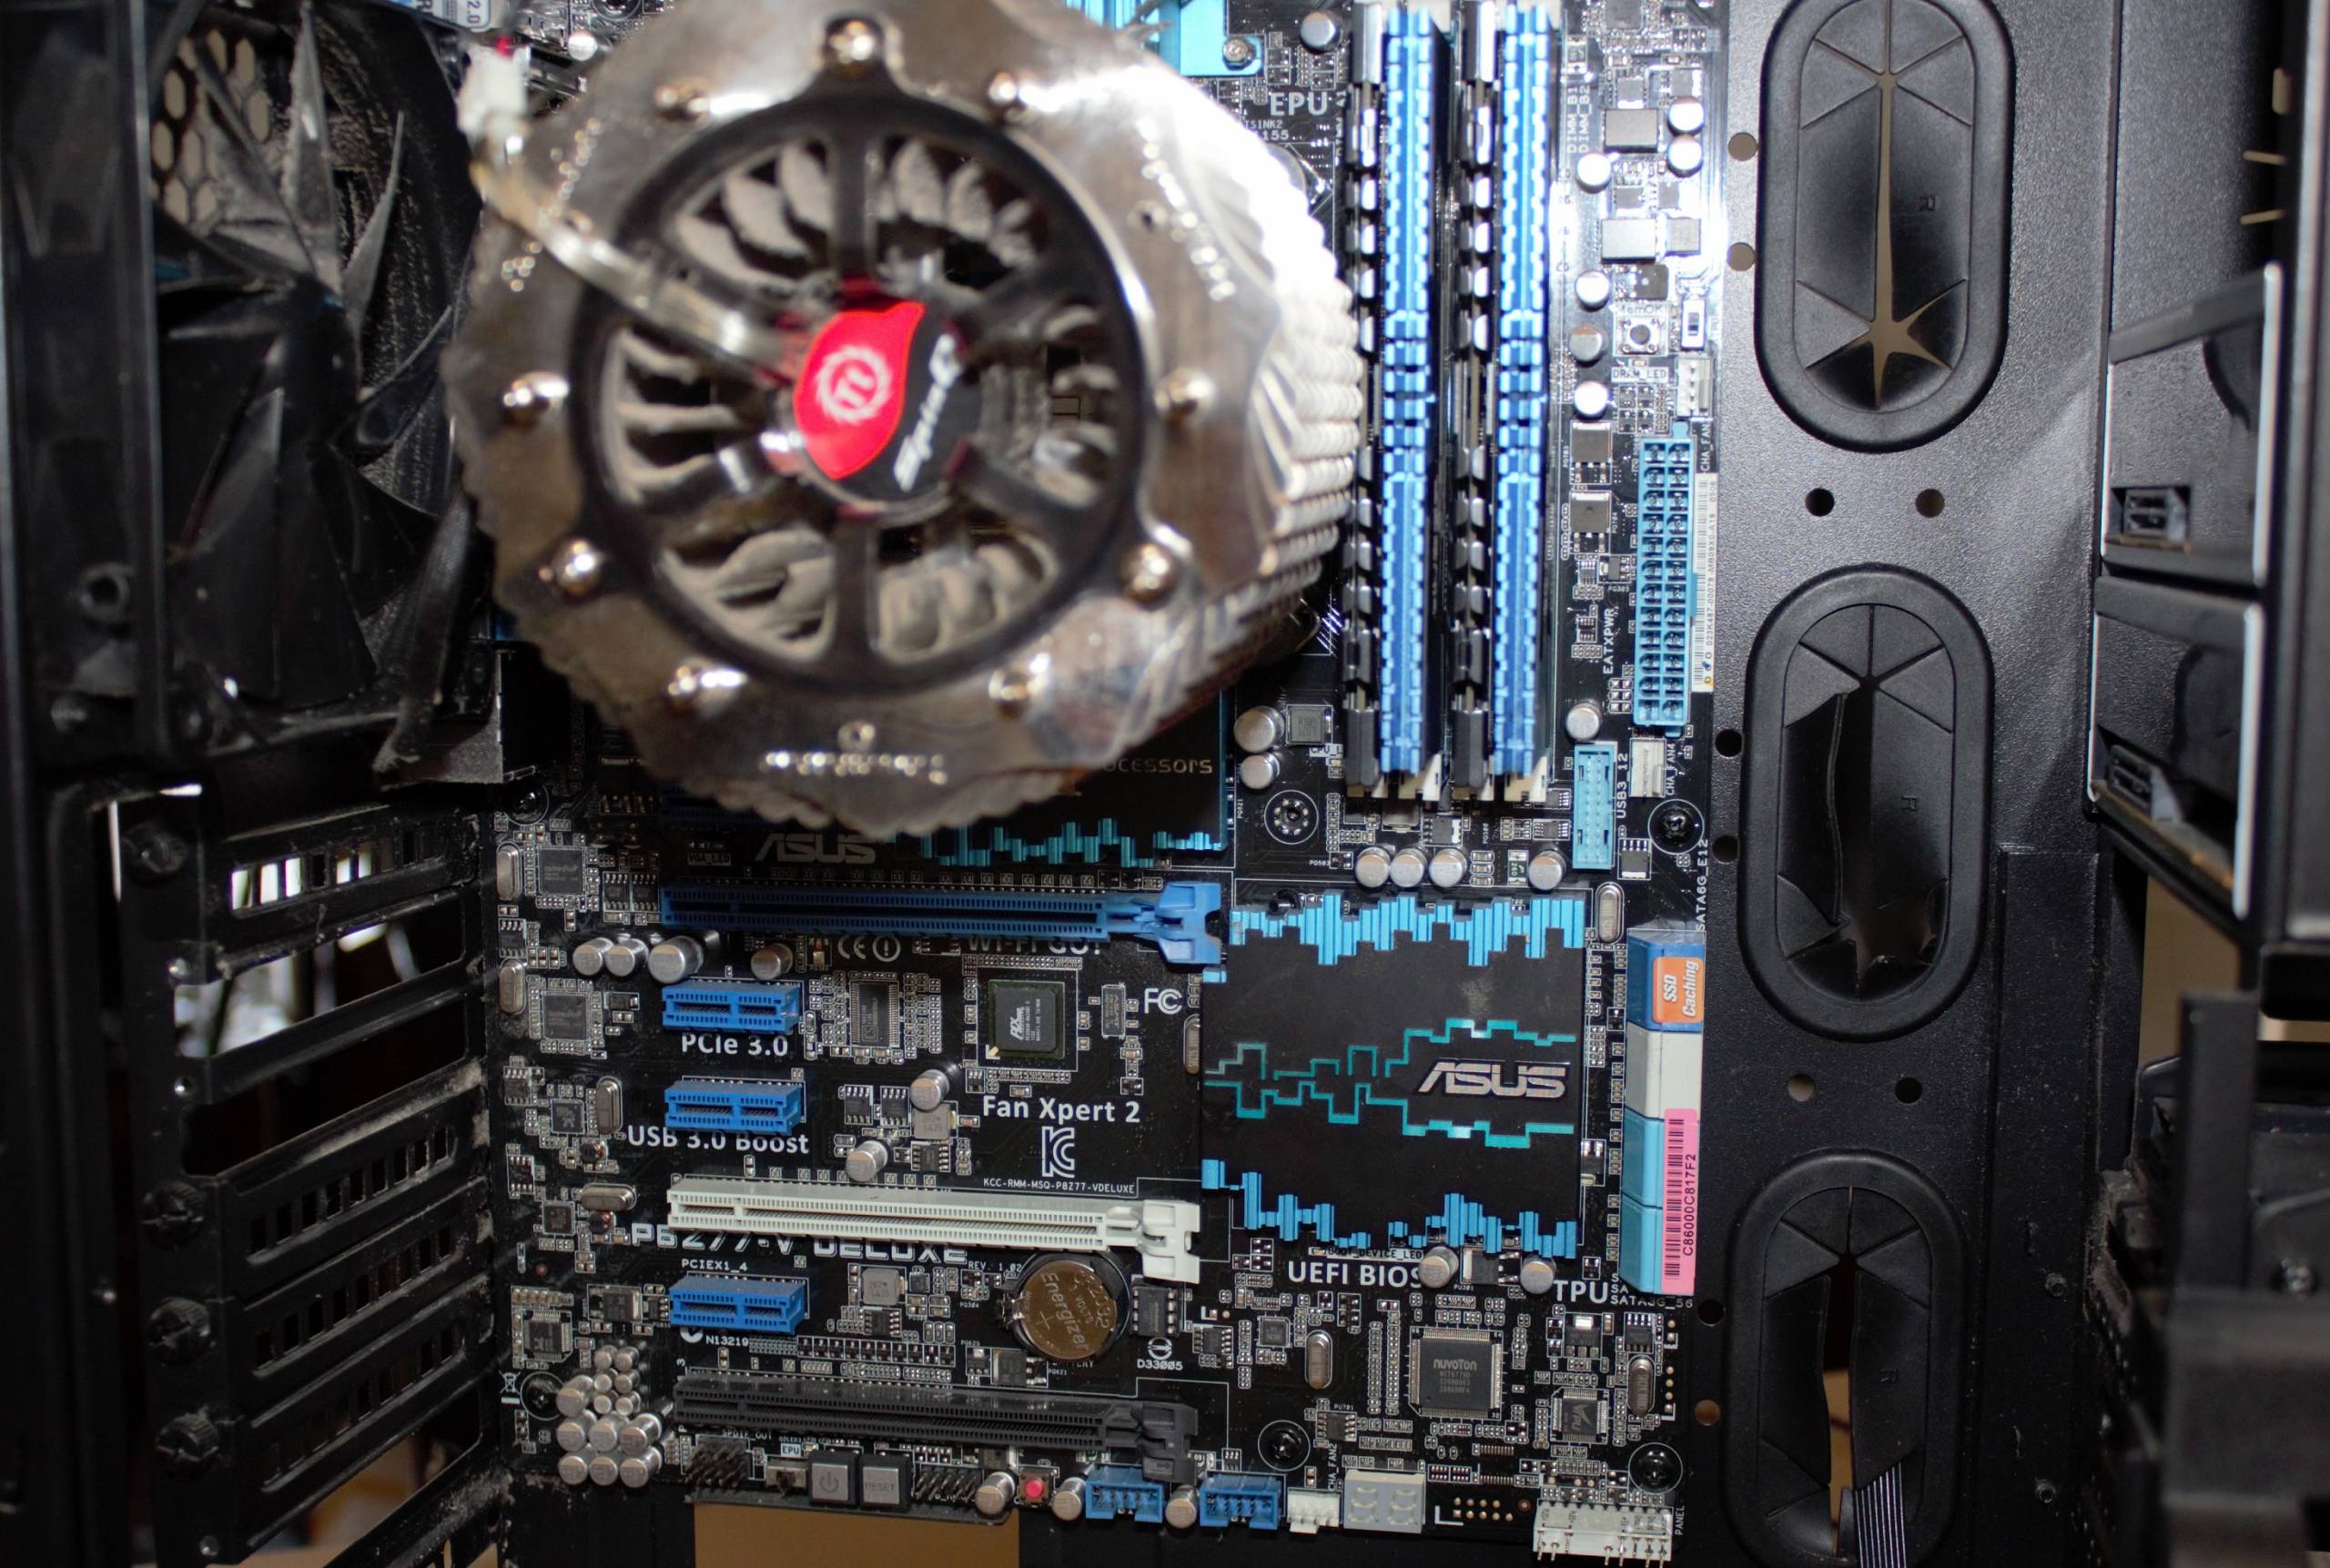
The original machine
The original machine was built in 2012 specifically as a gaming machine, DAW, virtualization and testing platform; and anything else that could be thrown at it. Because of this, the requirements included a RAID 5 array, 6-ch audio, dual Ethernet and onboard Wi-Fi.
Specifications
Taken from the original spreadsheet in 2012:
| Item | QTY | Item price | |
| CASE | Thermaltake Level 10 GTS | 1 | 114 |
| PSU | Thermaltake TR2 800 | 1 | 122 |
| Motherboard | ASUS P8Z77-V-DELUXE | 1 | 309 |
| CPU | Intel BX80637I73770K i7-3770K 3.5/3.9GHz LGA1155 IVY | 1 | 335 |
| CPU cooler | Thermaltake SpinQ-VT Universal CPU Cooler Fan | 1 | 56 |
| RAM | 8G Kit 2400 G.Skill Ripjaws-Z | 1 | 79 |
| Video card | 2G GTX 660 Gigabyte N660OC-2G | 1 | 249 |
| System HDD | Samsung 830 series 256G SSD-MZ-7PC256 | 1 | 209 |
| Other HDD | |||
| Optical drive | SATA Blu-Ray Writer LG | 1 | 0 |
| Optical drive 2 | SATA DVDRW Writer LG | 1 | 0 |
| Total | 1473 |
Product links included where possible*
The RAM was upgraded to 24GB within the first 12 months and four 4TB Seagate hard drives were purchased separately to the original built at around $200 each. However, a bunch of hard disks were initially claimed from a pile of decommissioned disks at work and used for a few years, along with spares from the previous build.
The new build
The new build must cover this fundamental rule: “Always match or improve upon the previous.”
The previous build lasted 8 years and is still going strong, it was only starting to suffer with the latest AAA-list game titles, everything else was still great; although a format was totally warranted.
The requirements include supporting a RAID 5 array, 6 channel or greater audio, Wi-Fi as onboard or expansion card, and dual Ethernet with preferably at least one 5Gbps or higher. More RAM was also slated because 32GB is a good fit now days.
Is it achievable to build 4, 6 or even 8 core system with these additional inclusions around a similar budget?
With AMD it certainly is.
Specifications
By reusing existing hardware such as the case, PSU and hard disks, it is absolutely possible to build a new machine that matches or exceeds the required specifications at a similar budget. This configuration gets us over the line with a small concession of a 2.5Gbps NIC instead of 5Gbps.
| Item | QTY | Item price | |
| CASE | Thermaltake Level 10 GTS | 1 | 0 |
| PSU | Thermaltake TR2 800 | 1 | 0 |
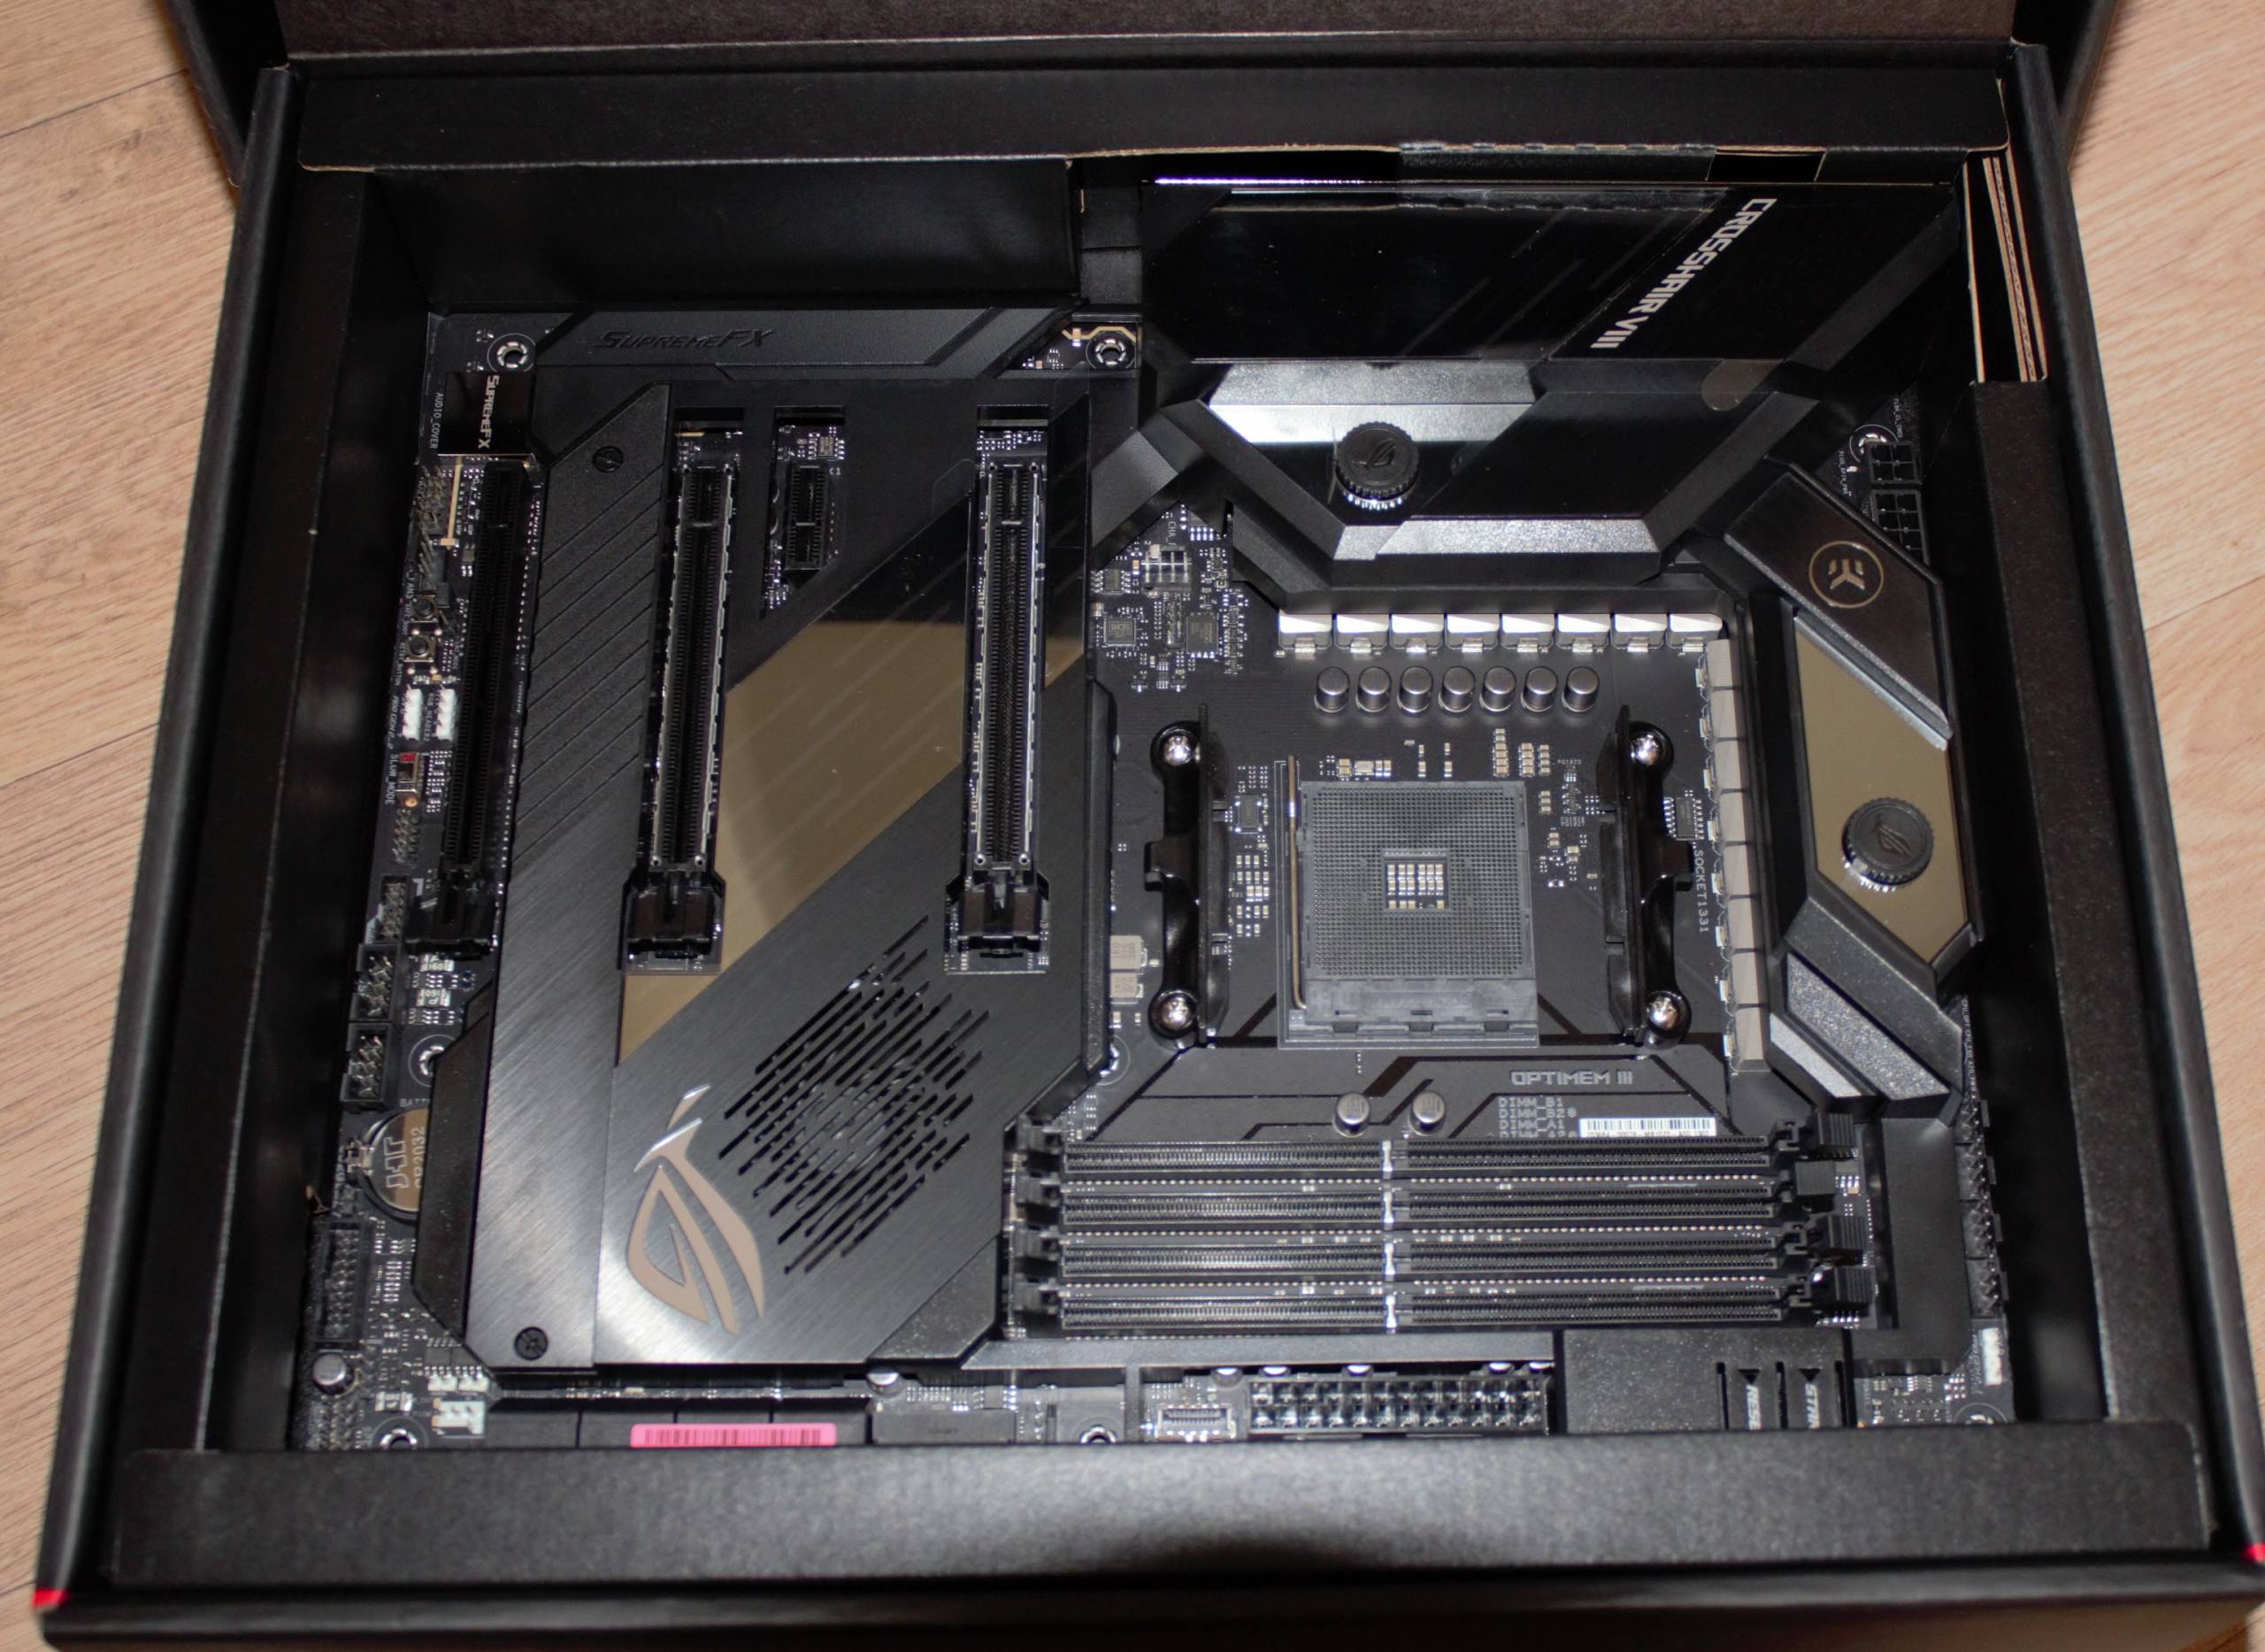
| Motherboard | ASUS ROG Crosshair VIII Hero (Wi-Fi) | 1 | 582 |
| CPU | AMD Ryzen 5 3600 | 1 | 349 |
| CPU cooler | Included Wraith cooler in retail CPU | 1 | 0 |
| RAM | G.Skill Ripjaws V 32GB (2x 16GB) DDR4 3600MHz | 1 | 209 |
| Video card | Gigabyte NVIDIA GTX 1070 8GB* | 1 | 200 |
| System HDD | Samsung 830 series 256G SSD-MZ-7PC256 | 1 | 0 |
| Other HDD | Seagate 4TB SATA III | 4 | 0 |
| LSI RAID card | LSI MegaRAID 9267-8i + Cable | 1 | 65 |
| optical drive | SATA Blu-Ray Writer LG | 1 | 0 |
| Optical drive 2 | SATA DVDRW Writer LG | 1 | 0 |
| Total | 1405 |
Of course, with a bit of scrimping, including 2nd hand items from friends and contacts, and ruthless bargain hunting you may find you can narrow that gap even more.
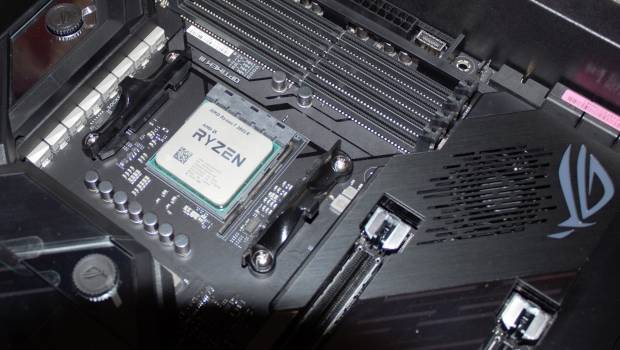
When AMD heard we were building a new gaming rig, they contributed an AMD Ryzen 7 3800X towards the build, which is a significant upgrade form the Ryzen 5 3600 processor, with an additional two cores for a total of 8 cores 16 threads.
There were also a few additional components gifted towards the build which we are to simply say thank you very much.
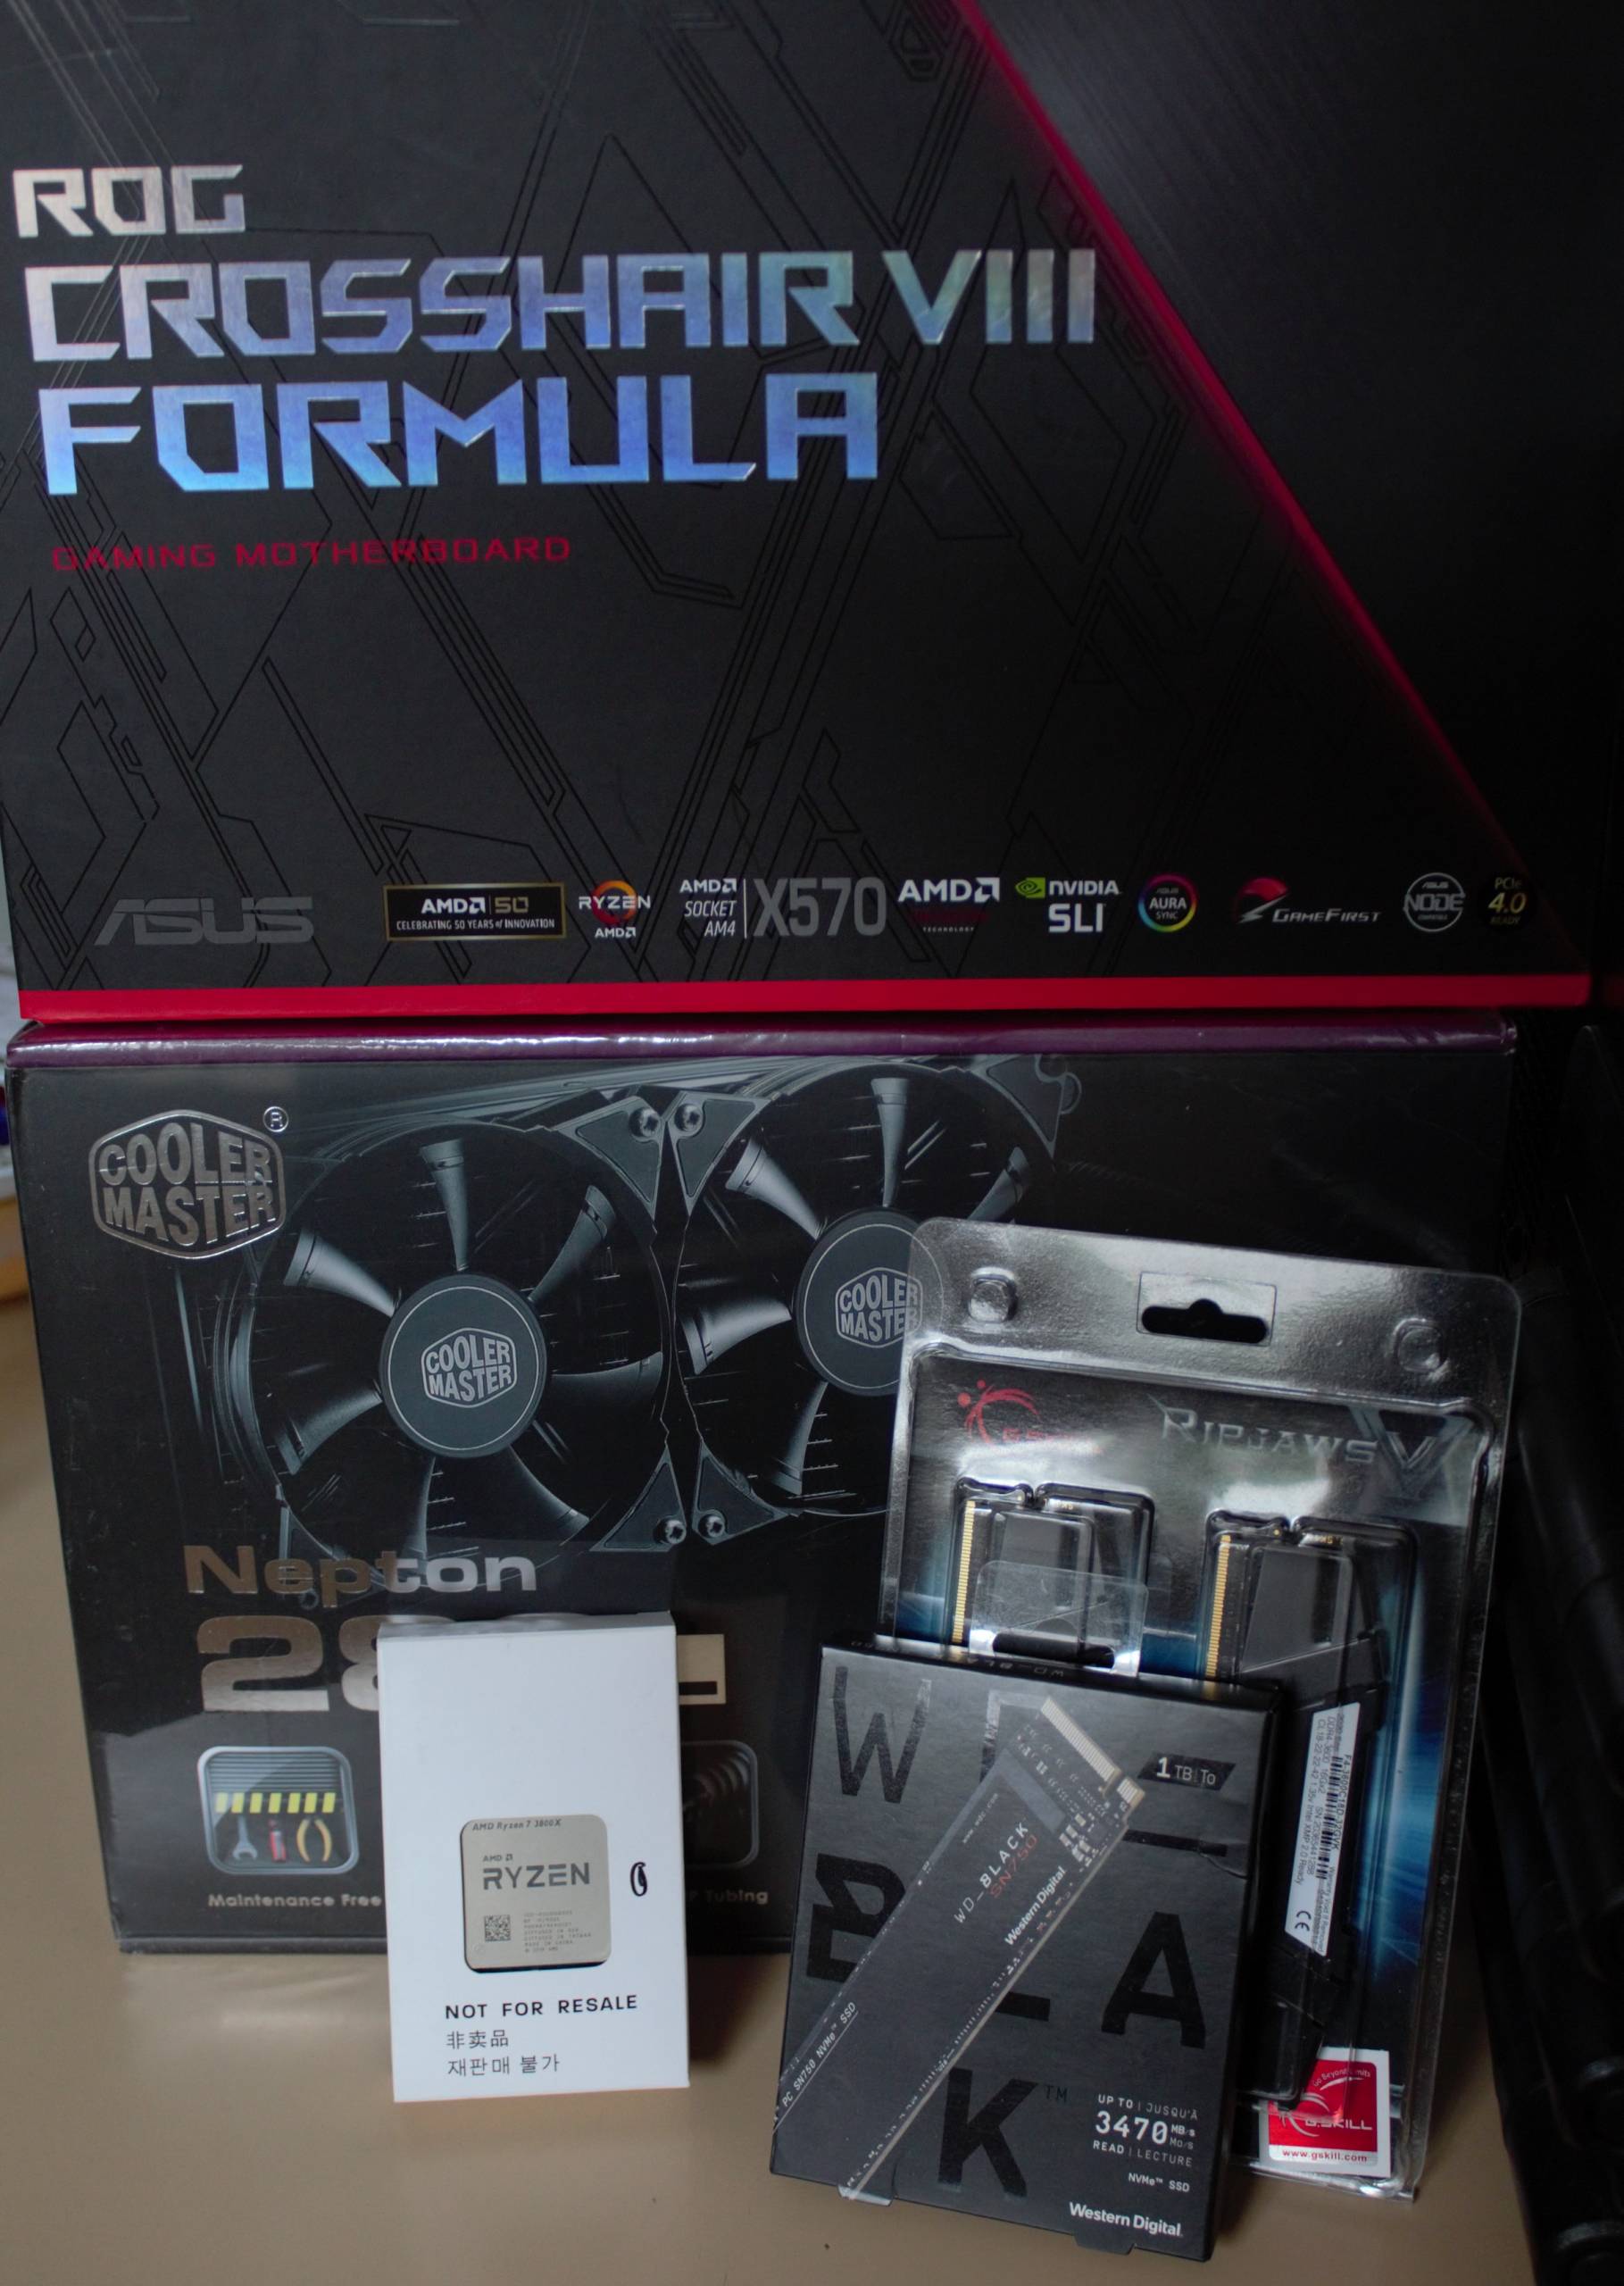
Because this represented a significant cost saving in the build, there was an opportunity to upgrade the motherboard to the flagship ASUS ROG Crosshair VIII Formula; which is a significant investment platform that will be also used to testbed and review future hardware upgrades and options.
The final build specs are as follows:
| Item | QTY | Item price | |
| CASE | Thermaltake Level 10 GTS | 1 | 0 |
| PSU | Thermaltake TR2 800 | 1 | 0 |
| Motherboard | ASUS ROG Crosshair VIII Formula | 1 | 769 |
| CPU | AMD Ryzen 7 3800X | 1 | 0 |
| CPU cooler | <Experiment> | 1 | 0 |
| RAM | G.Skill Ripjaws V 32GB (2x 16GB) DDR4 3600MHz | 1 | 209 |
| Video card | Gigabyte NVIDIA GTX 1070 8GB | 1 | 200 |
| System HDD | Western Digital SN750 M.2 1TB NVMe | 1 | 0 |
| Other HDD | Seagate 4TB SATA III | 4 | 0 |
| LSI RAID card | LSI MegaRAID 9267-8i + Cable | 1 | 65 |
| optical drive | SATA Blu-Ray Writer LG | 1 | 0 |
| Optical drive 2 | SATA DVDRW Writer LG | 1 | 0 |
| Total | 1243 |
Cooling was an uncertainty right from the start, included in one of the gracious gifts was a Cooler master water AIO cooler, but it was a game of wait and see if the mounting would or could be made to work and handle the TDP. There was also an outside possibility of reusing the SpinQ rated at 150 TPD or otherwise buying/sourcing a suitable cooler.
Building on a budget: Principals
- Always start with a set maximum total price and don’t exceed it.
- Embrace the art of scrimping: Get the best deal you possibly can from where you can.
- Re-use what you have whenever possible, ‘if it ain’t broke don’t fix it’
- Stick to your design spec, but be prepared to make some accommodations and sacrifices
- Buy what you need now, add on the additional items later*
No 5: Means buy that additional FAN, RAM, monitor, add-on card etc later. You can wait until prices move or 2nd hand items become available. Don’t buy a lesser product with the plan to upgrade it later; you probably won’t.
How, where and when to scrimp
The art and knowledge of scrimping, passed down from grey-beard builders to the new generation is more than a methodology, it’s a way of life.
The ultimate goal here is to stick to (or below) the budget, but not to sacrifice any of the set criteria for the build or take shortcuts that would be excessive and risky.
- Re-use existing known working components from your previous system(s) where possible.
- Never ever use a low rated, low wattage power supply. Just don’t.
- Consider 2nd hand video cards, especially when there are new models about to drop on the market and people want to upgrade.
- Avoid deferring a greater cost or greater accumulative cost later. That is not good value.
- Spend more money on things when the value of the expense is worth it and when you can benefit from it.
Let’s consider this case for a moment with respect to the video card. If there was a $200 shortfall in the budget to purchase a new video card whilst keeping to the target specifications, the options would be to lower the specs of another component and take the next tier down thus freeing up some budget, or to simply continue using the older video card until additional budget allows for the upgrade (correct option).
Where opting to go to a lower spec component may be a reasonable decision depending upon the circumstances, in this case it would have sacrificed the minimum requirements, such as dual Ethernet, Wi-Fi or a minimum of 6 cores, which would be unacceptable. There simply was no significant step down that ticked the boxes.
In actuality, there was no budget shortfall, however the local computer shop – AKA the next-door neighbor, offered the GTX 1070 for $200 which for the most part, outperforms and is a better value choice than the new GTX 1660. Not only was this an opportunistic bonus, but it also saved money and was useable in the old system until the new parts arrived!
Many may suggest to “spend less on the motherboard, spend more on the video card”, however when you know that NVIDIA are releasing the 30 series and AMD (at time of writing) were about to drop their new offering, you also know that early adopters will sell their premium cards at a much lower rate, as will the retail prices of lower models will decline. Spending $200 today, vs $300-1000 or more on a video card that will still tick the box for a lengthy period of time until an upgrade makes value-sense is absolutely the right thing to do, especially when that video card may still be worth ~$100-150 as a resale at a later time.
Adaptation
Having a serious look at the objectives, one must also consider in all humility:
- Do I need it?
- Will I use it?
- When will I use it?
- How else can I achieve it?
One of the sticking points for the dual Ethernet was that at least one port had to be 5Gbps or greater. There was no doubt that this was not ‘needed’ immediately, but it would be needed very soon, especially when reviewing further network devices that do run at 5Gbps or higher. Afterall, it was not long ago that Wi-Fi 6 hit the market and compatible client devices were not so ubiquitous.
Could a cheaper motherboard that ticks the other boxes be used, with an 5Gbps or 10Gbps expansion card purchased now or later? This was well worth exploring, but the short answer is a 5Gbps card was already at the price difference between the Hero and the Formula motherboard, and for that to make sense in terms of value, you would have to ignore the premium power delivery and VRM cooler block, the OLED display and a better chipset cooling design.
The same consideration was applied to Wi-Fi, and in this case, it would make sense to purchase a motherboard that fell short with onboard Wi-Fi for an external PCI-E 1x Wi-Fi 6 card, especially when they can be had from as low as $40 AUD on eBay. However, in the real world the boards that tick the required boxes also include Wi-Fi anyway.
One of the early considerations for this build was in fact an Intel 10th Generation system, mainly because of the Intel Rapid Storage features offering RAID 5 which was in fact in use in the previous build. After consideration of all the other benefits of the AMD platform surpassing Intel, it was apparent that the way of thinking needed adjustment; why not get a hardware RAID card? A one-time RAID rebuild for a card that you can continue to use (hopefully) into the next system, and with a marked performance increase. At only $65 AUD for a hardware RAID card, this is what we call good value and a good adjustment.
Sourcing the best price
Aimlessly browsing your favorite computer stores price lists online is not sufficient enough to get a bargain. It is great to get a feel for availability however.
To get the best prices available, do the following:
- Itemise the products that match your specifications, with acceptable alternatives
- Use the StaticICE (Australia) or similar search engine to find the cheapest price possible
- Follow the link and validate the item, price and availability is correct and take note of shipping costs
- Search Google (DuckDuckGo, etc) and eBay for the same product: especially considering the 2nd hand items where appropriate, with the keyword “buy” and your country
- Double check manually with your identified online / local stores
- Take the cheapest price + shipping if local pickup is unavailable and collate all results
- Where there is a split of multiple suppliers, identify the shipping costs vs the difference ordering from a single supplier, opt for the lowest total price paid overall
- If possible, identify a single suppler (excluding eBay) that has all or most of the items and email the sales team directly: Tell them you have identified a number of products at cheaper prices elsewhere and you would prefer to do business with them if they would match the price. Cross your fingers and wait for a response
- Take the bargain if offered, or be confident that you exhausted your options and purchase from your retailer and or ebay seller accordingly.
Assembly
Cleaning and restoring
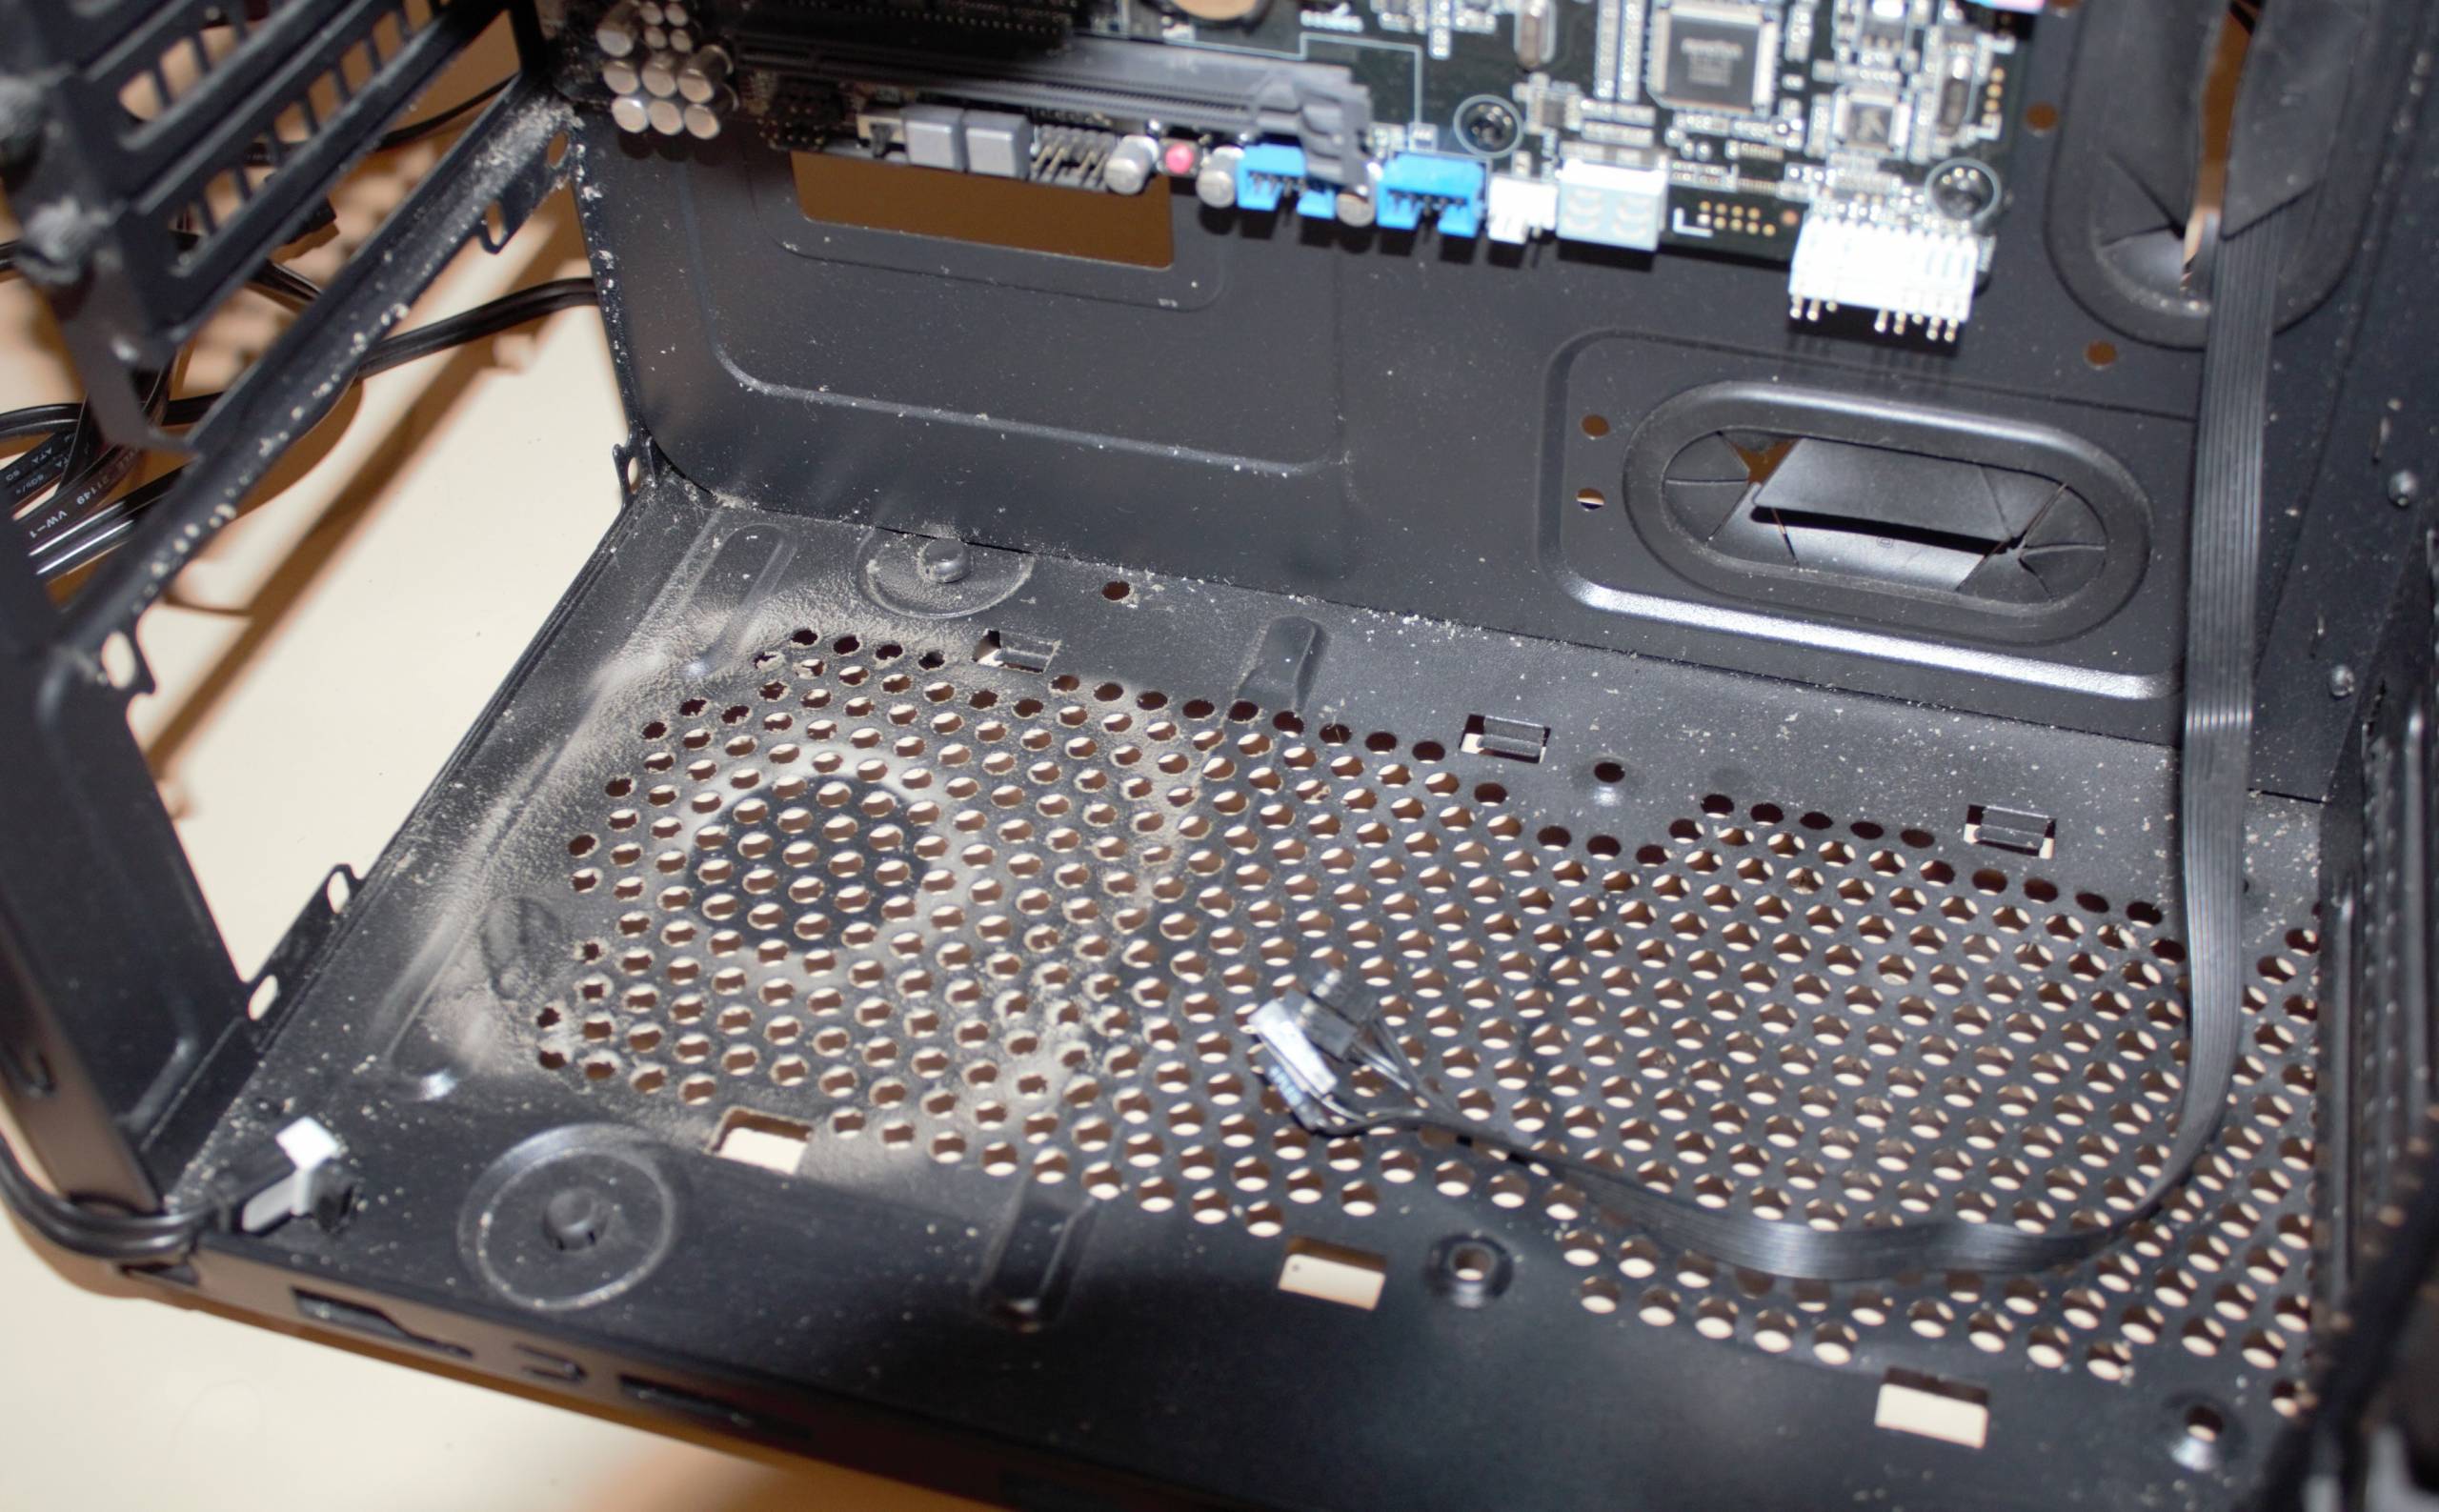
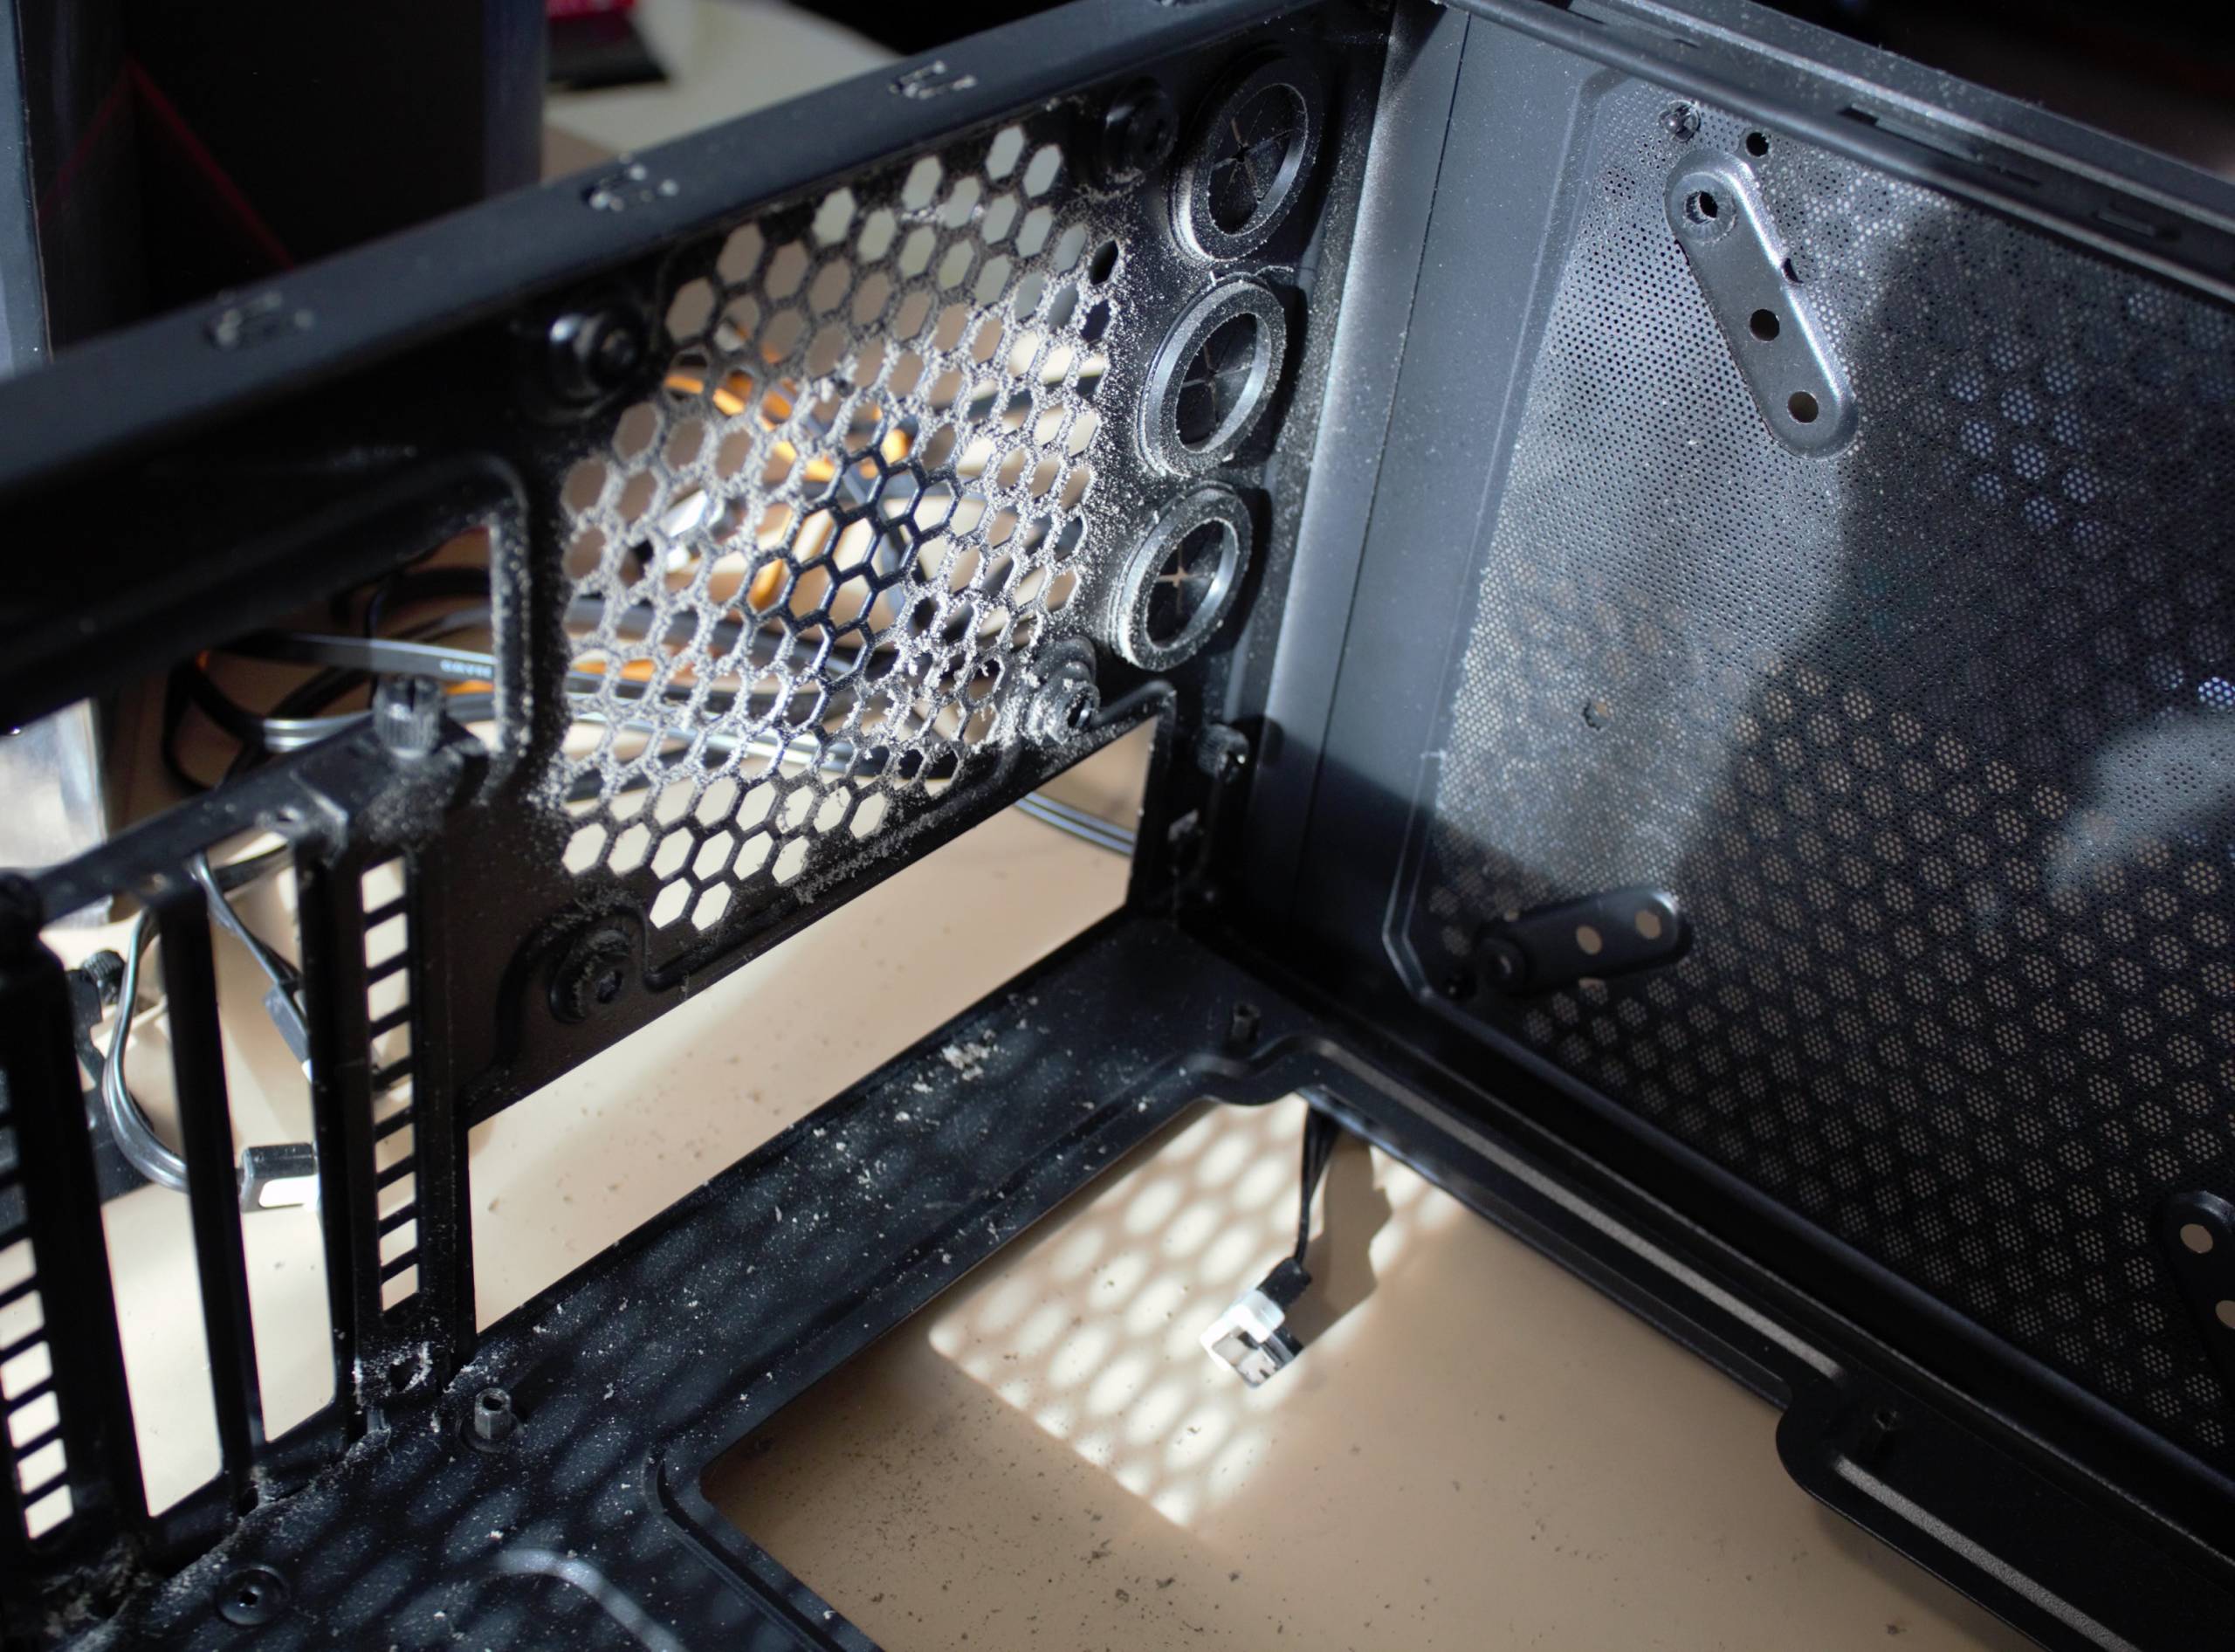
The Thermaltake Case
First the existing Thermaltake case had to be cleaned and detailed inside and out. This took more time than anticipated and was a little frustrating.
Original 900RPM case fan
The power supply
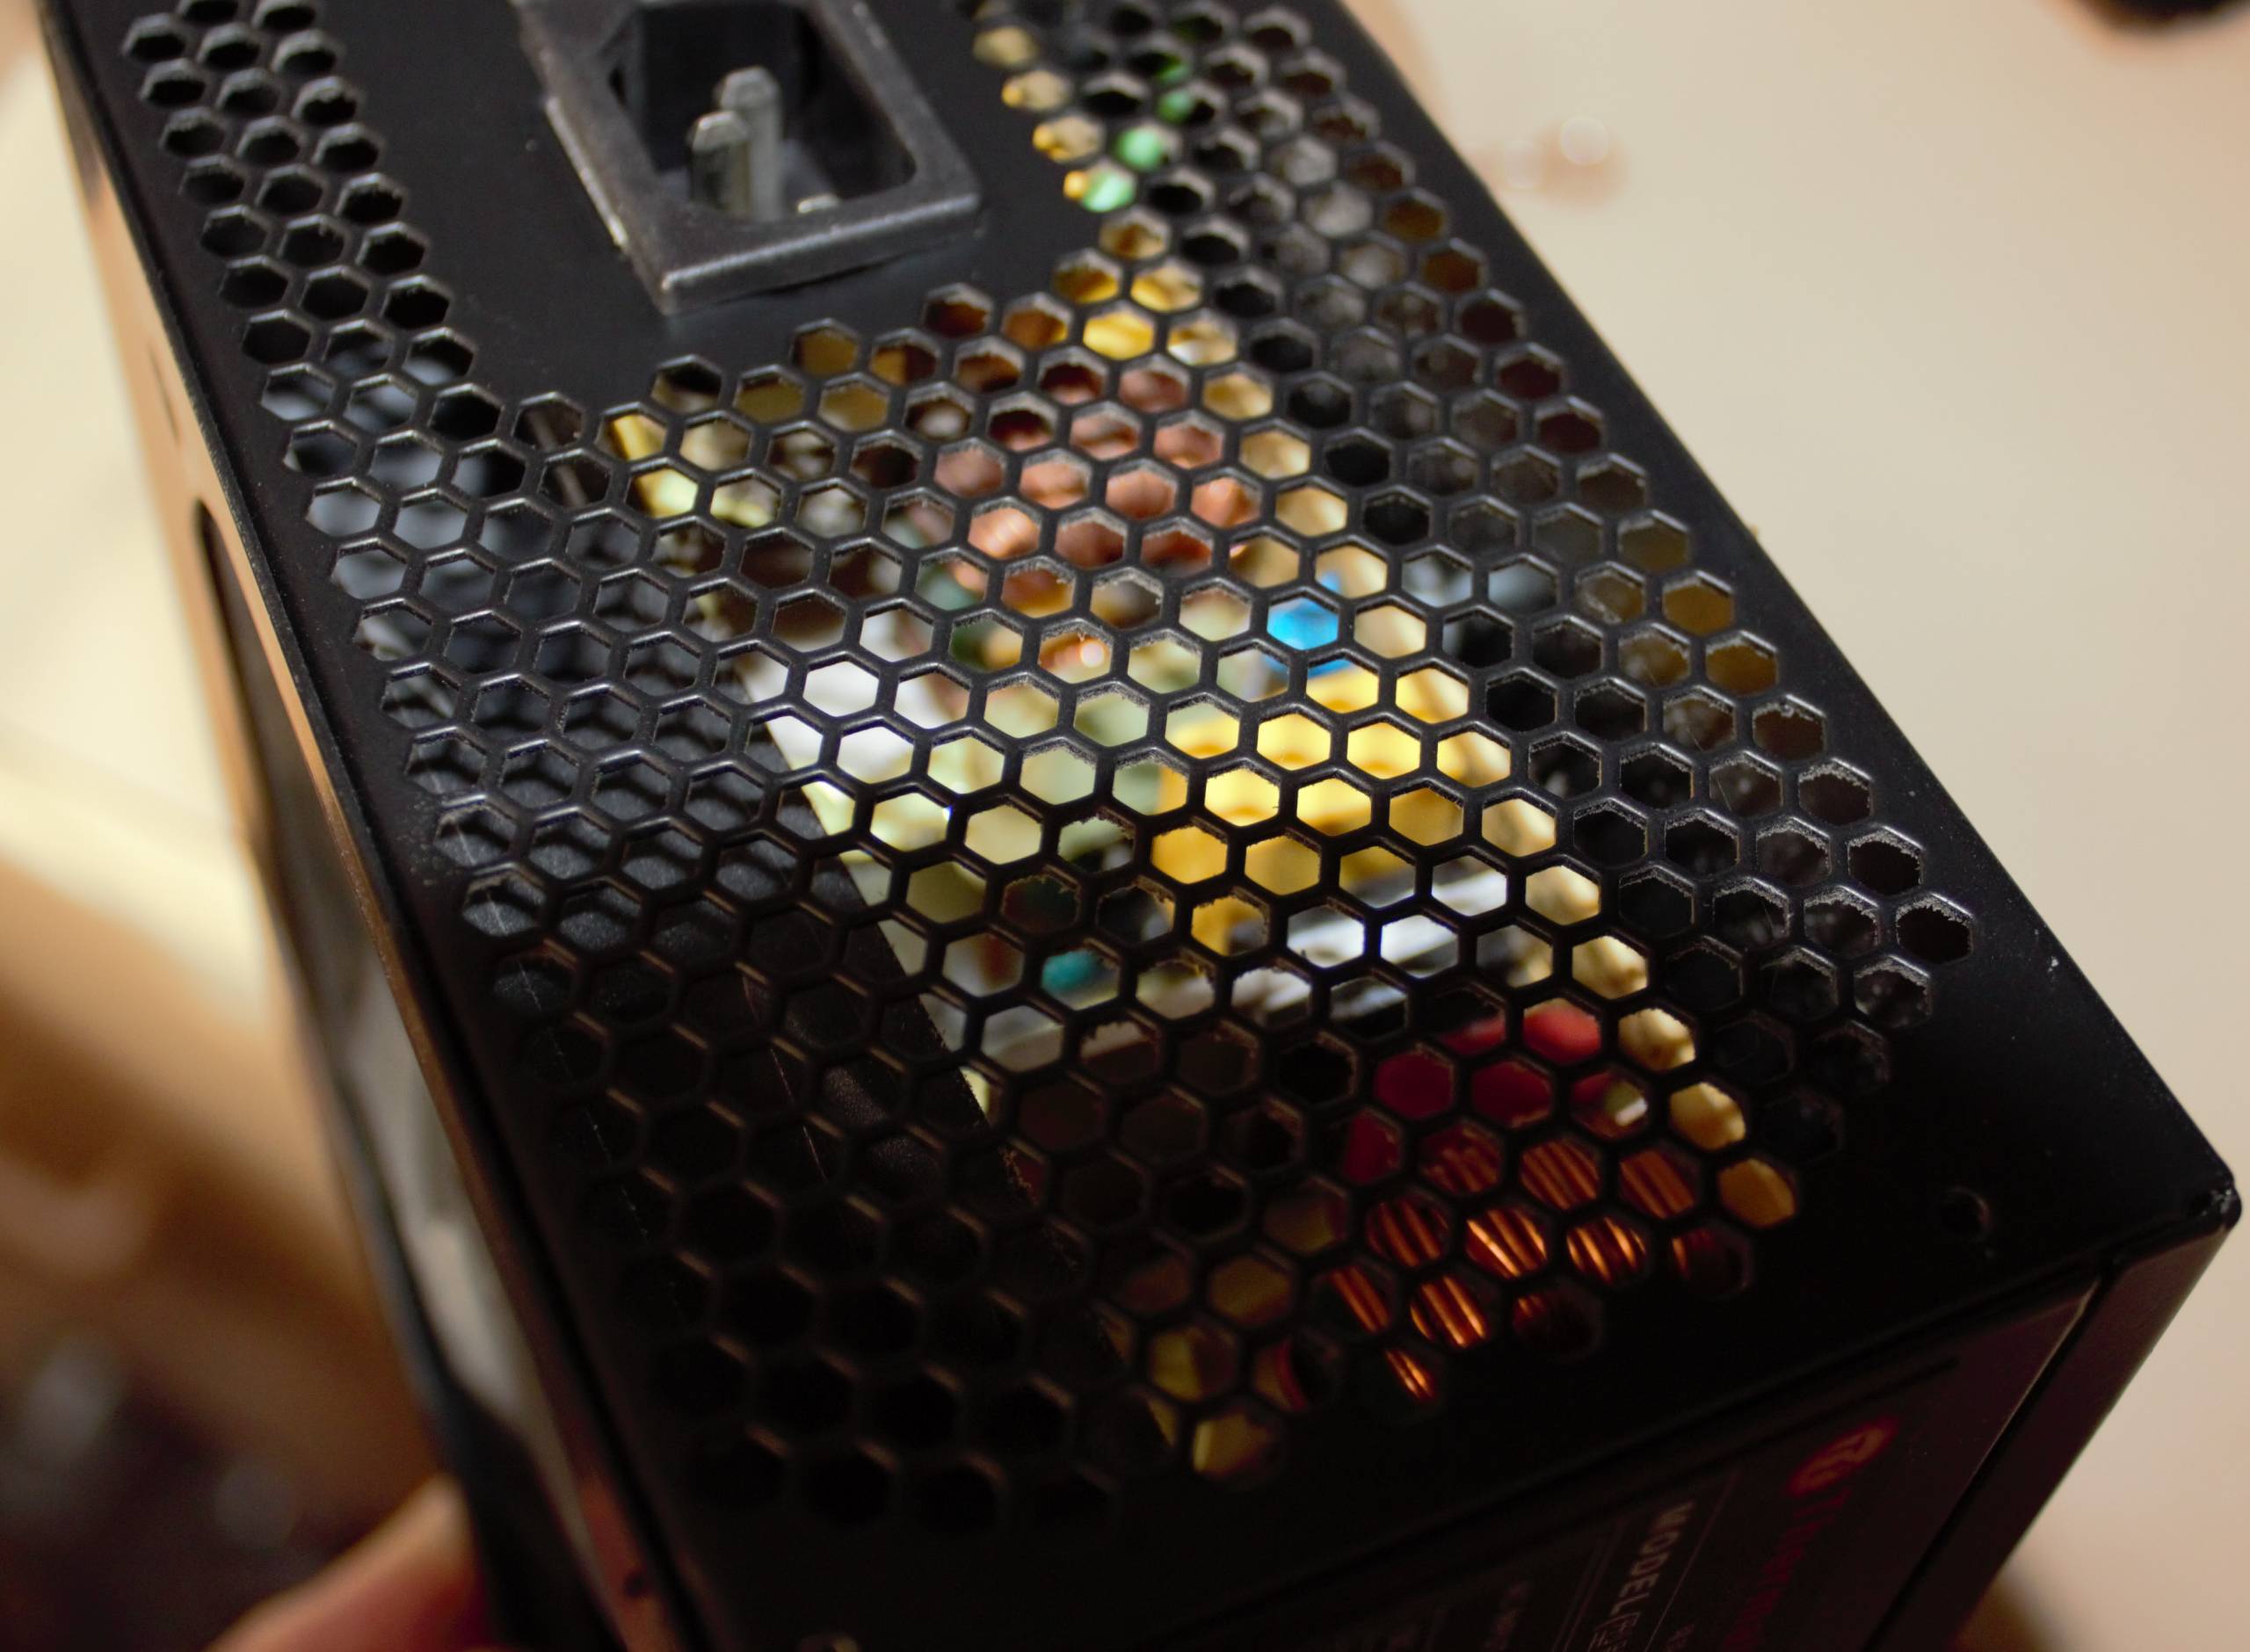
The power supply looked like it had been through the wars and there was a decent amount of caked in dust, how embarrassing.
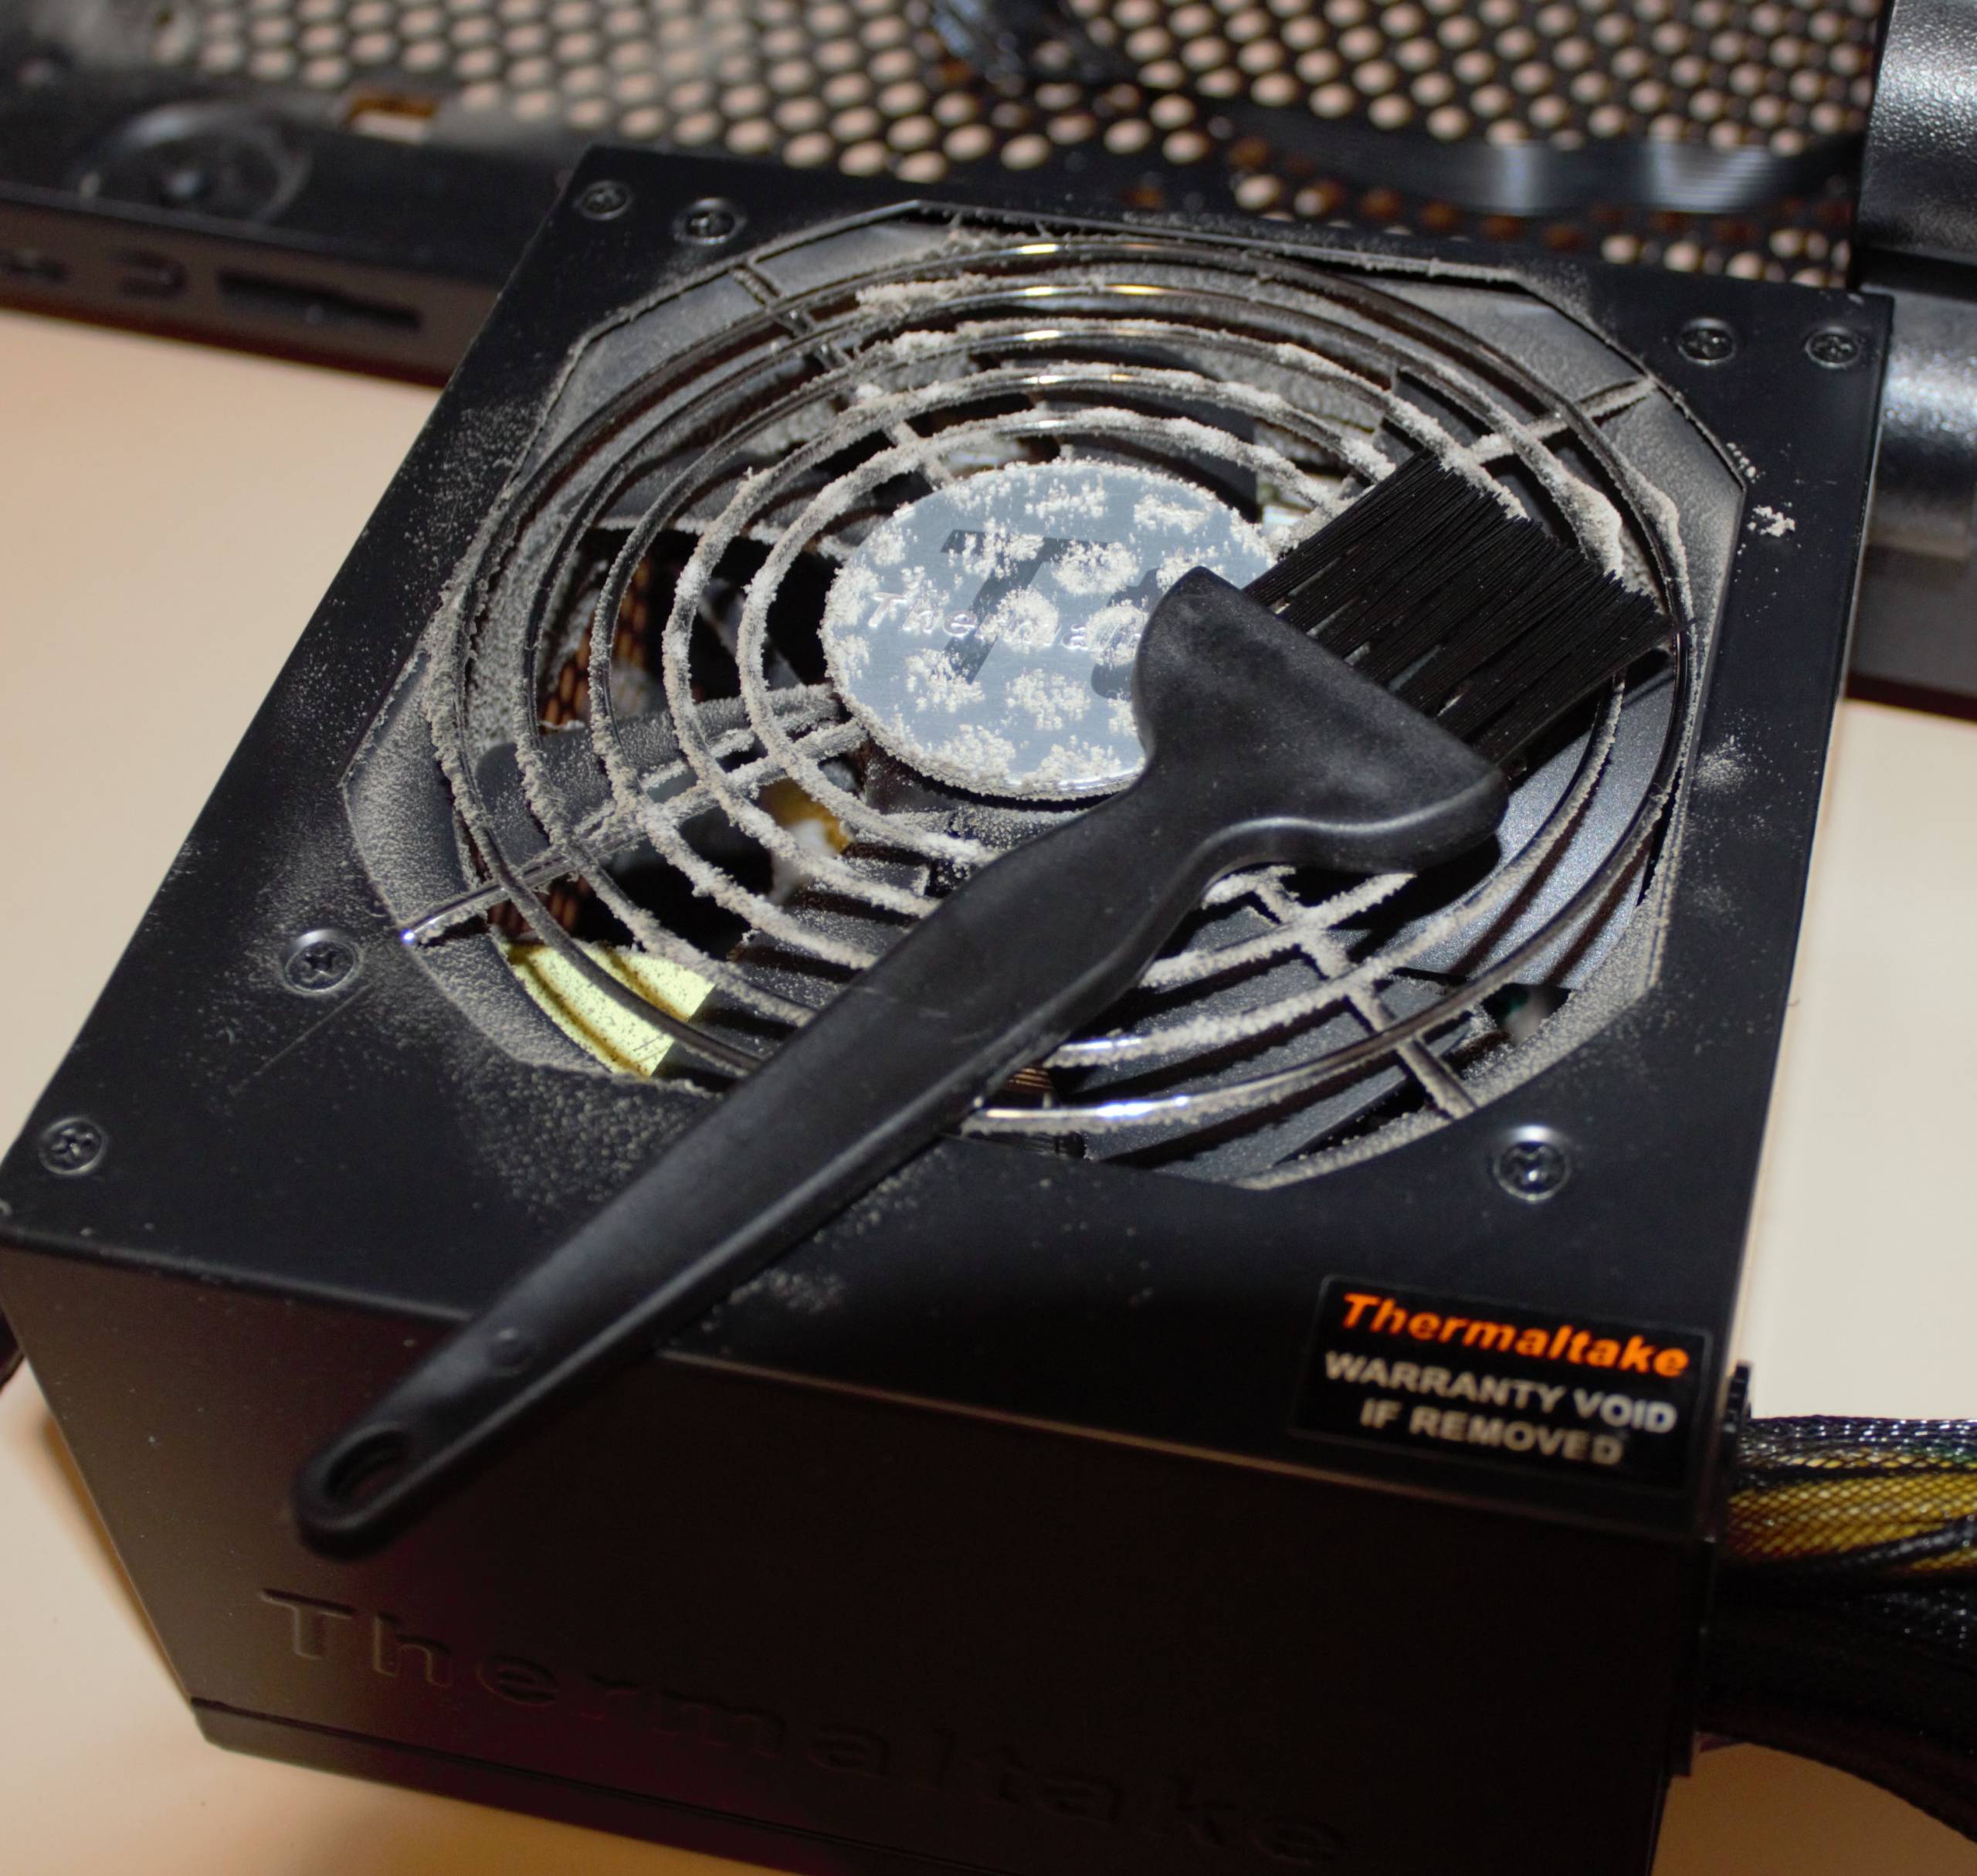
The vacuum cleaner was not able to remove all the dust externally and opening up the power supplies case would break a warranty sticker. In this case there was a “CBF factor” that couldn’t be satisfied, luckily there is a trick that many may not be aware of.
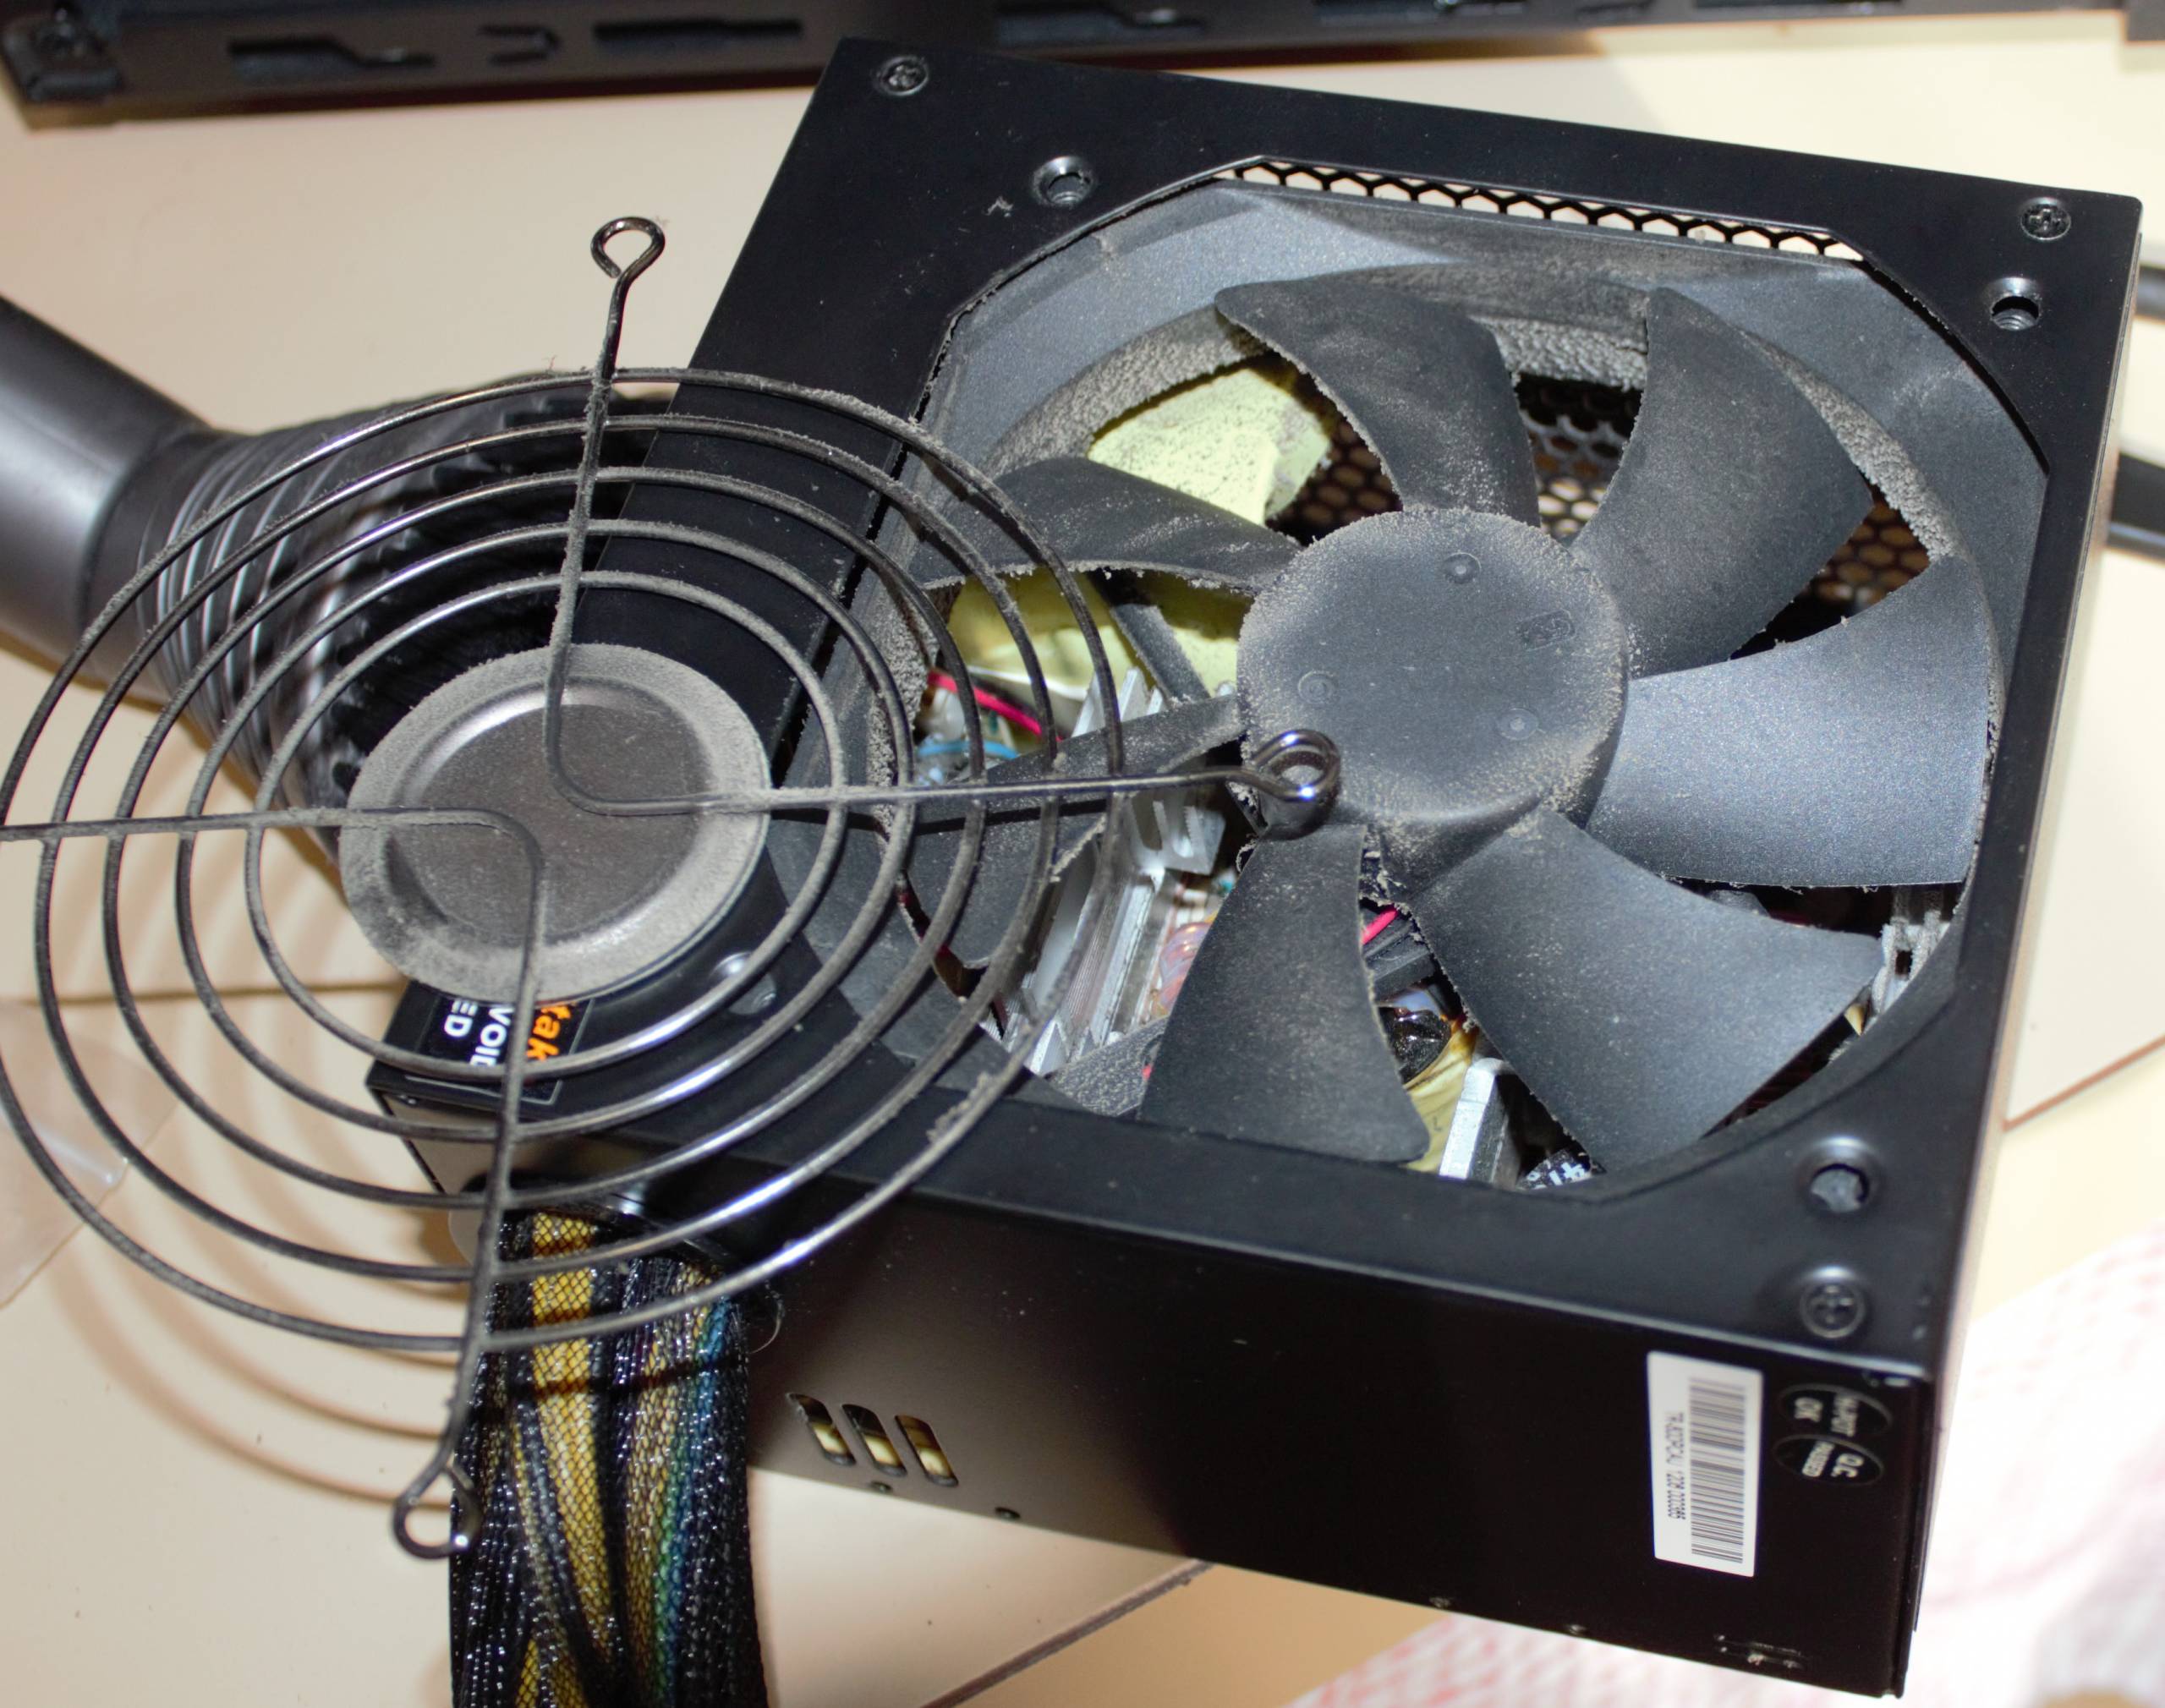
Remove the four screws and work the grill out. Try not to bend the grill mounts though.
Simply remove the four mounting screws for the grill and fan and with careful leverage the grill will move within the housing and allow the grill to be removed so that adequate cleaning can be possible with the vacuum attachment.
Now looking like a bought one, we have an 800W PSU that can handle the demands of this new system.
Fully cleaned Thermaltake PSU (side view)
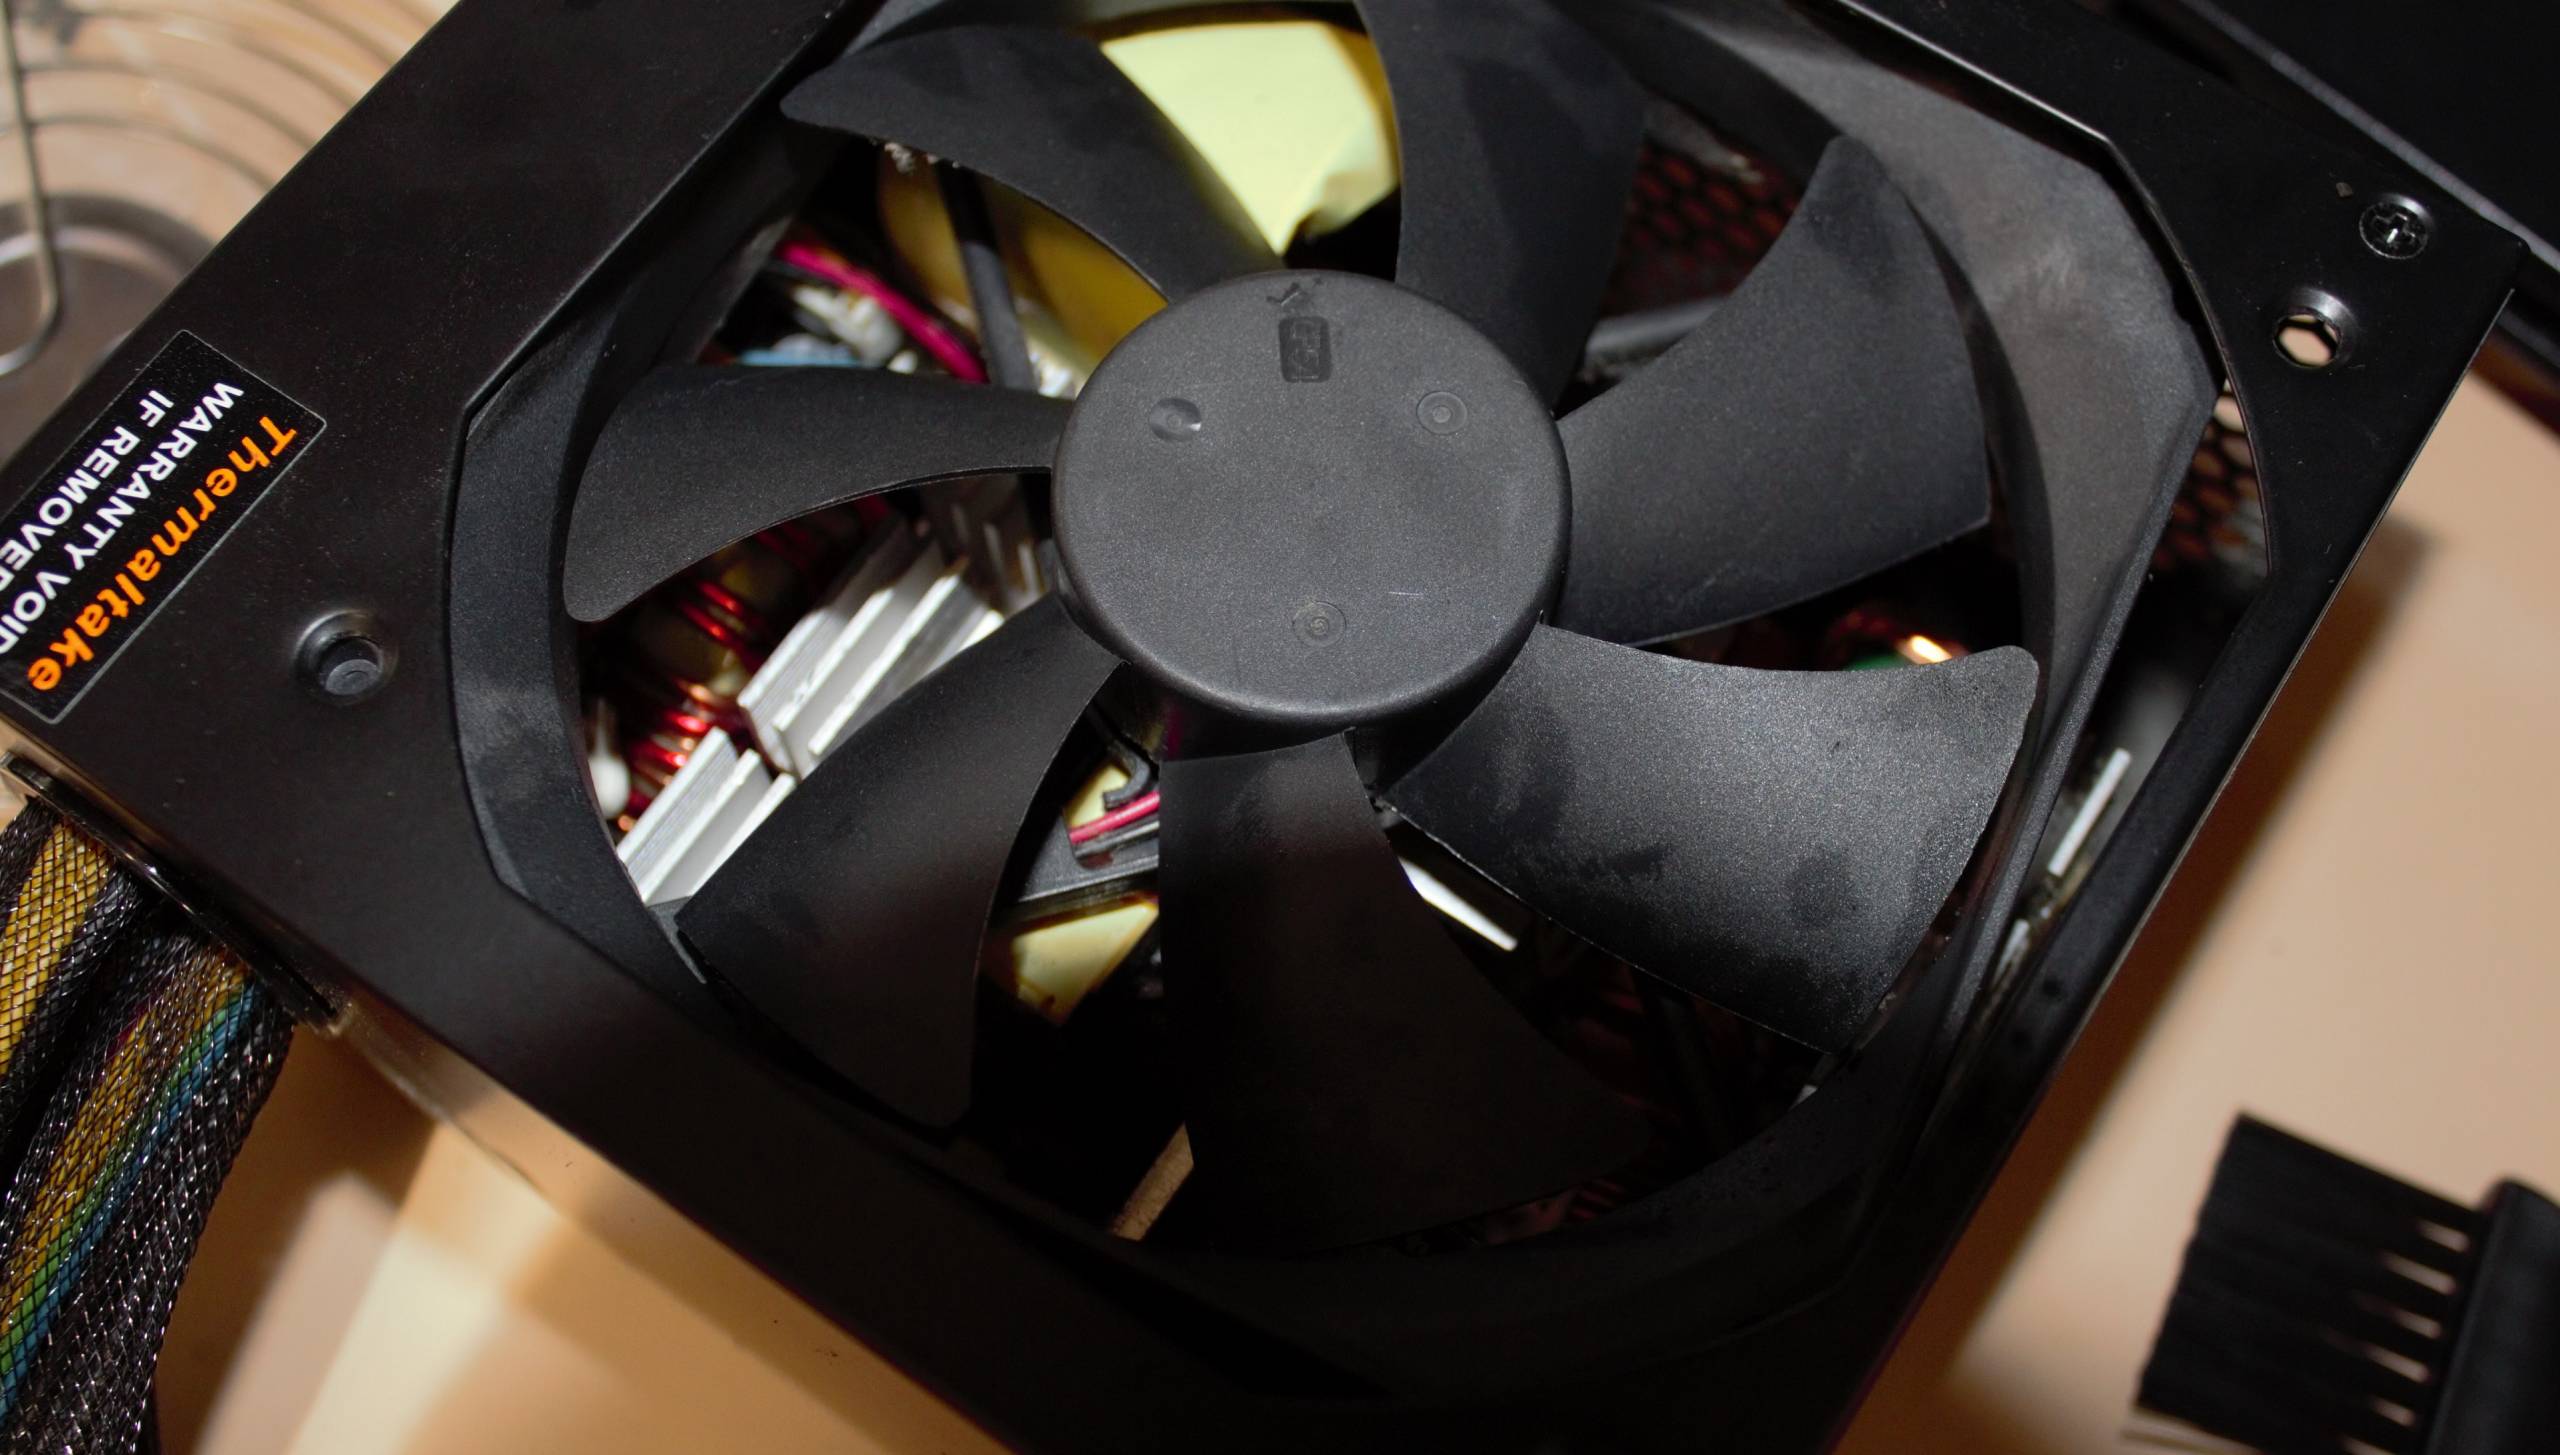
A fully clean Thermaltake PSU
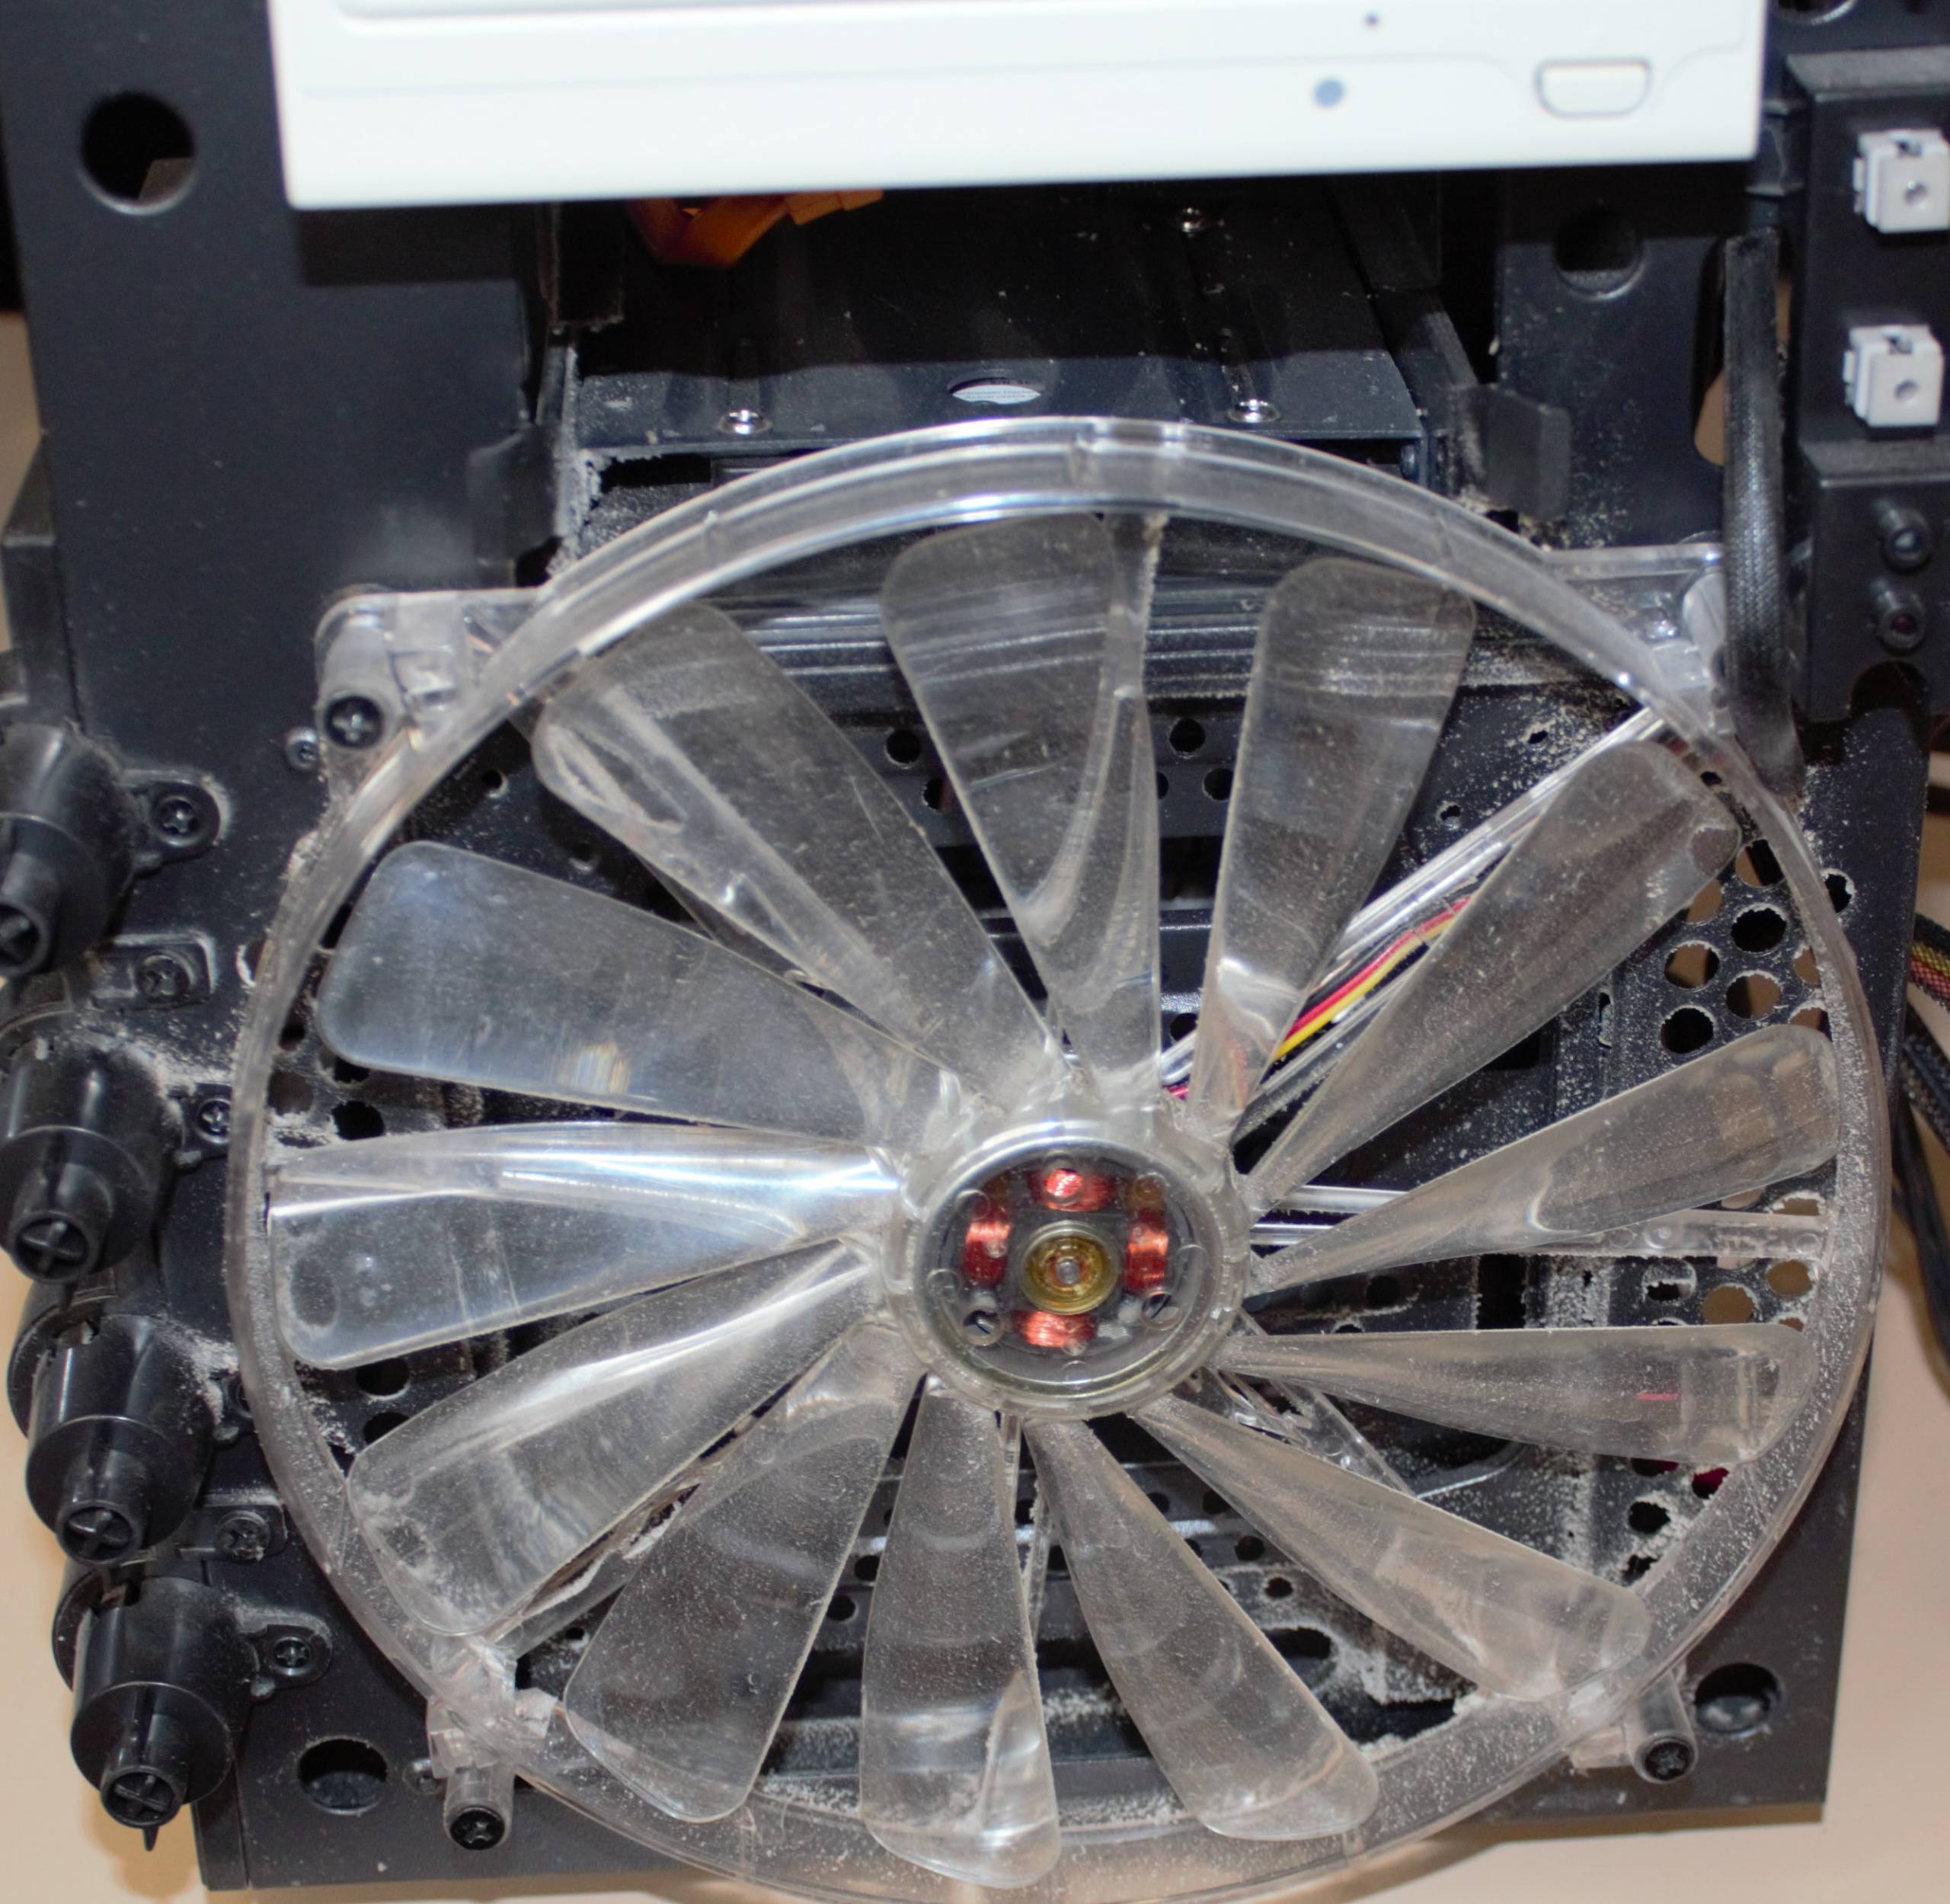
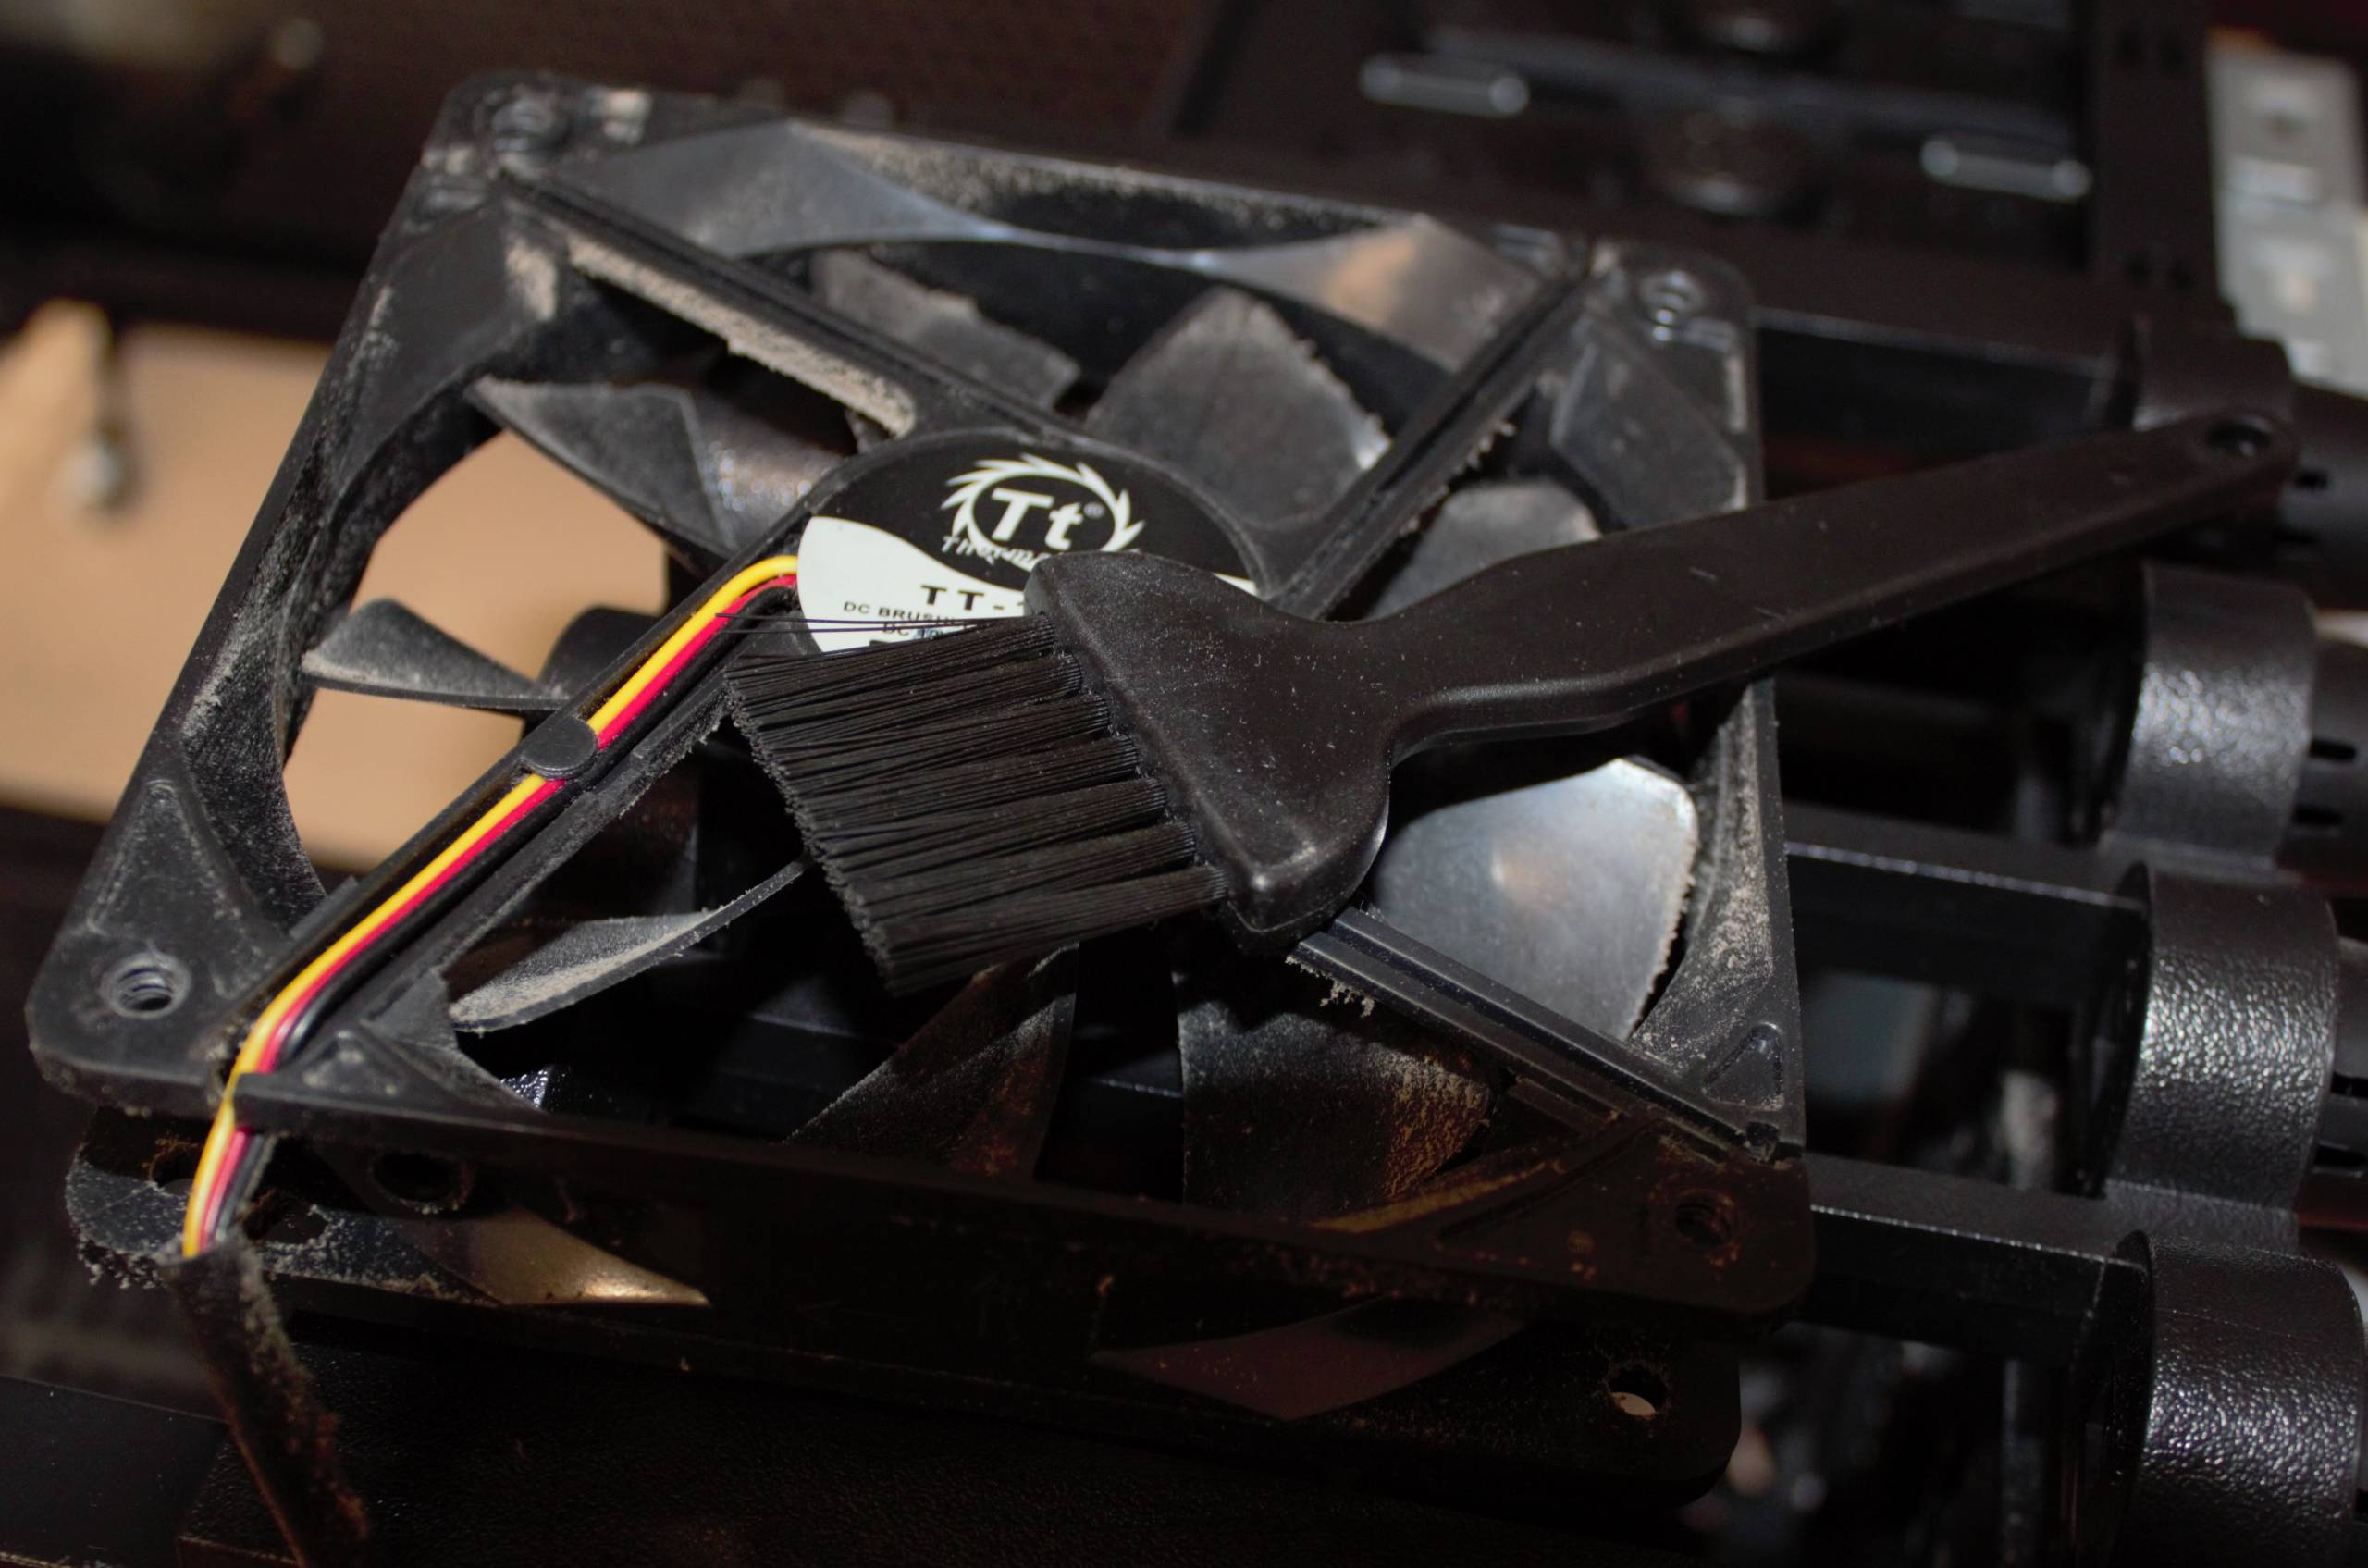
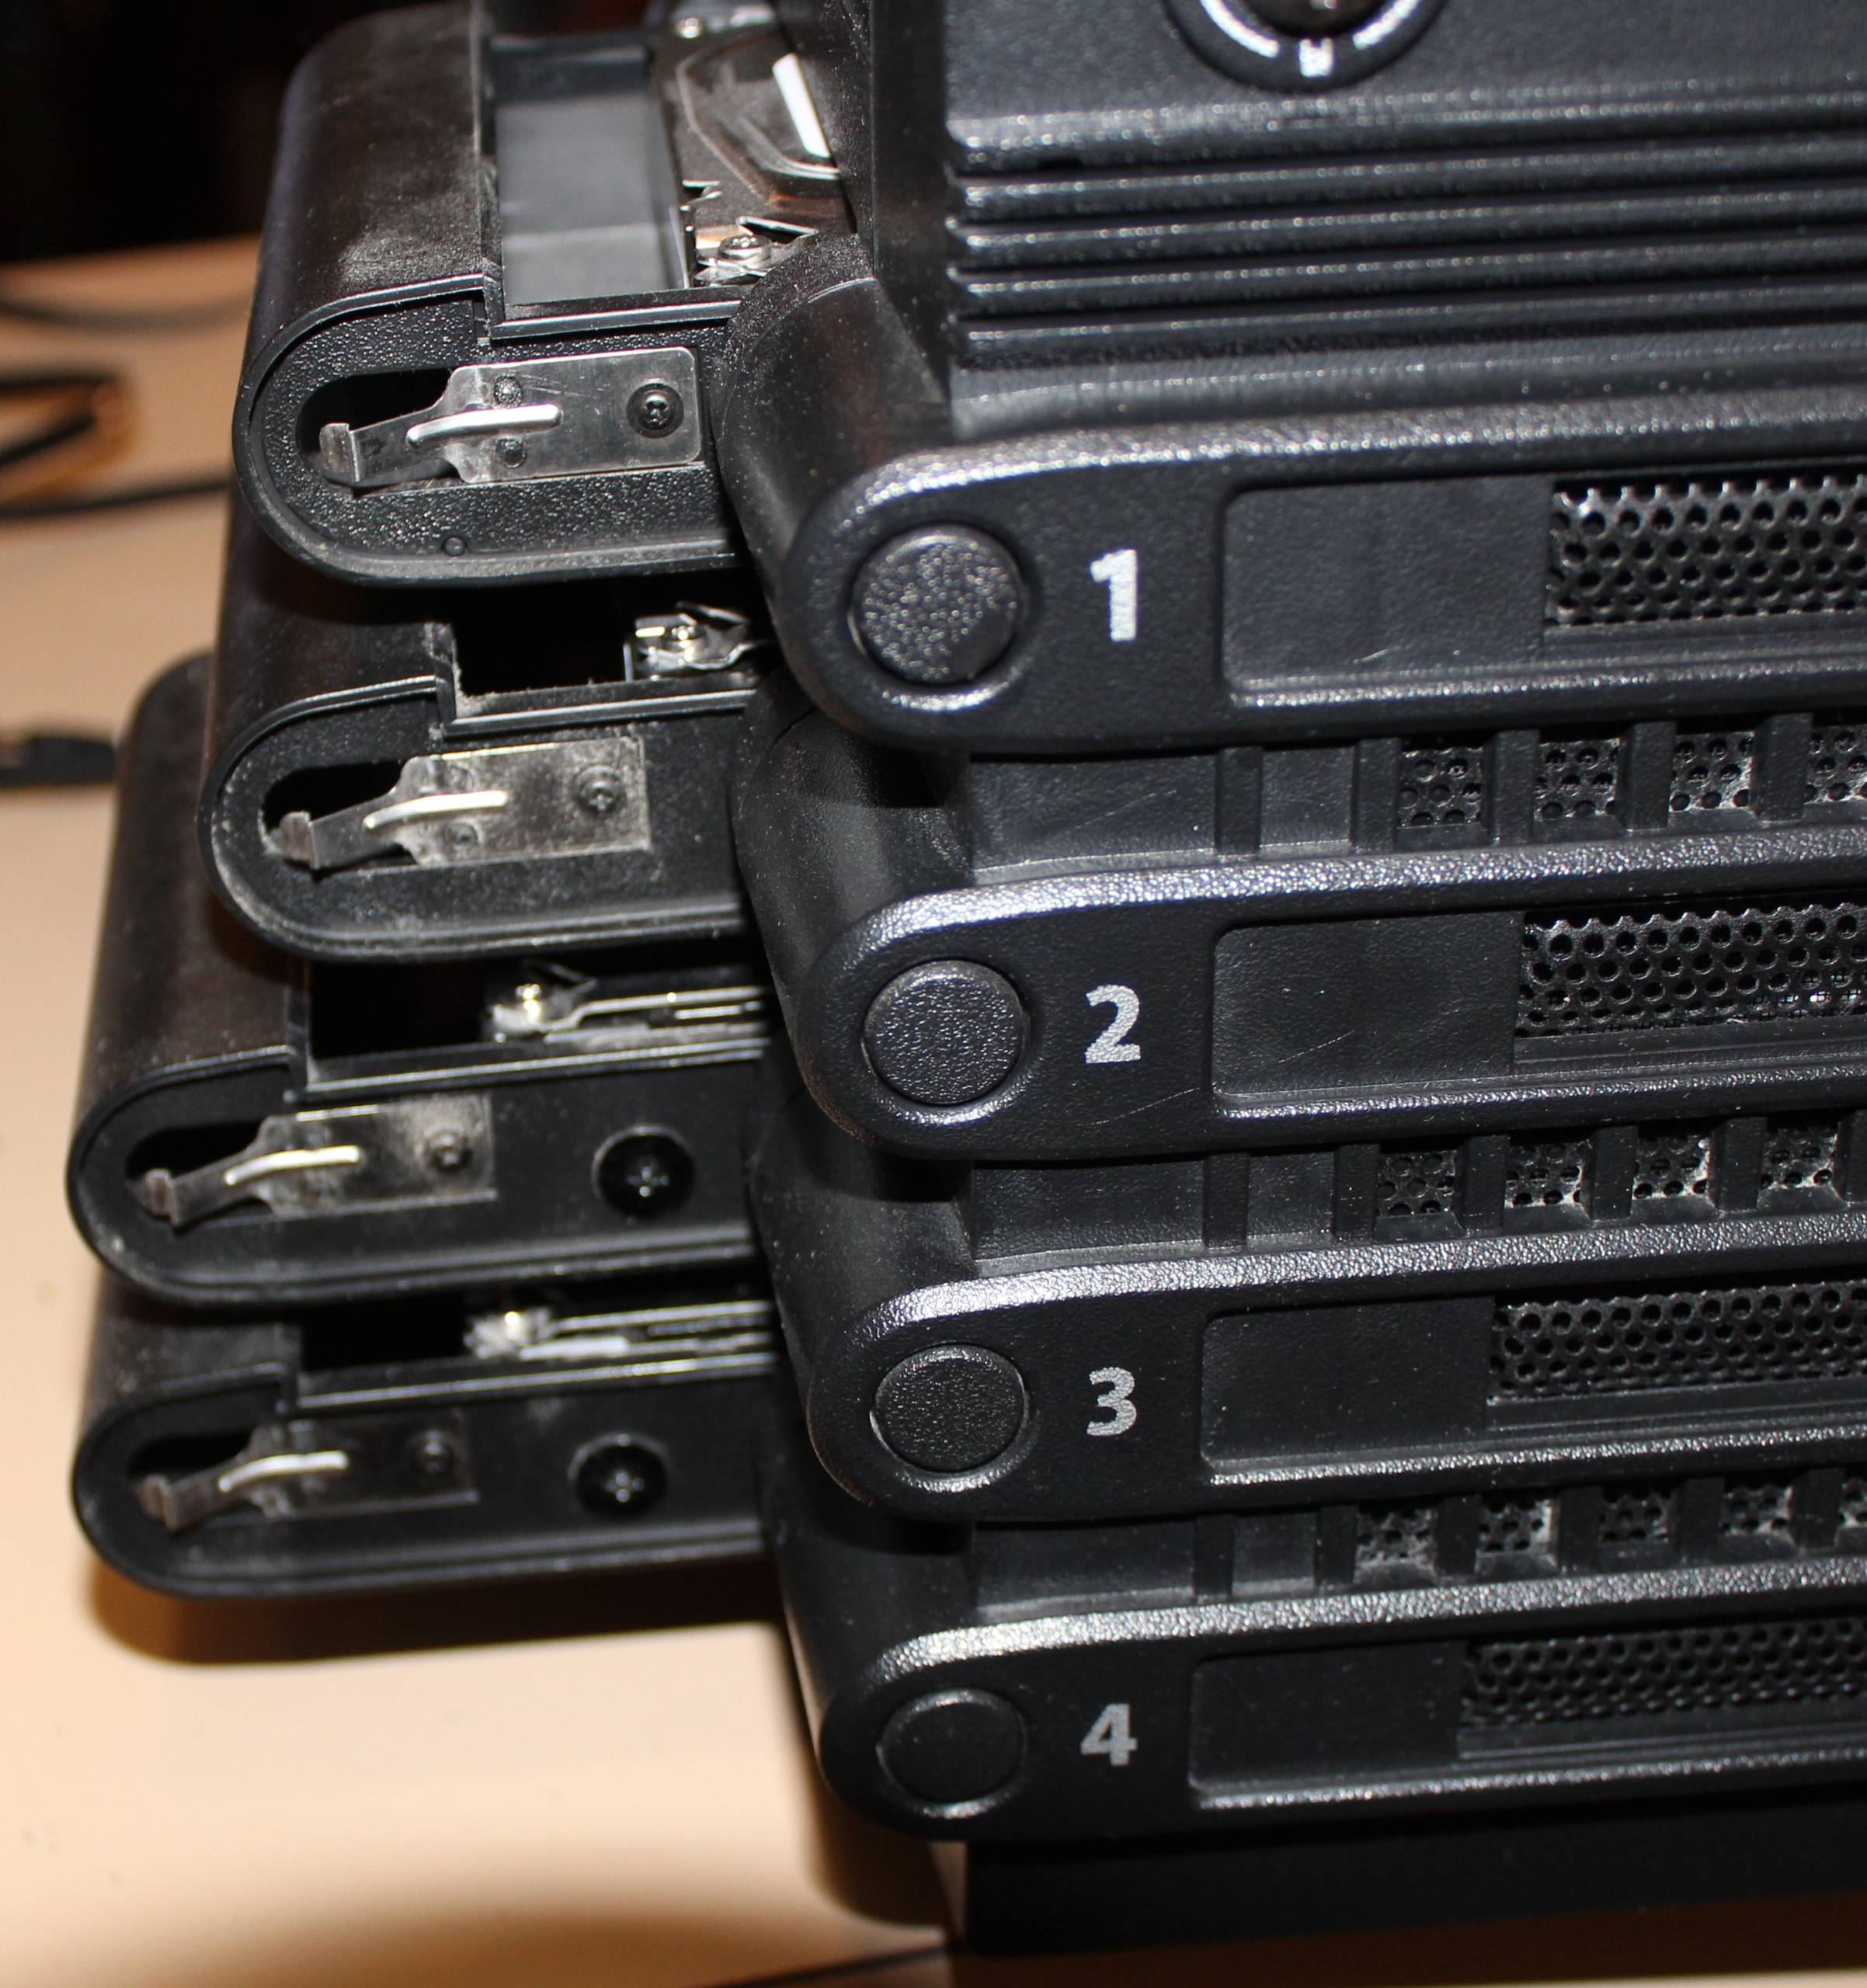
The fans
The existing case fans included a 200mm intake fan at the front (#1), and a 900RPM 120mm rear exhaust fan (#3) as configured from the original promotional graphic.

Again, a quick stop to the local computer shop, aka the next-door neighbor, picking at his surplus fans and $10 later, two pro 1700RPM 120mm 4 pin PWM fans.
Cotton tips and wet cloth detailing later ensued and the airflow design was a-foot!
Airflow design – Working with what you have
The airflow design provided by Thermaltake is a good reference but of course experimenting is always needed. If at all possible, avoid buying new fans or attempt to fill every fan mount just because you can. Use what you have available first and see if you can get the desired outcome.
The additional mounting options were the top, the side and the bottom in an intake or exhaust configuration. With only two additional fans and uncertainty around the AIO being a possibility, there was a bit more involved than simply throwing the fans in and calling it a day.
It also seems to be the case that no matter which brand of power supply you purchase, the CPU 4 and 6 pin motherboard power cables are always too short. You can never get them to route through the cable management and hide it around the back and this was the problem encountered in the original build. The case is designed to accommodate the power supply exhaust fan through the bottom; doing this will amount to the same problem of clogged filters and restricted air flow encountered from the original build.
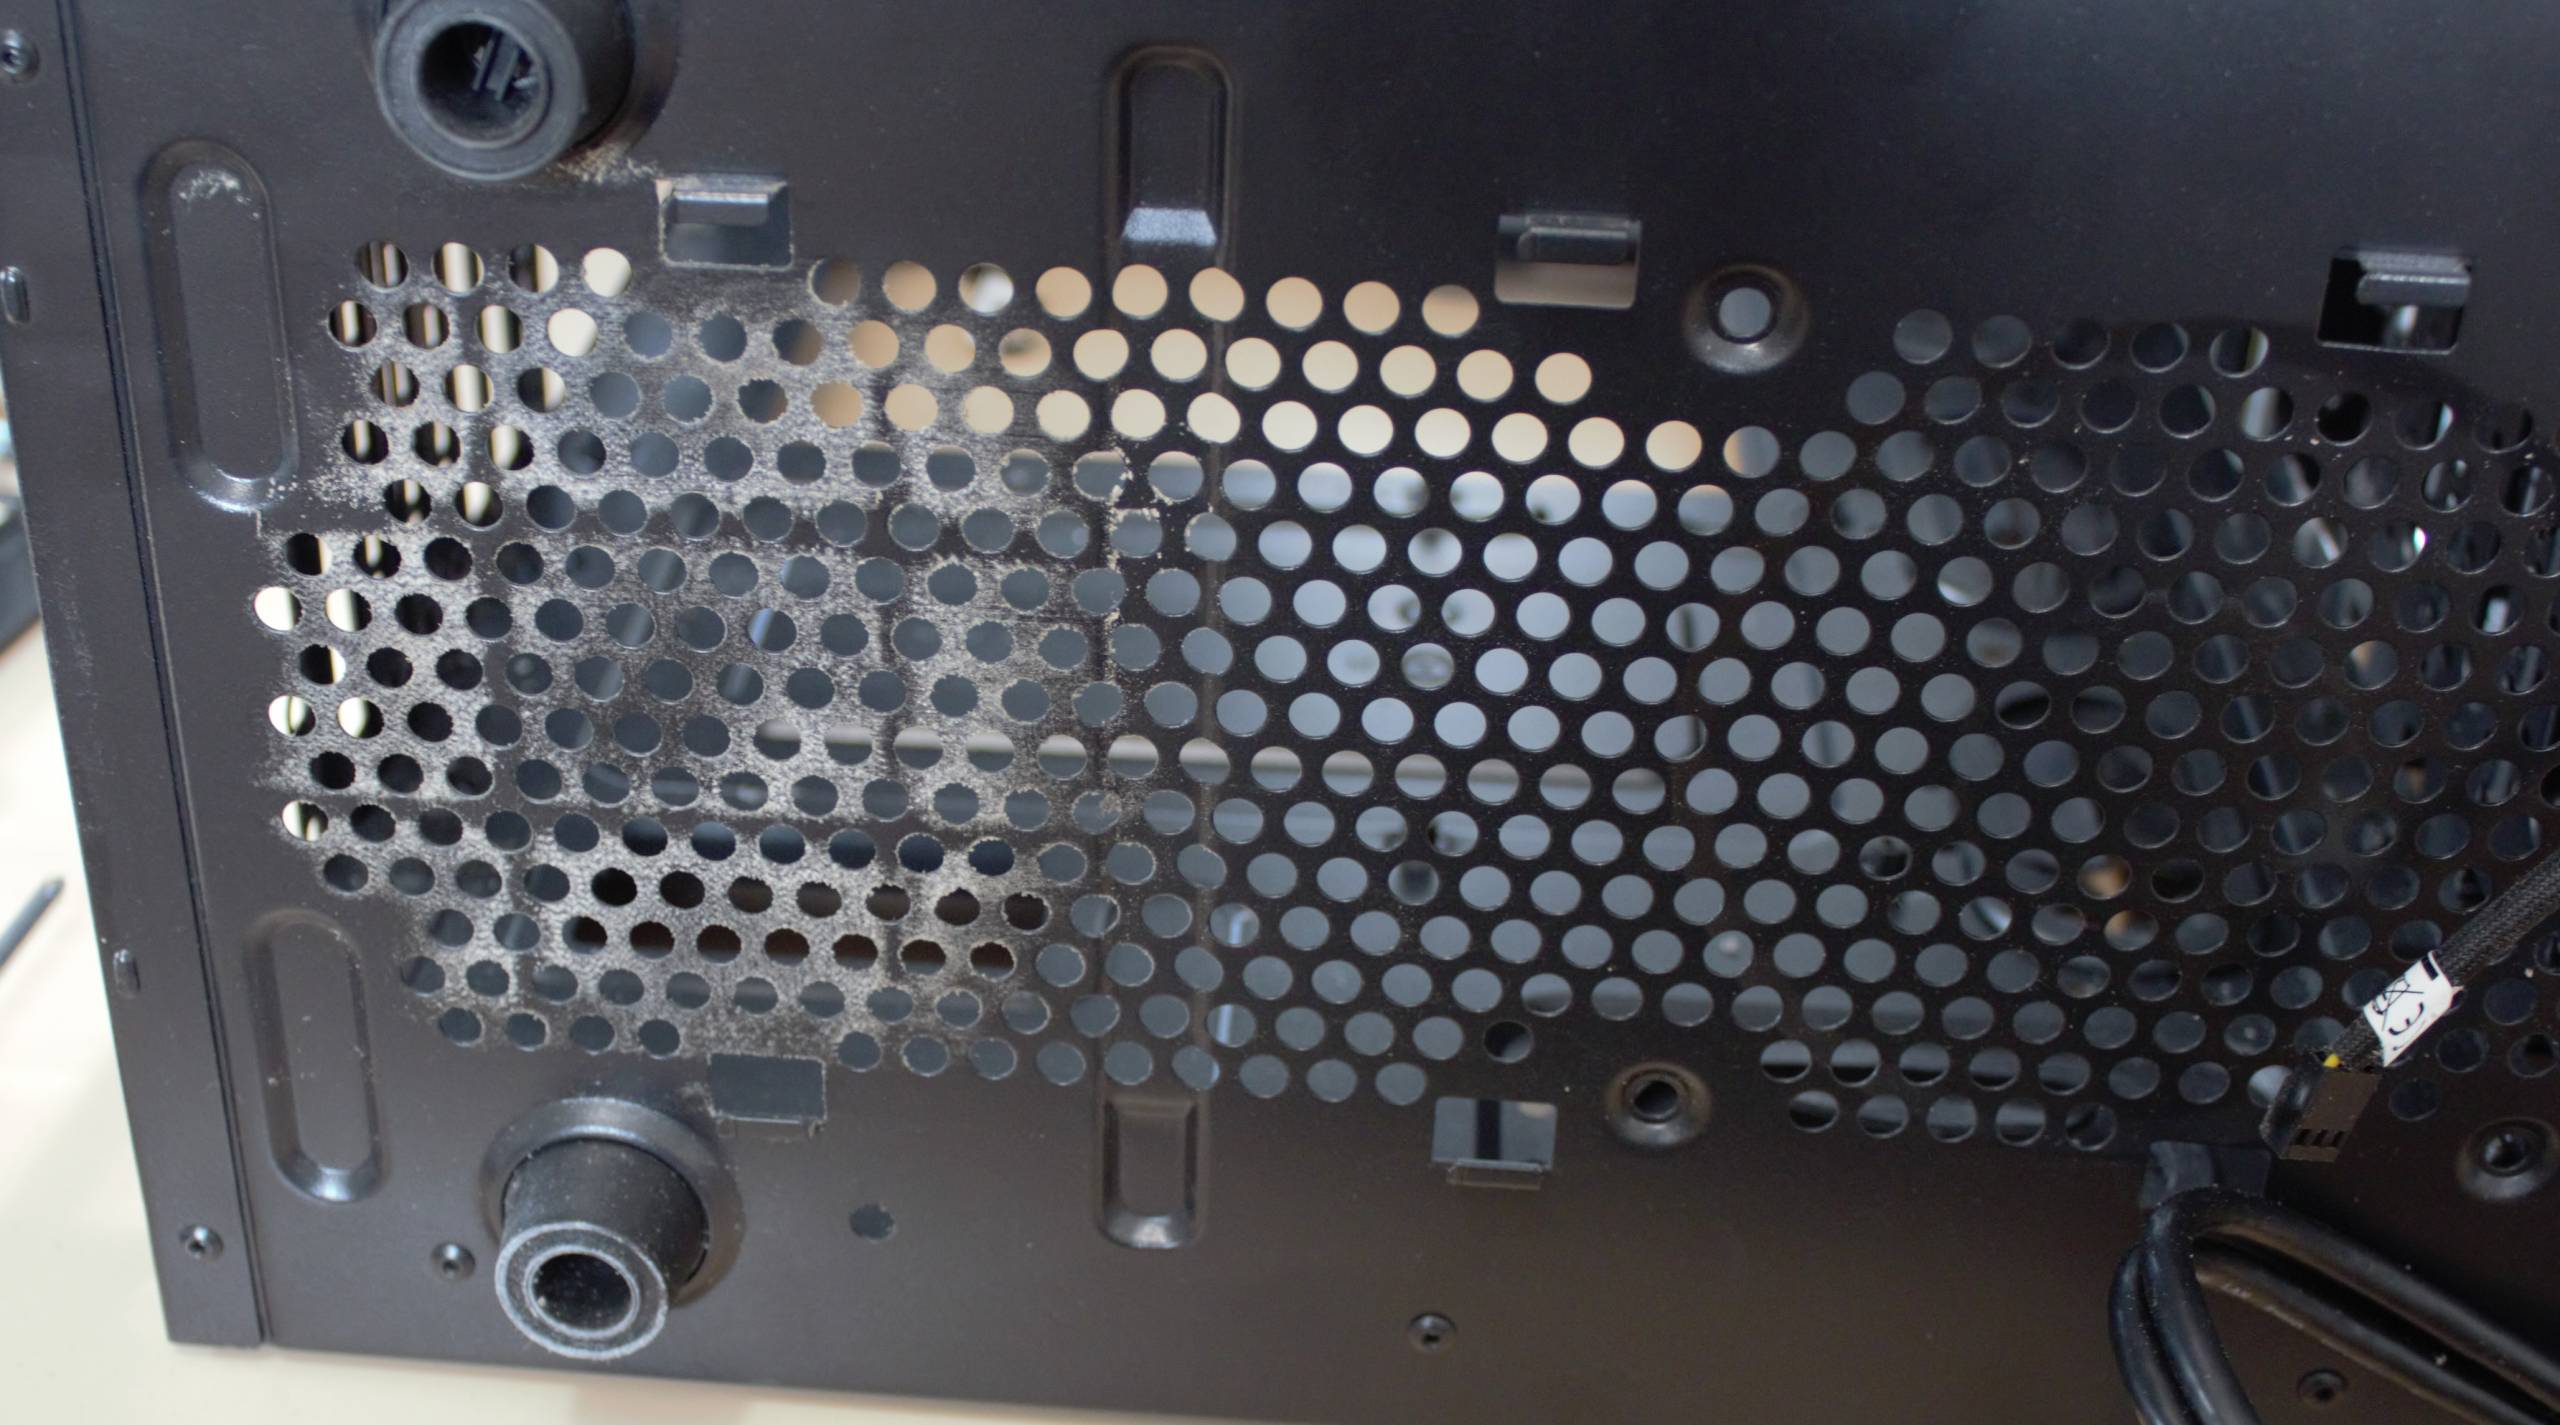
The understand of the PSU vent. Add the material filter and you have clog-central, greatly restricting the airflow of the power supply.
The PSU fan is now another internal fan and the cable can now make it around the case fan to its location. Hiding the sins nicely.
The air from the power supply is actually quite cooler than expected; it also operates far more efficiently without being restricted by the bottom filter. Configured as an exhaust fan, there was a moment of contemplation of cracking open the case and reversing the fan, which is not unheard of but in this case it wasn’t necessary. Simply installing the power supply “upside down” as it were, would allow another fan as an intake blowing directly over the RAID card and the graphics card.
And magically, the cable just makes the distance and can be tucked in along the path to its destination. Nice enough. Sure, under load the PSU will start to be more on the ‘warm’ side, but this will still be at a lower temperature than the graphics card. The trick will be introducing cooler air and getting rid of the hot air as quickly as possible.
To this end, after experimenting with one of the fast 120mm fans on the side panel, the vibration noise was extreme, mostly because the fan needed to run at a high RPM to be of benefit and in all fairness, the side panel is thinner and designed for a slower 200mm/120mm fans anyway.
This first layout was fine whilst idle but lead to an unhealthy buildup of warm air under load. This was due to a few factors in the configurations, which ultimately came down to the fact that the hot air was not being removed fast enough and cool air was mixing with the warm.
The culprit was the slow 900 RPM exhaust fan; we were not getting the desired purchase out of this slow fan. It simply couldn’t keep up with the volume of air being introduced. It is also exacerbated by the video card acting as partial wall between the top and bottom of the case.
The hottest component in the computer is the CPU, and the goal is to push a lot of air through the cooler and exhaust the hot air as soon as possible. If you do this correctly, the CPU fan will run at a lower RPM and the overall noise will be reduced.
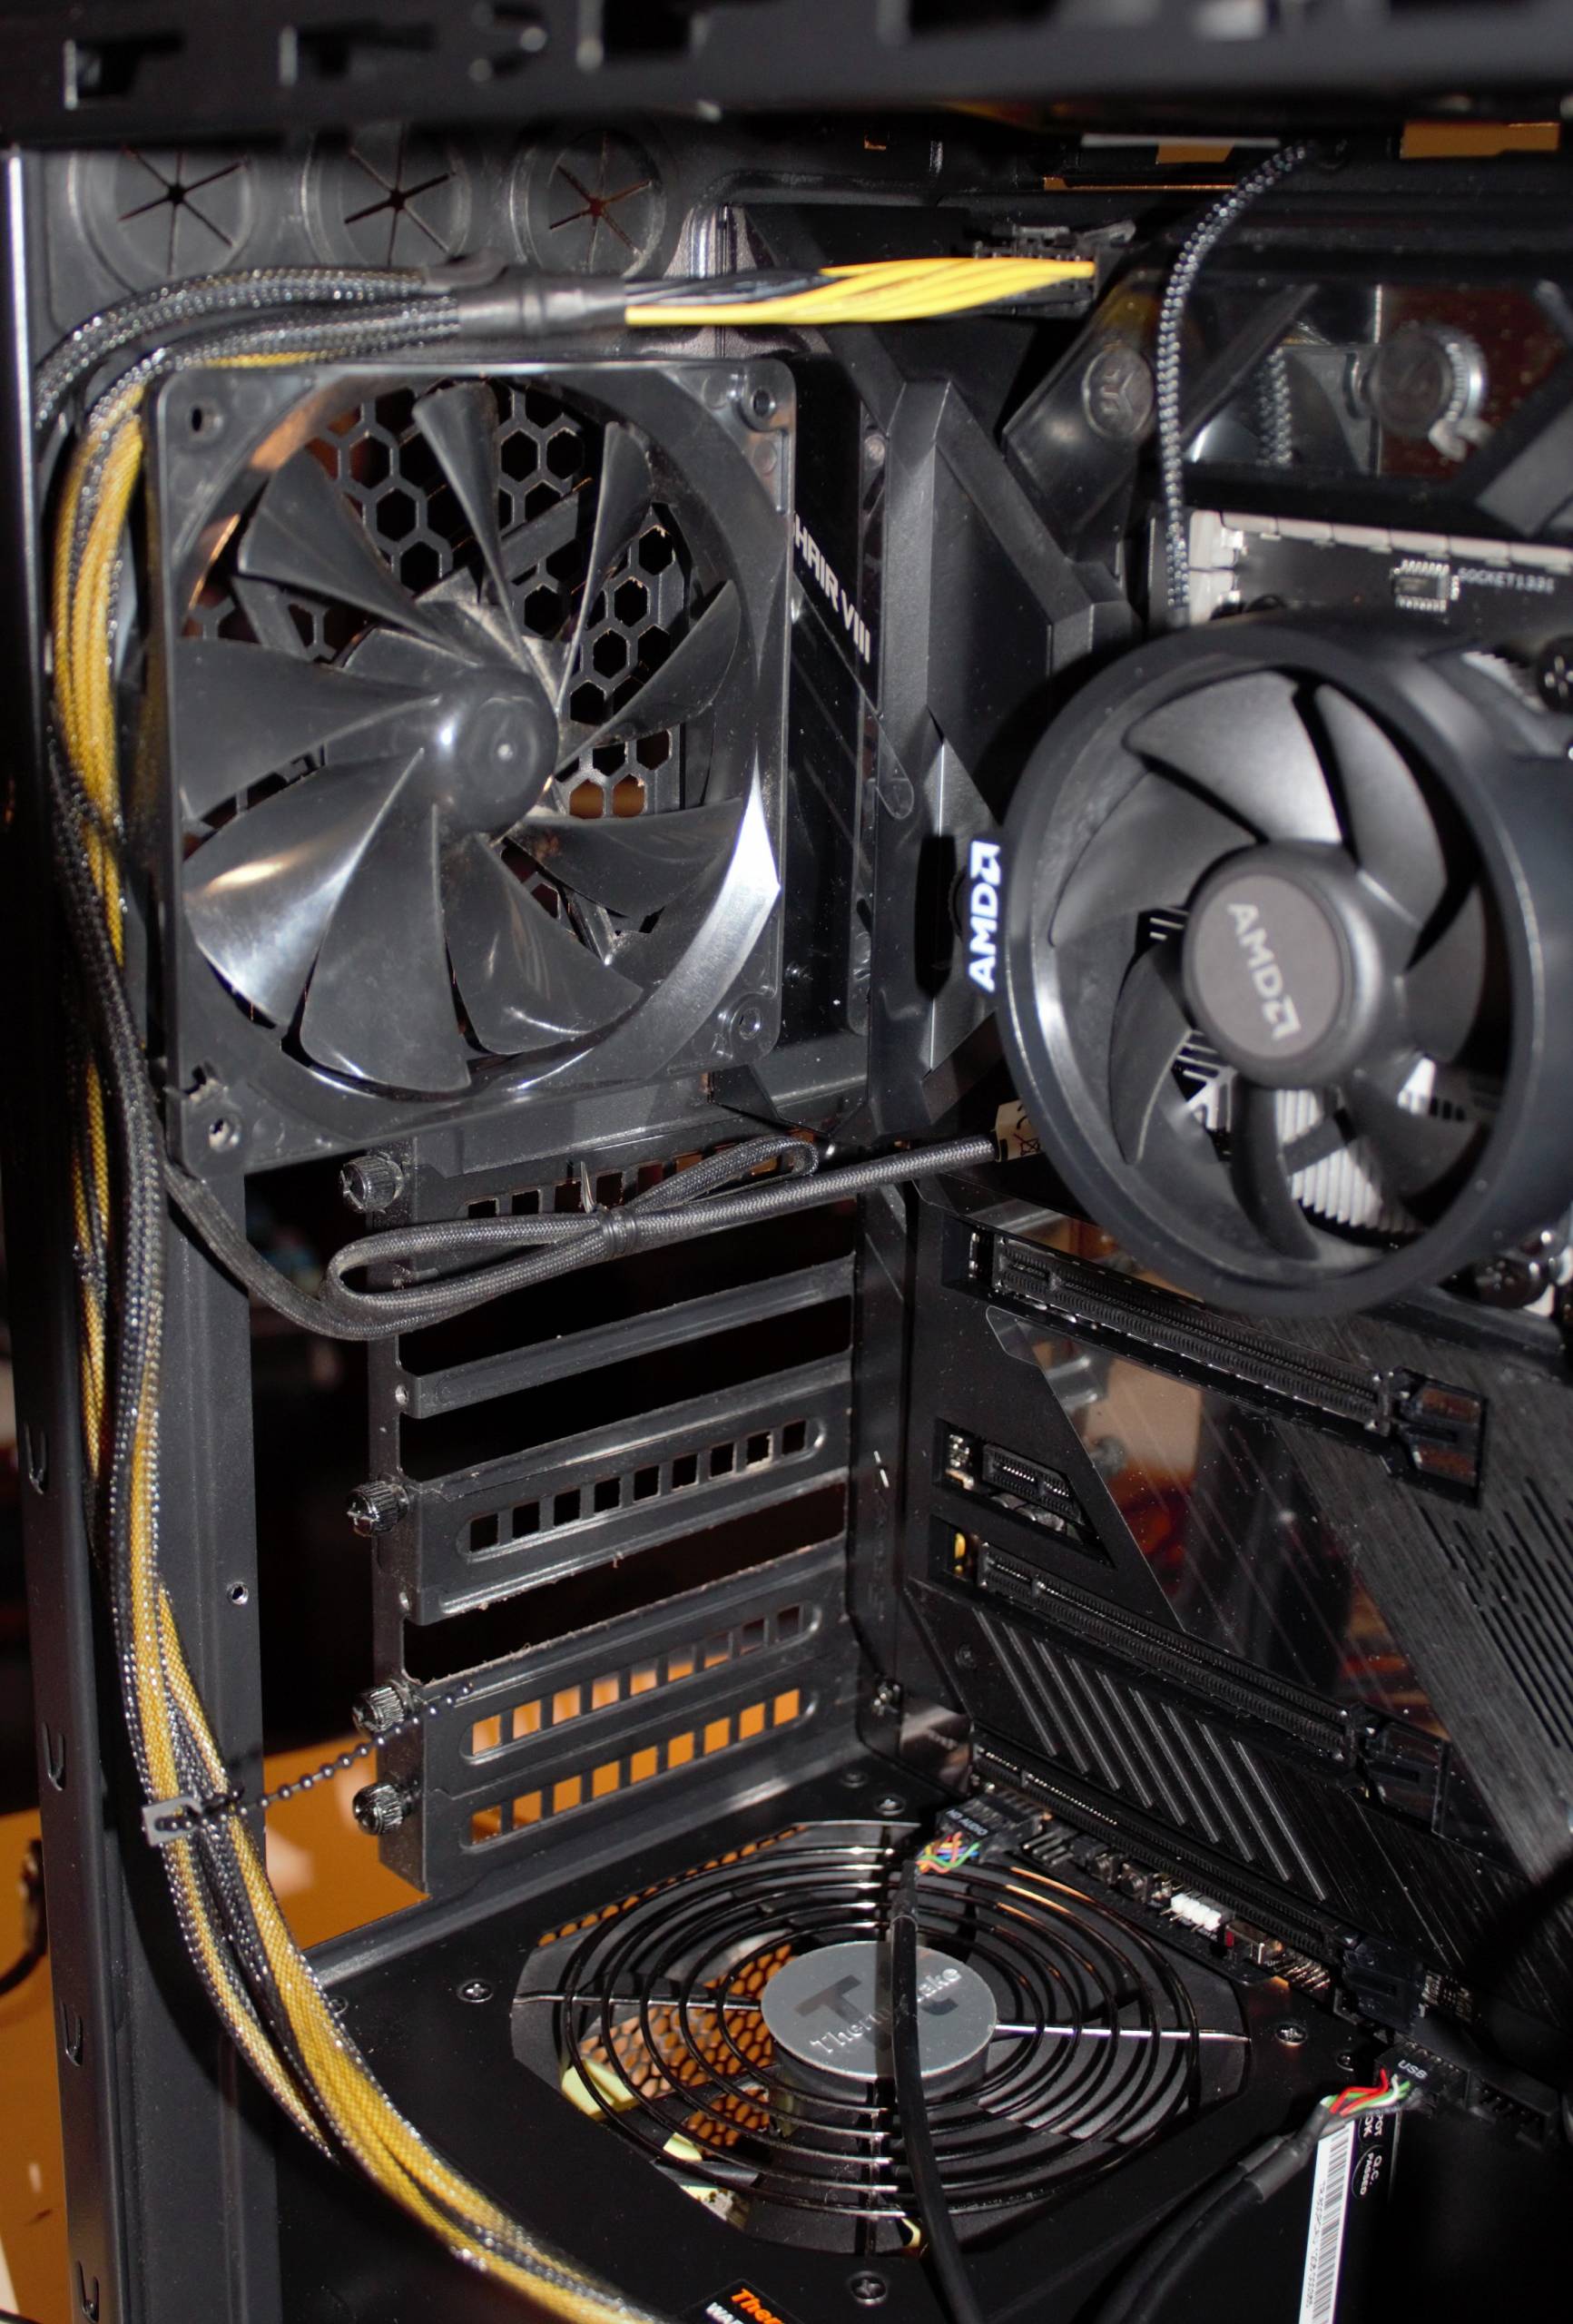
The reconfiguration of replacing the rear exhaust fan with the 1700RPM fan and the slower 900 RPM fan on the bottom as an exhaust fan, ensures that there is a constant cycling of air flow around the two ‘hot zones’. The second 1700 RPM fan is tied into the motherboards linked CPU fan header which ties its controls with the CPU fan speeds. This is also mounted on top to assist in the air flow as an intake.
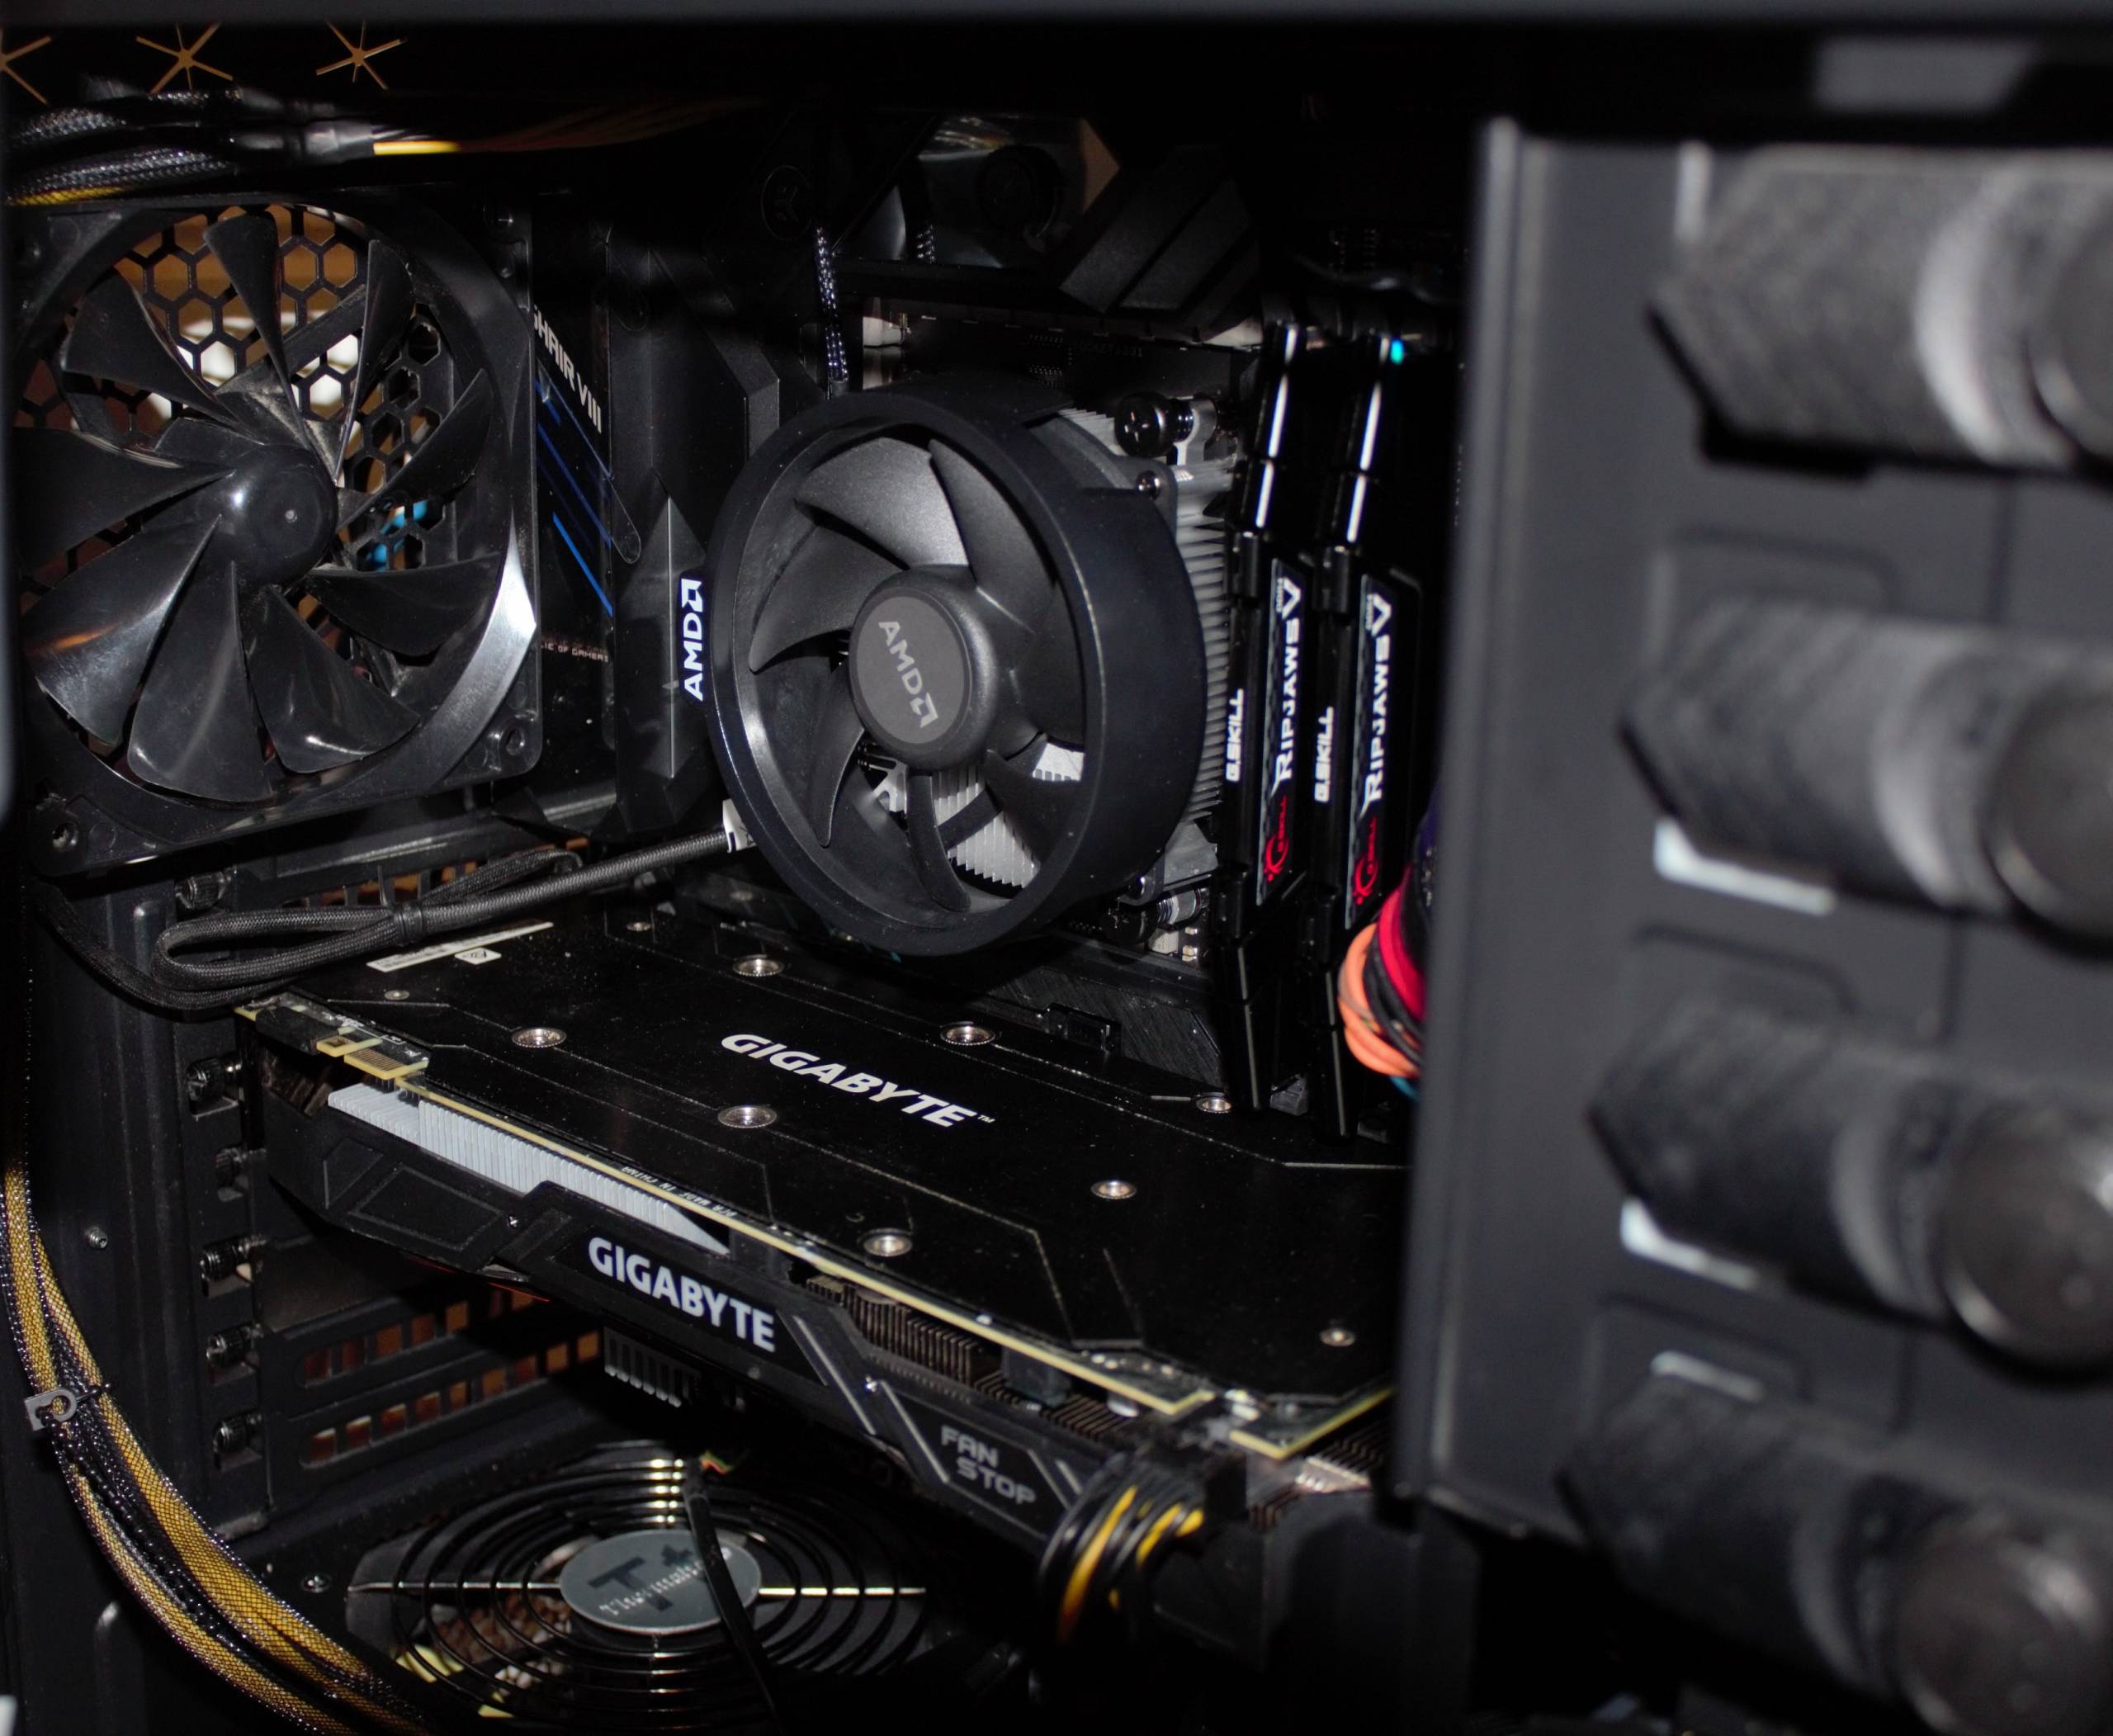
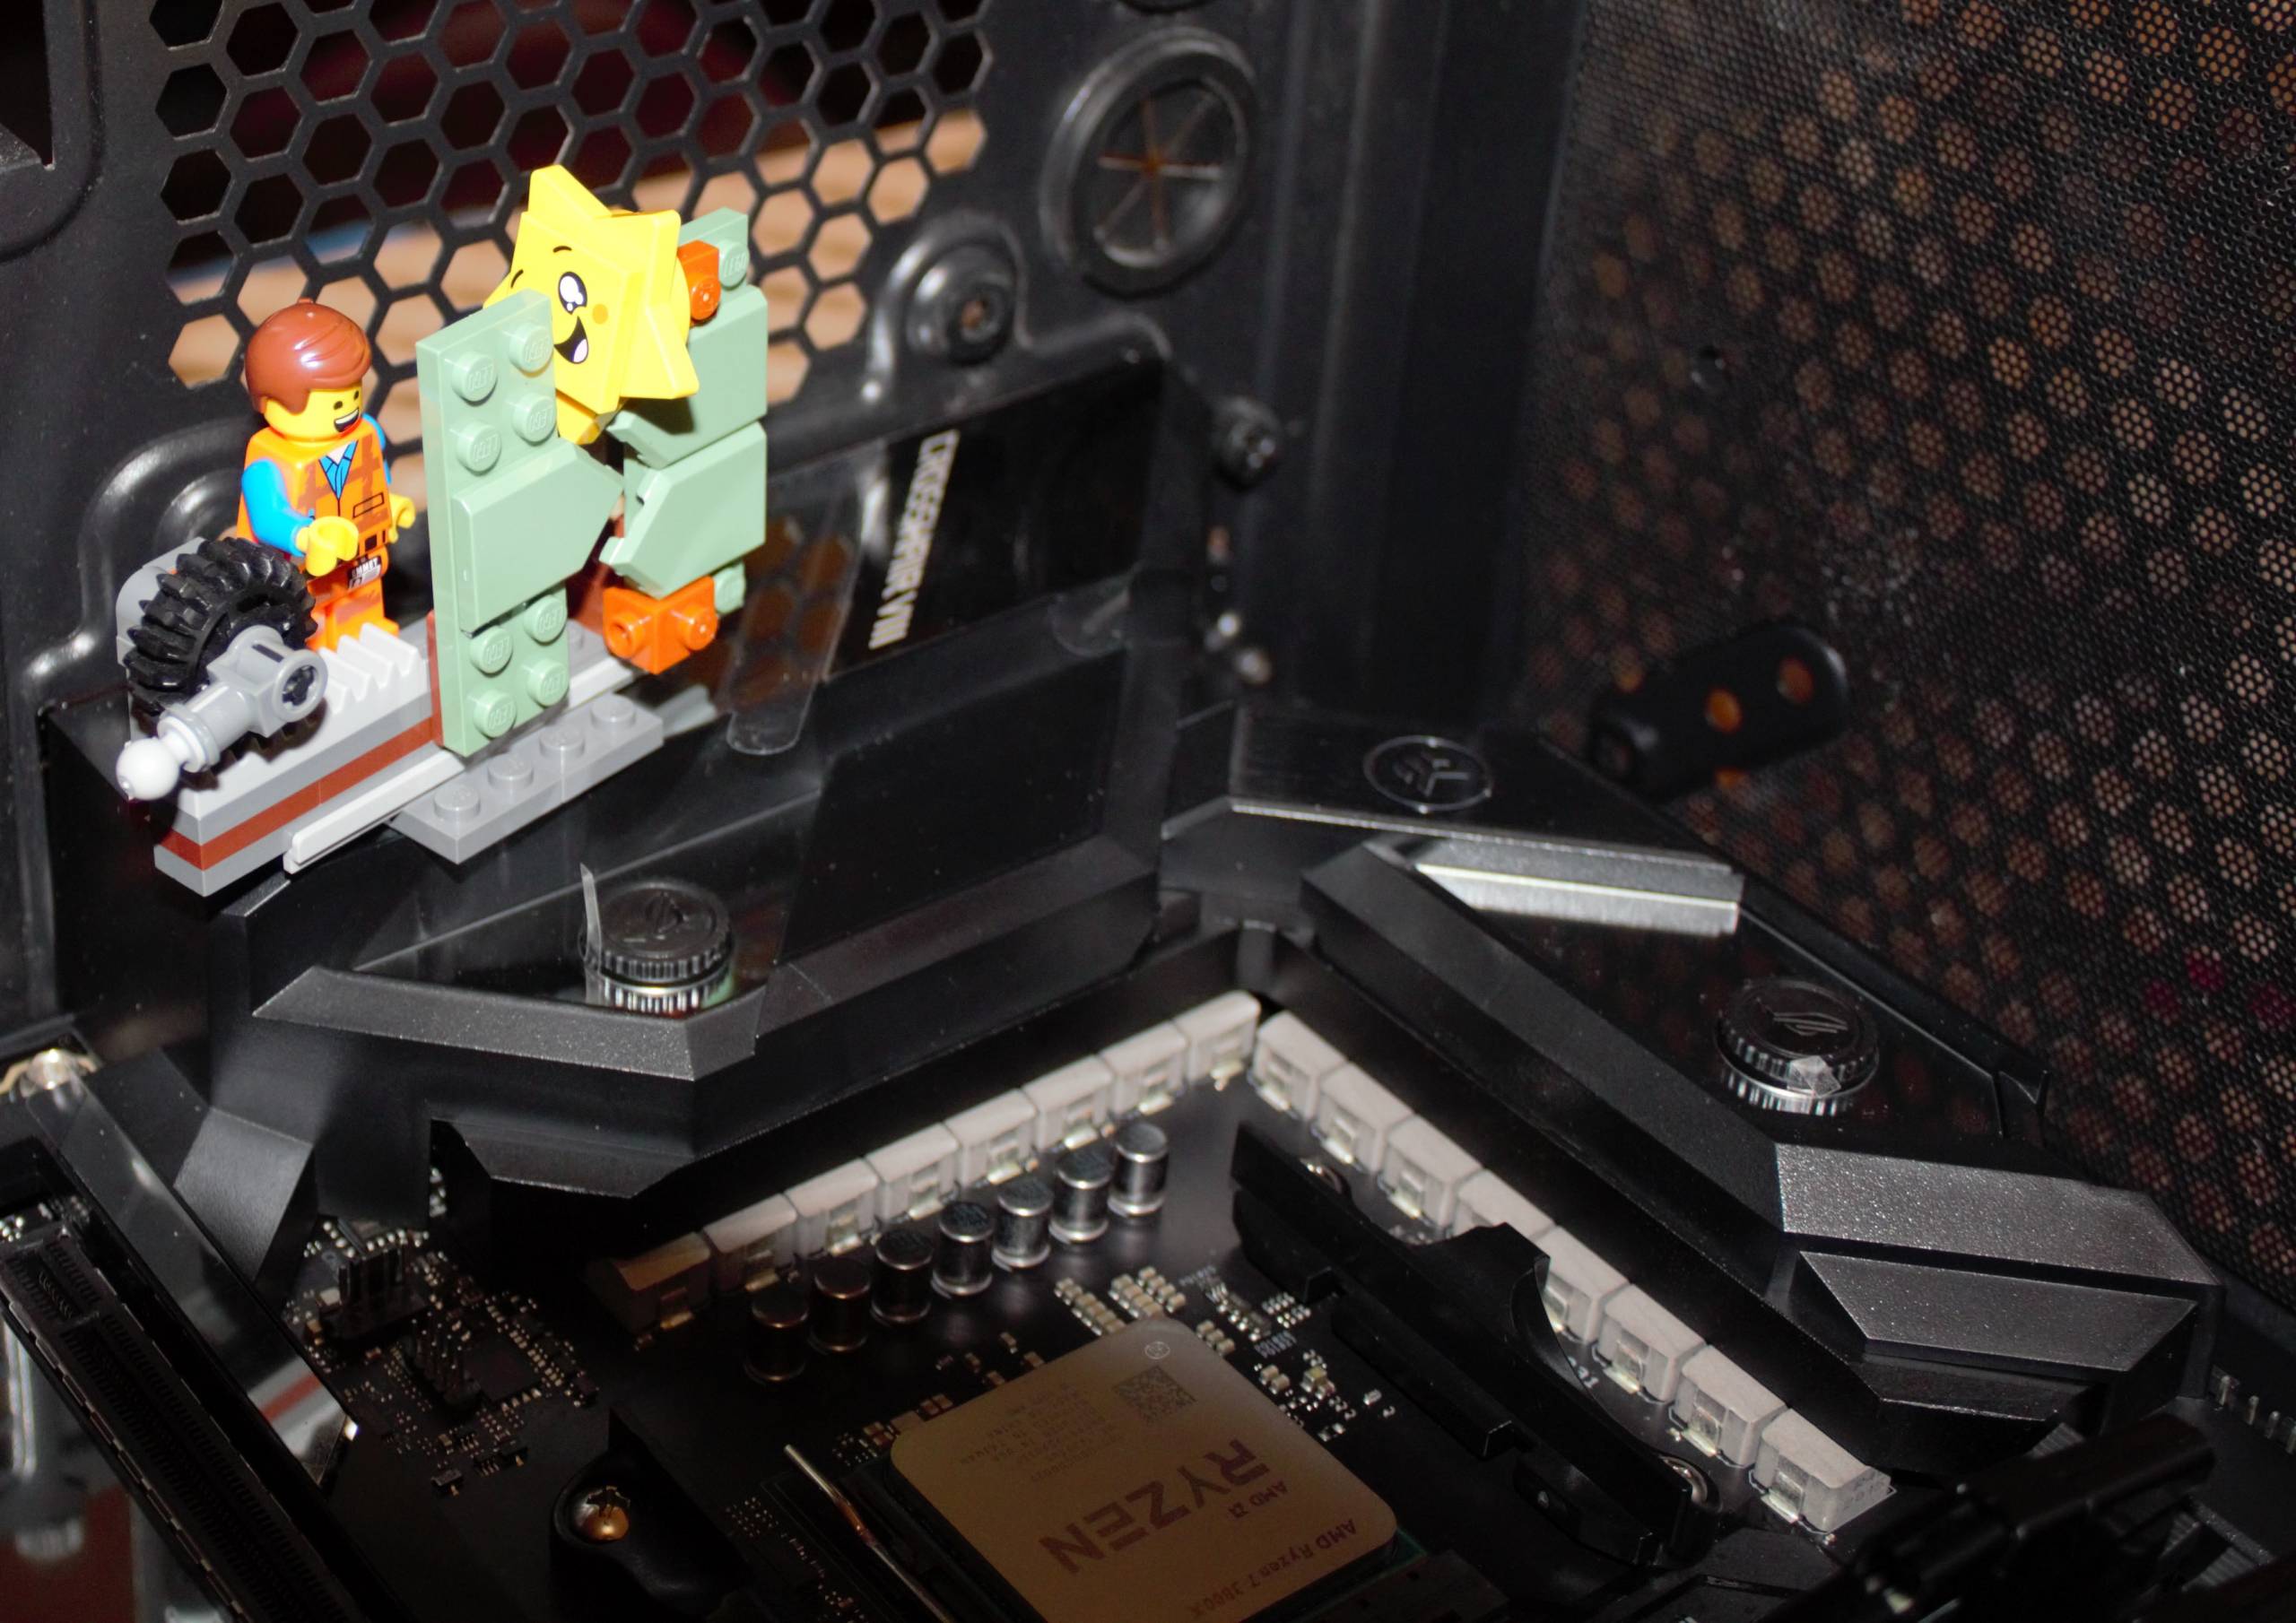
System fully built, prior to “musical fans and CPU coolers!”
This simple change equated to a good 10-15 degrees difference to the idle temperature and a significant noise reduction and reduced temperature under load.
There is more to be gained with an additional 200mm fan for the side and perhaps a reversal of the top fan may make a difference; but for now this is good enough.
Cooling the AMD Ryzen 7 3800X
Thermal cooling requirement
The Intel i7 3700K had a much lower TDP than the AMD 7 3800X, which is a whopping 105W TDP which if we are honest it’s likely to be a portion more under 100% load. Either way, the maximum rated temperature is 95 degrees. We don’t want to get anywhere near that.
The frustrating thing about coolers now days is that most no longer state their TDP rating. The argument for not doing so involves marketing, testing conditions etc. But with every design being implemented by every manufacturer, they are all mostly derivative and it really is a matter of just finding a review where your chosen CPU has been used with that cooler then just crossing the fingers anyway.
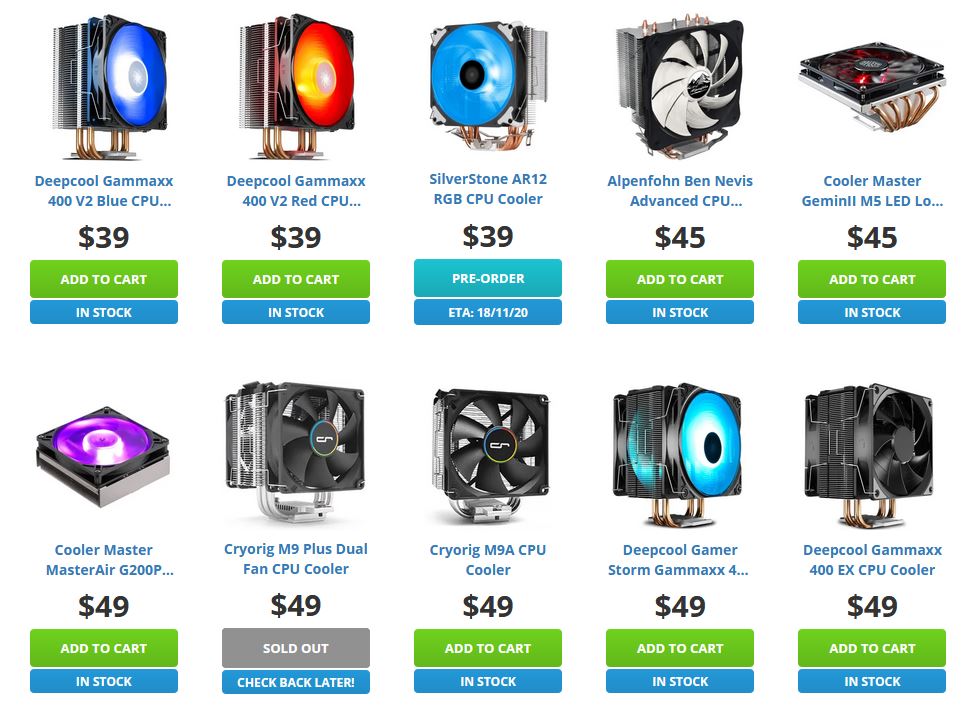
Just one page of some of the ‘affordable’ AM4 CPU coolers. Diversity in coolers is now predominately in the fan and LED’s than the design itself.
Using what you can get!
A half decent air cooler will cost you around $60 AUD and depending upon the age of your existing cooler, you may find that you can make a significant saving there as well.
If buying a new cooler, spending $60+ is typically a good call, especially if it is for an AM4 socket, which would ensure it can be used for the next generation of AMD Ryzen processors.
The Cooler Master AIO water cooler was sadly a no go. The mounting plate was incompatible with the AM4 socket, due to its age and it was not able to be installed. However, the plate may be 3D printable so this is still a possibility for another day. For those who have access to a 3D printer and have the required skillset, consider the options available to you with re-using some older coolers – and if that exercise is something you want to do.
The Cooler Master Nepton 280L mount was not compatible with the AM4 socket. No harm no foul, it was an older cooler. Brackets are difficult to source however.
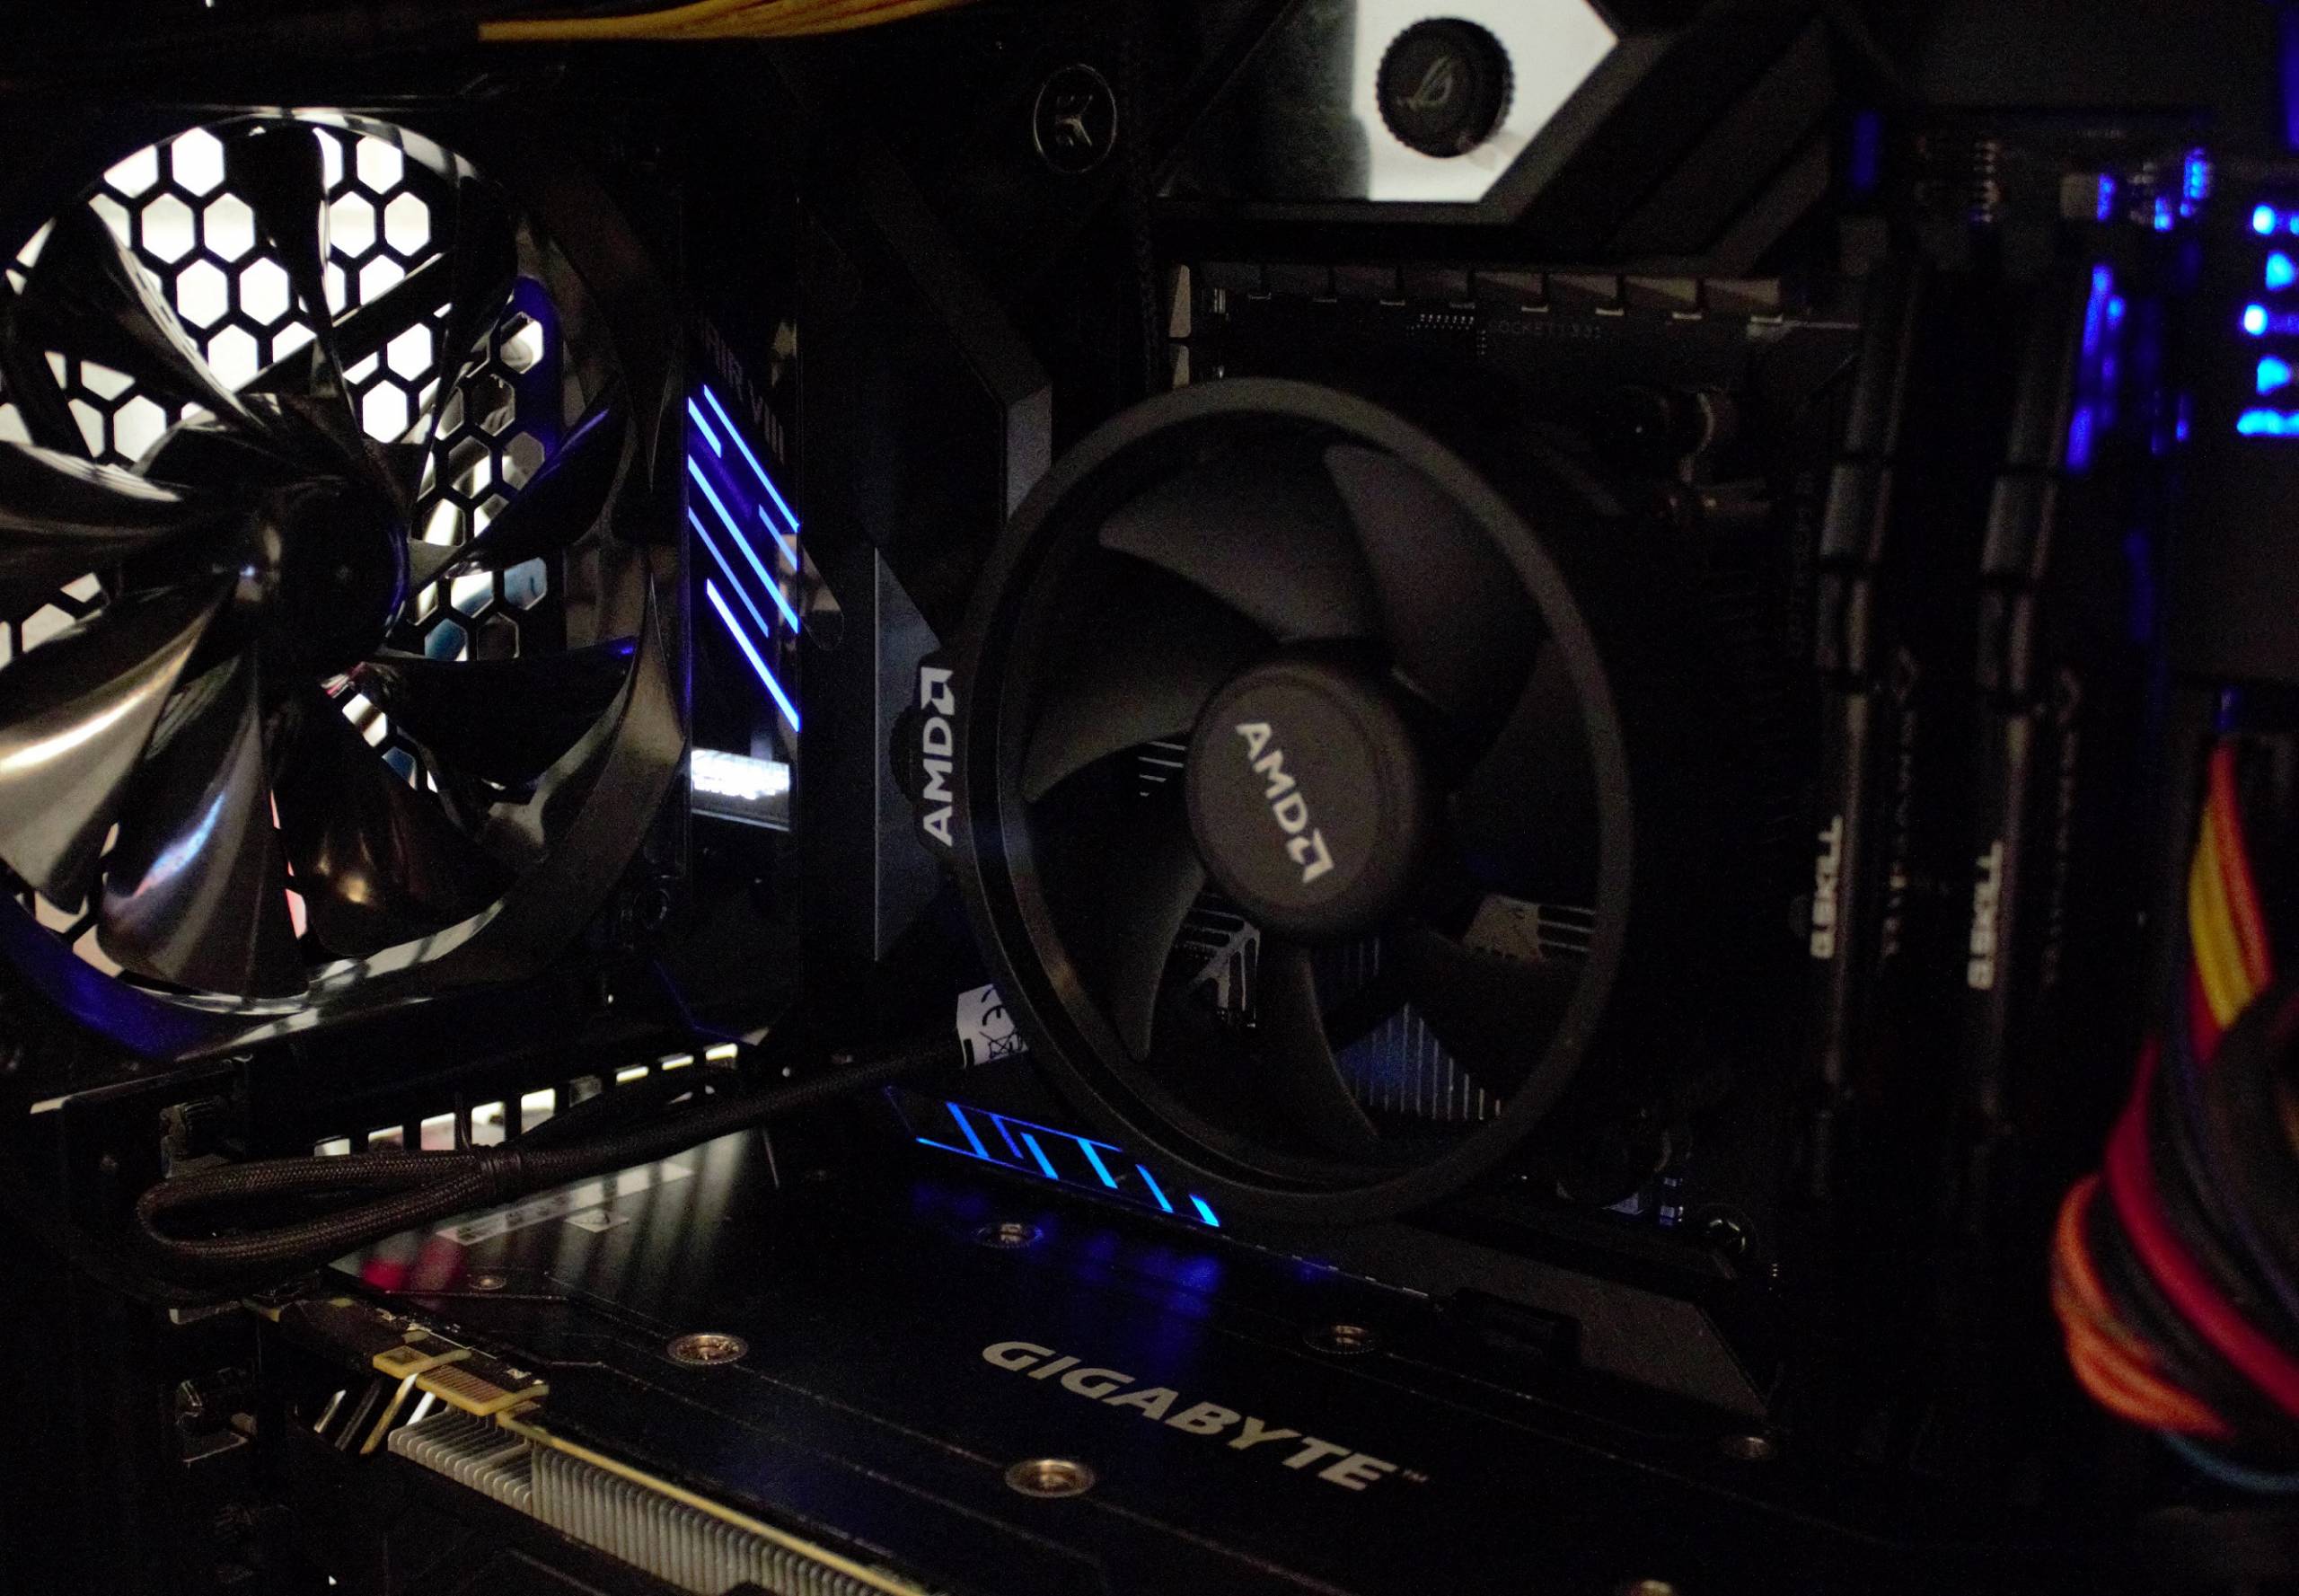
Without a suitable AM4 bracket for the SpinQ, there was no choice but to borrow a cooler from the neighbor; The Ryzen 5 stock Wraith STEALTH cooler actually.
The Wraith cooler is for 65W TPD processors, so it should struggle to cool the 3800X right?
Performance of the Ryzen 7 3800X
So that you don’t have to, here is how the Ryzen 7 3800X performs when flogged with a cooler that isn’t intended or rated for it.
Testing conditions
- ASUS ROG Crosshair VIII Formula
- AMD Ryzen 7 3800X @ default clock
- AMD Wraith STEALTH cooler with factory applied thermal paste
- 32 GB 3600 RAM
- Enclosed case with
- Intake from front 200mm 800 RPM, side 120mm 1700 RPM
- Exhaust from rear 120mm slow 900 RPM
- Windows 10 Professional
- Ambient room temperature 18-24 degrees
Cooling performance with the Wraith cooler (65W TDP)
The Wraith cooler actually performs reasonably well whilst idle, the fan noise was reasonable and temperatures held steady around the 40-60 degree mark whilst surfing the internet and watching YouTube videos and using office applications.
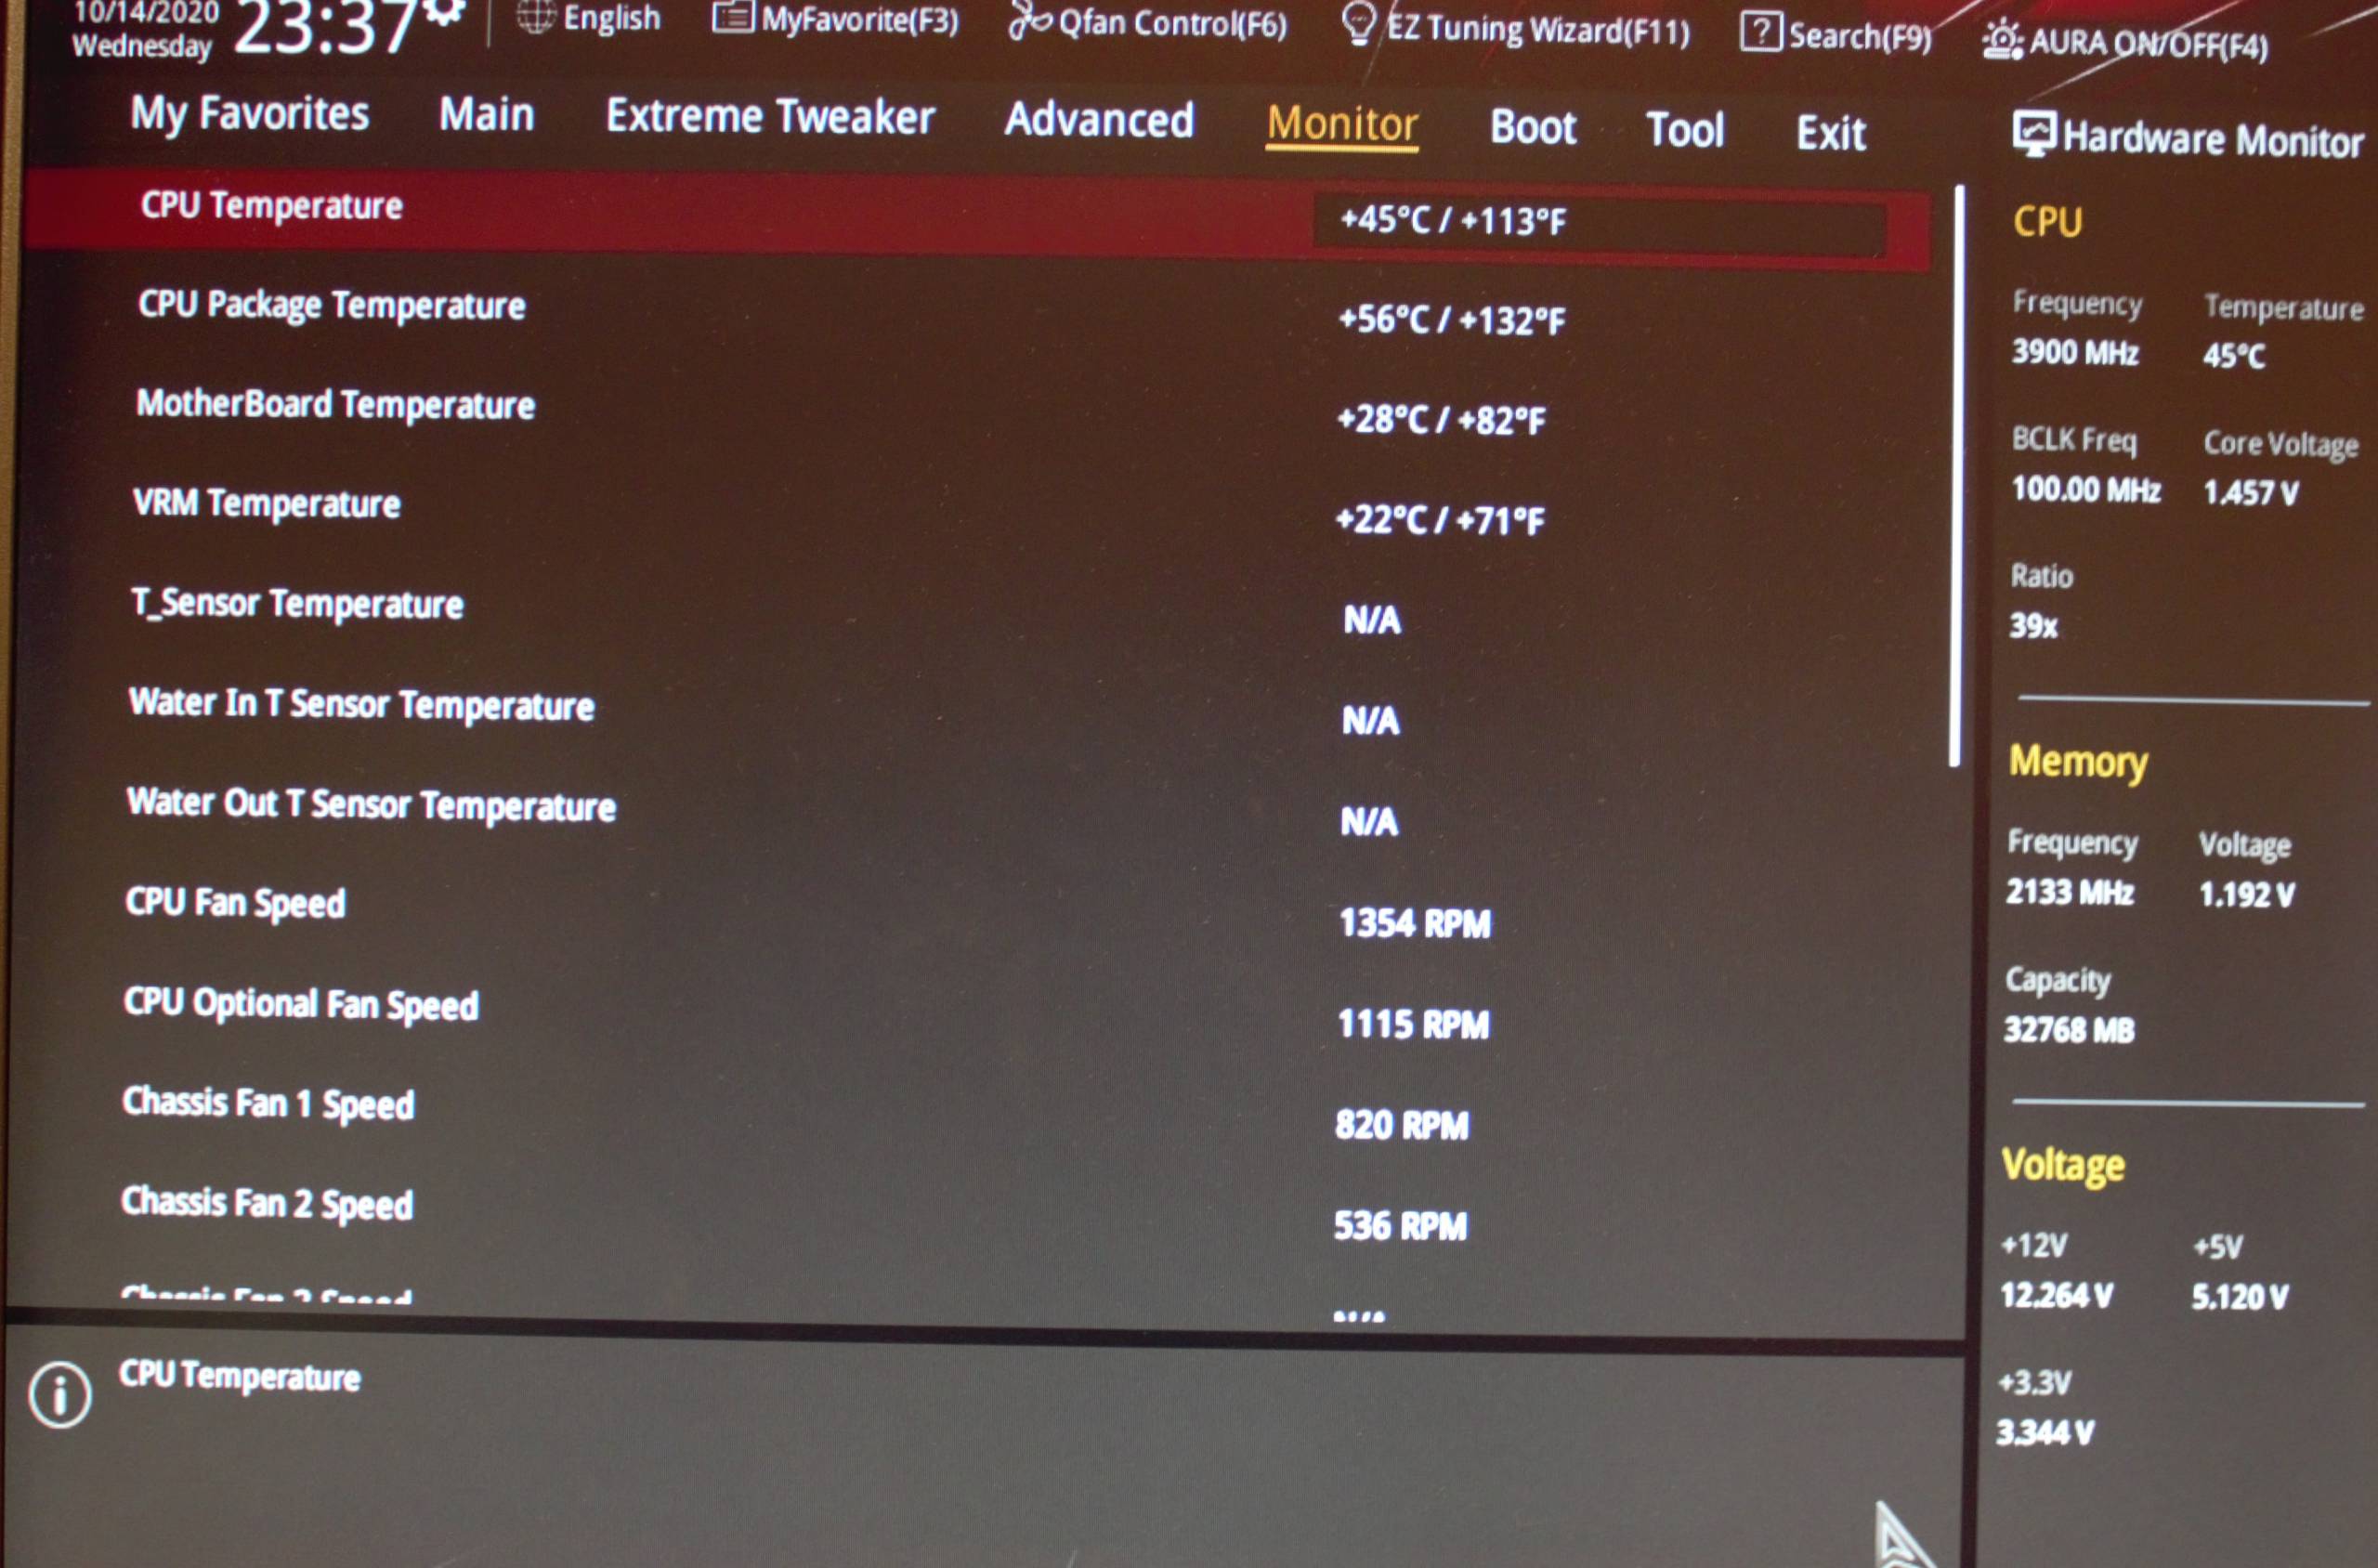
The VRM and CPU temperature was reported by the software as well as measured at the heatsink with the temperature gun. In either case, several measurements were taken with the gun and the software reported a consistent temperature, however the baseline did ‘creep up’ a bit when the case started to warm up.
Of course, under load is a different story.
With any intensive tasks, the cooler fan ramped up to maximum and temps for the CPU reached 84 degrees as reported by the LCD and ASUS monitoring software. What is of note is that the temperature never exceeded 84 degrees.
Although not a definitive test, in this experiment the Wraith cooler was able to keep the processor from approaching the thermal limit with a considerable safety margin. Although its loud as hell!
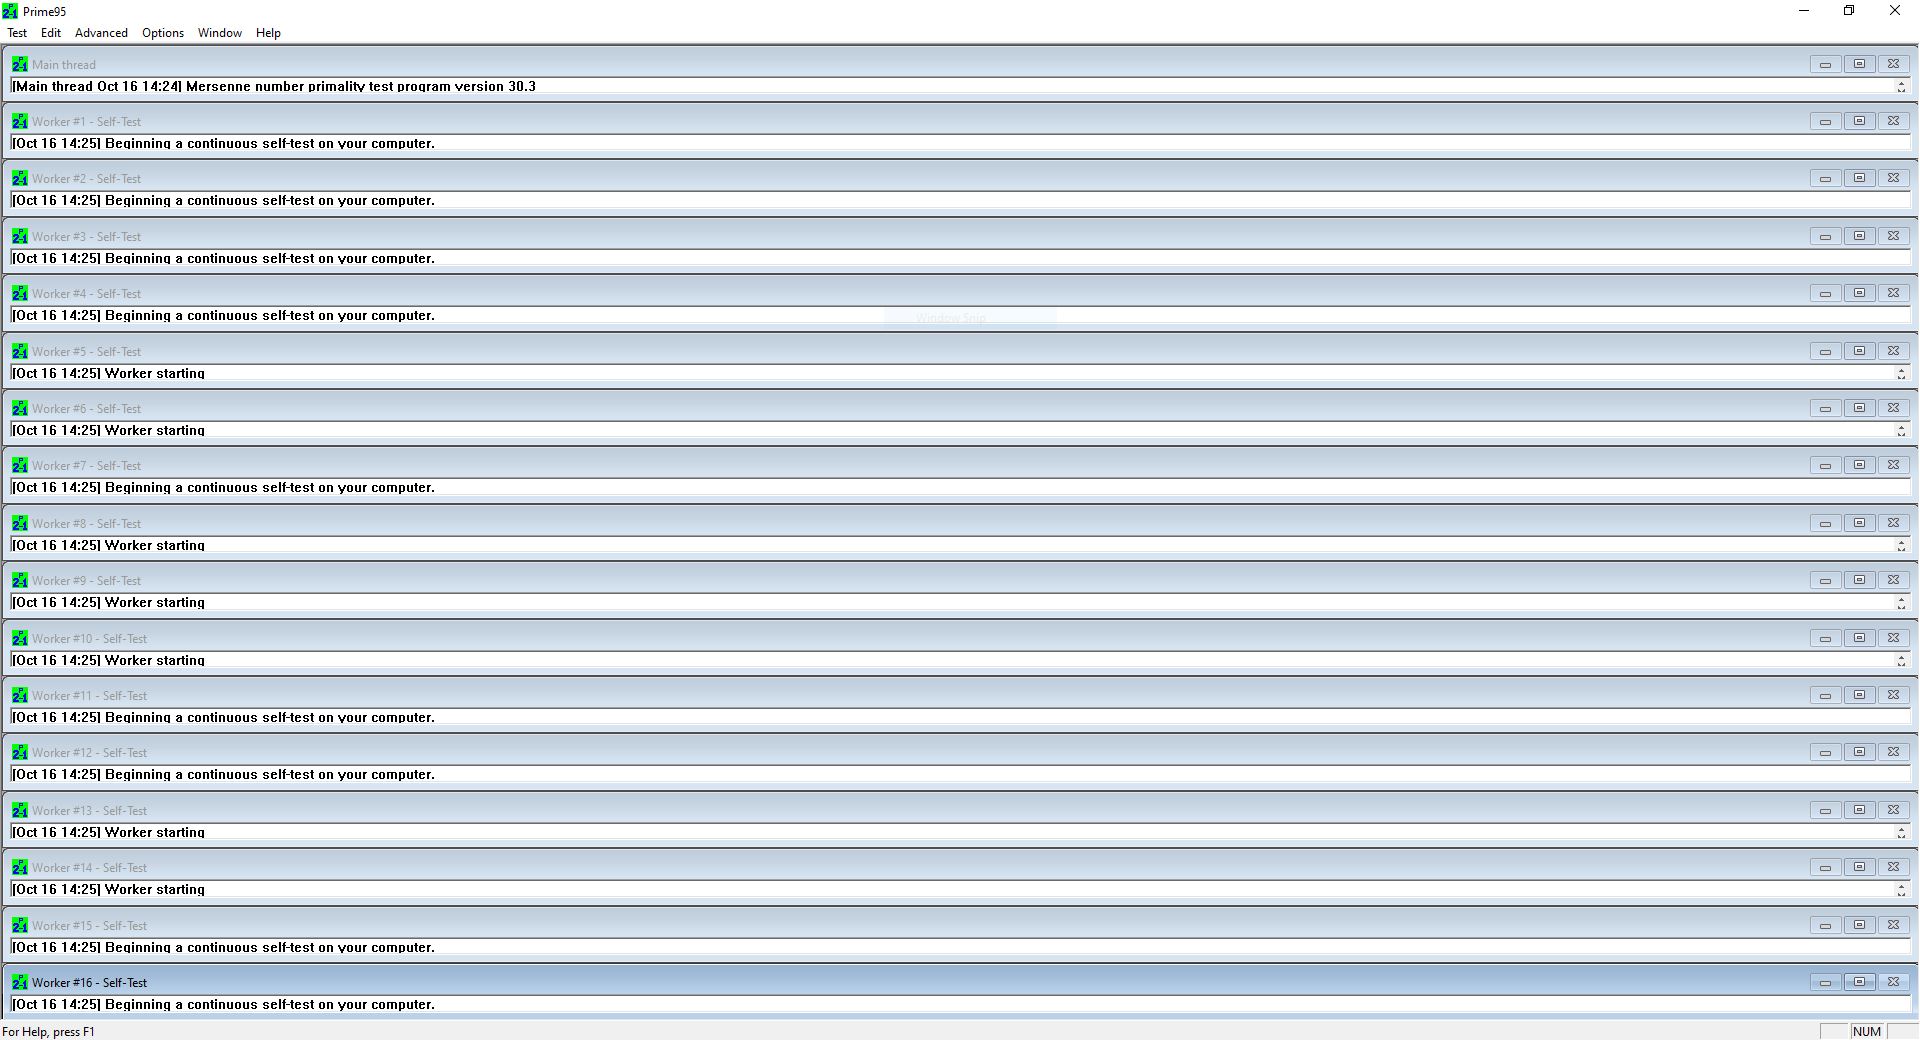
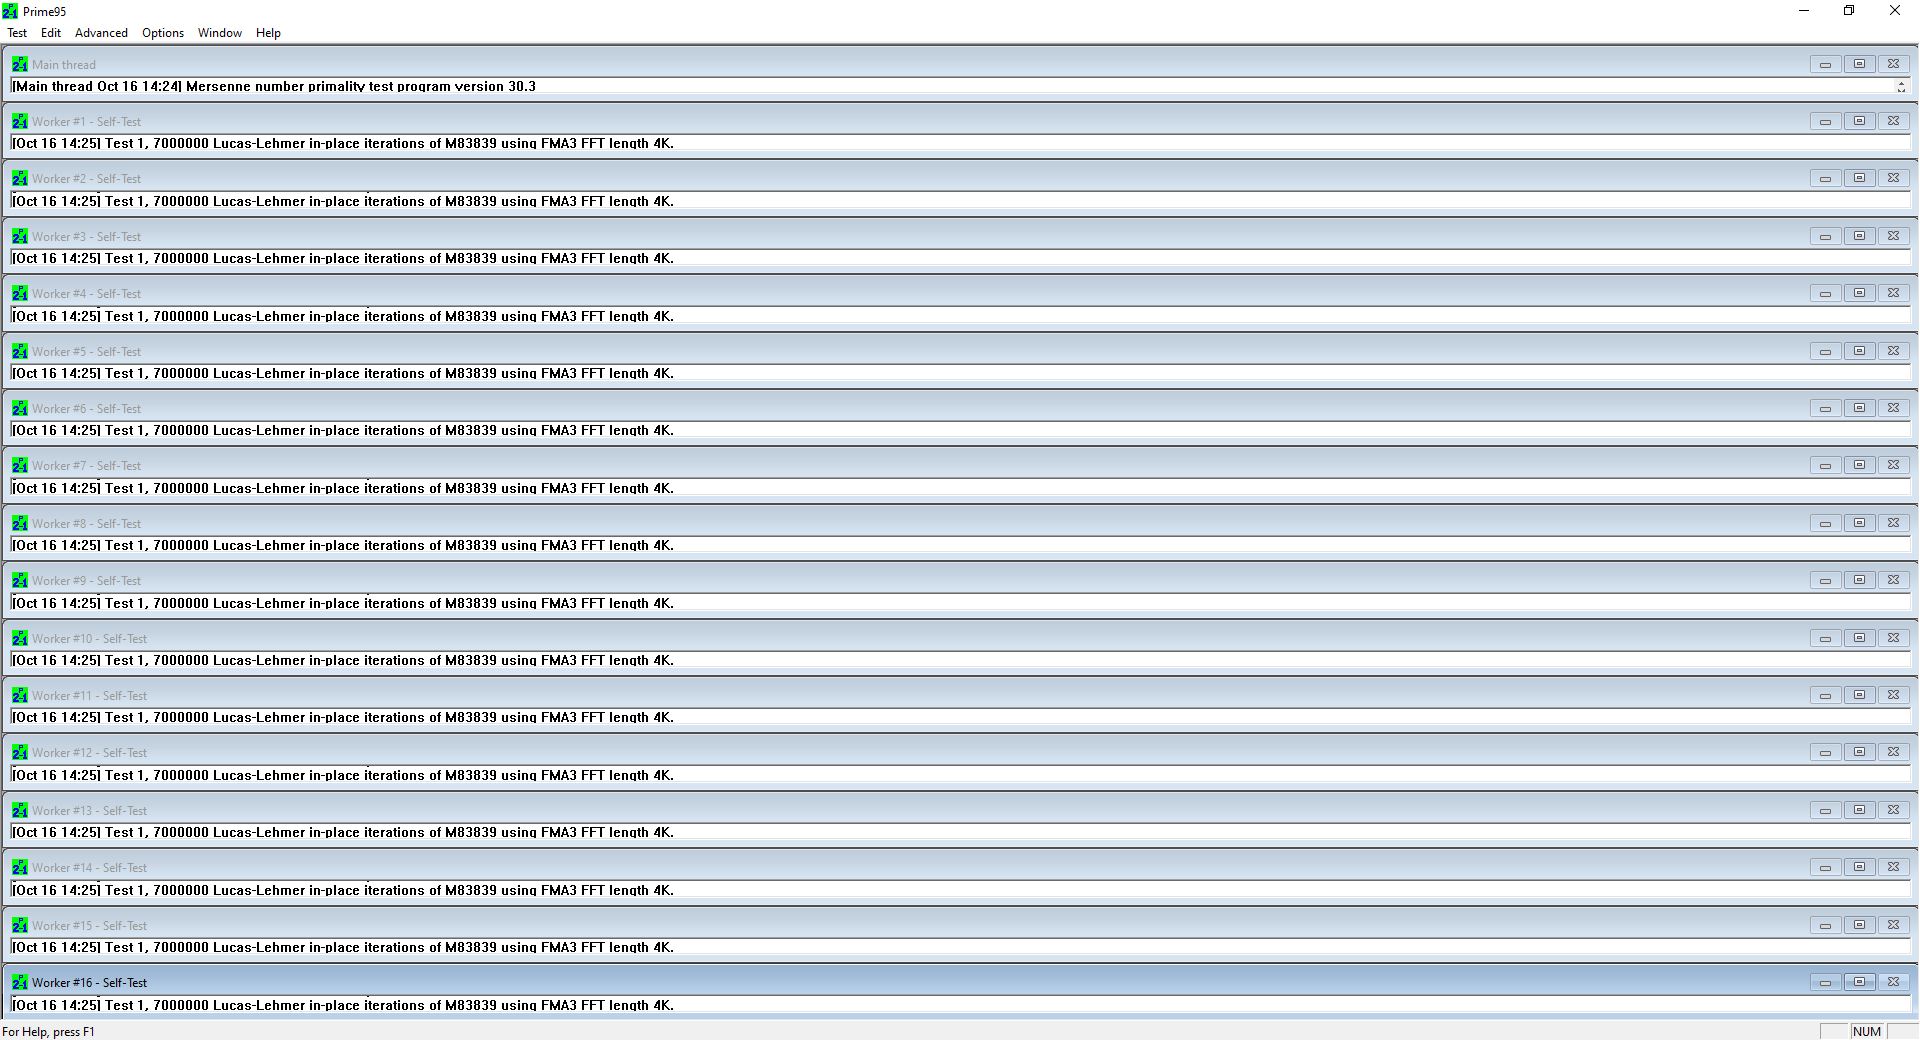
Prime95 with the Wraith Cooler
Prime95 was run for around 6.5 hours straight.

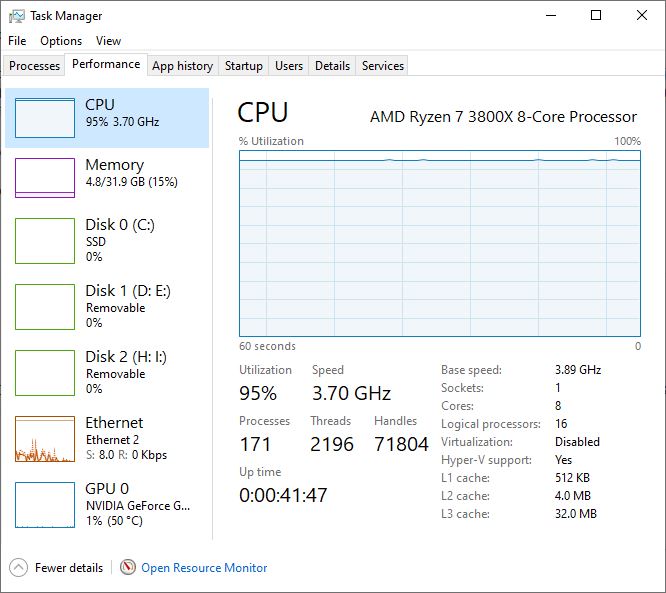
Near the start of the the Prime95 sequence. CPU utilisation maintained 95% and the core’s locked down to 3.7 Ghz. Thermal limit? Most likely. 84 Degrees Celsius
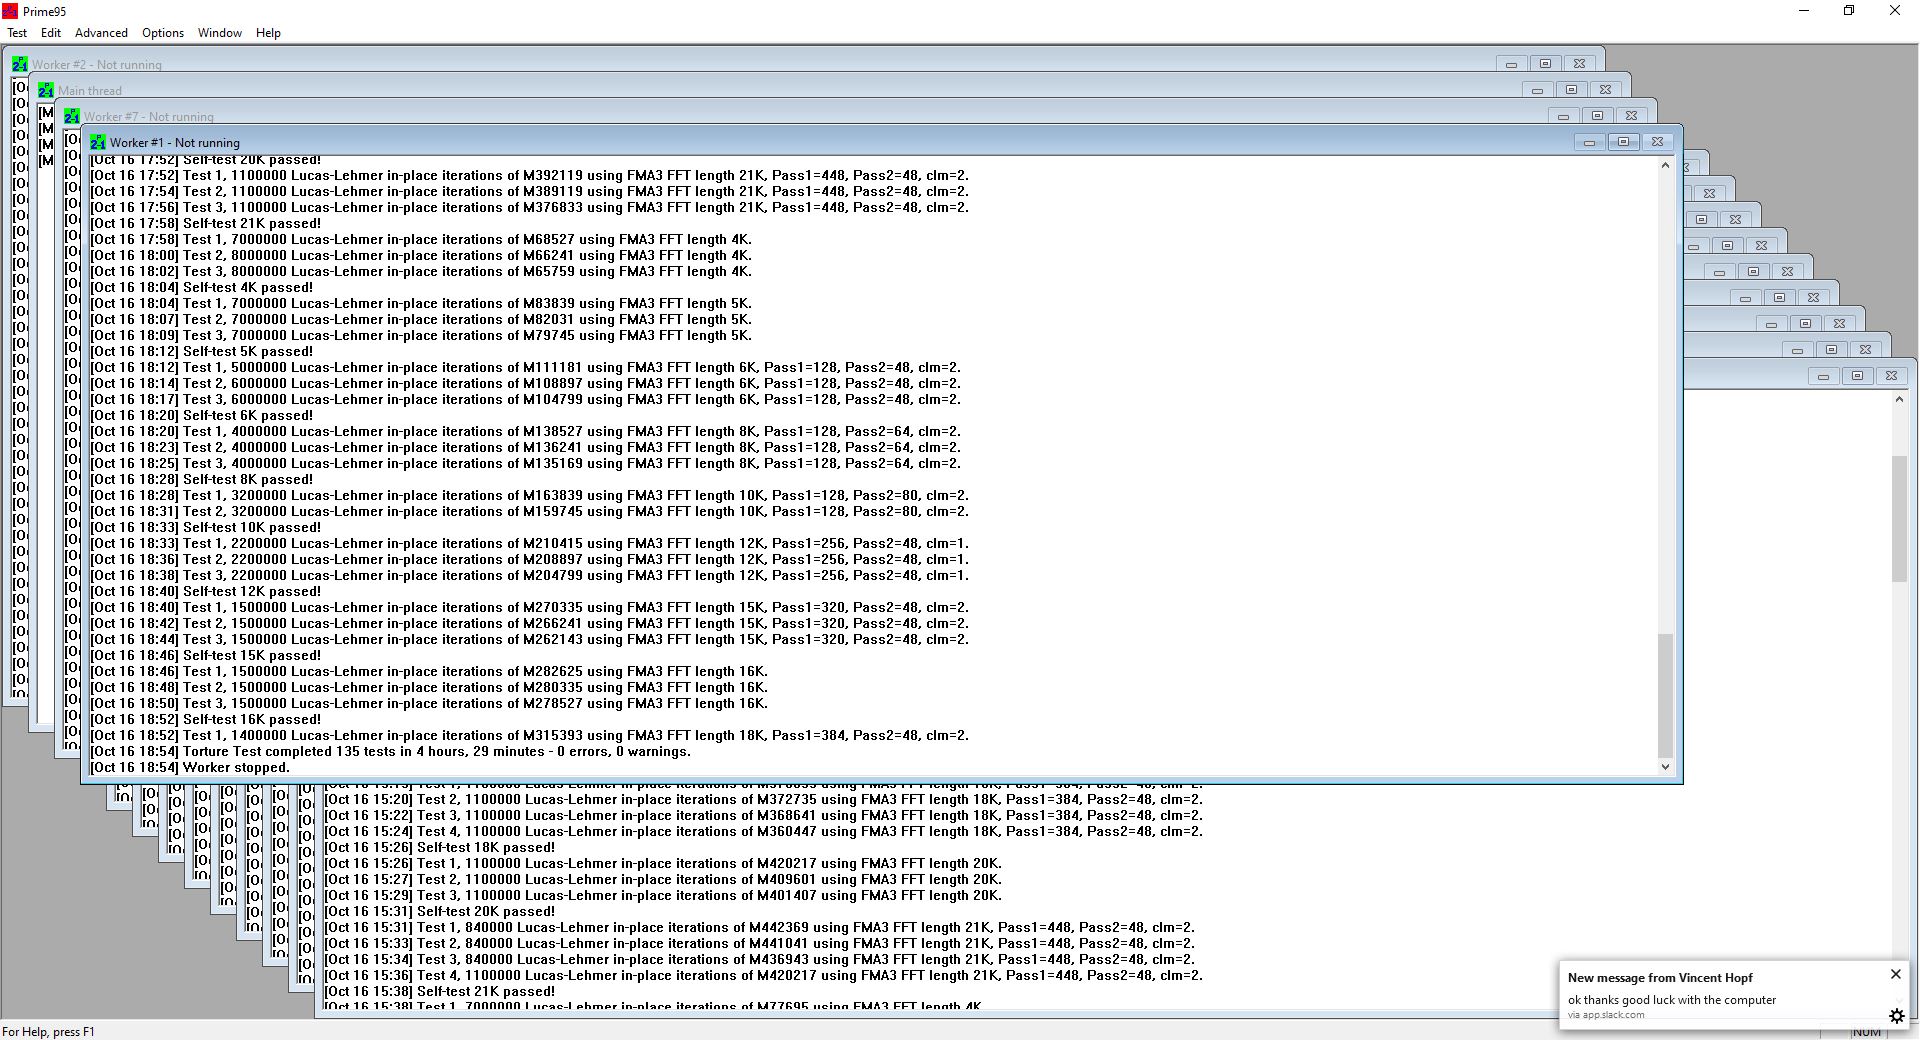
Flogging the CPU to within an inch of its life on an insufficient cooler for this amount of time may sound like a crazy thing to do, and it is; however it does prove in that AMD’s Ryzen 7 3800X CPU is well built and can withstand some serious punishment.
Windows 10 Experience Index
A nice healthy windows 10 experience was obtained. For what it is worth, this result is consistent regardless the cooler used and the CPU temperature.
| CPU Score | 9.3 |
| CPU Sub Agg. Score | 8.8 |
| Video Encoder Score | 9.9 |
| D3d Score | 9.9 |
| Dx9 Sub Score | 9.9 |
| Dx10 Sub Score | 9.9 |
| Graphics Score | 8.9 |
| Disk Score | 9.05 |
| Memory Score | 9.3 |
| Gaming Score | 9.9 |
| System Score | 8.9 |
Full details included for the purists.
3DMark Results
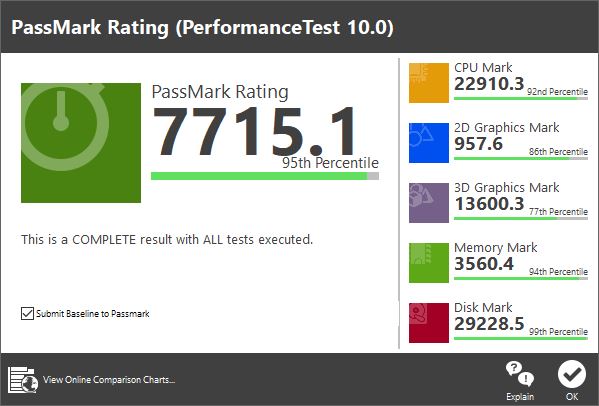
Test 1
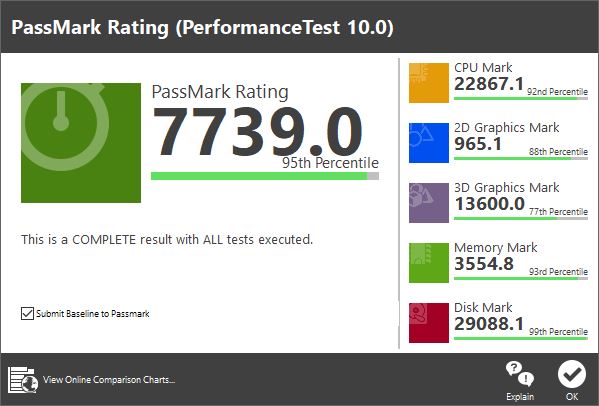
Test 2

Long test
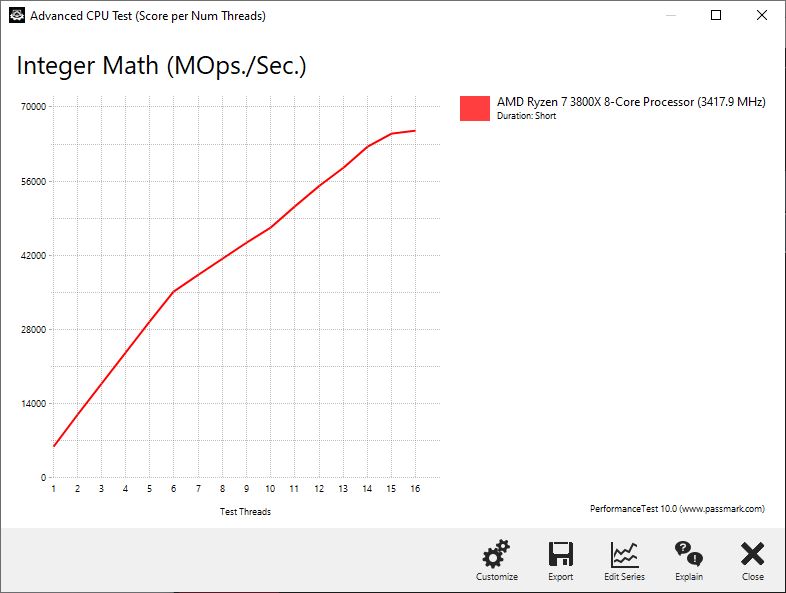
Score per threads
Cinebench results
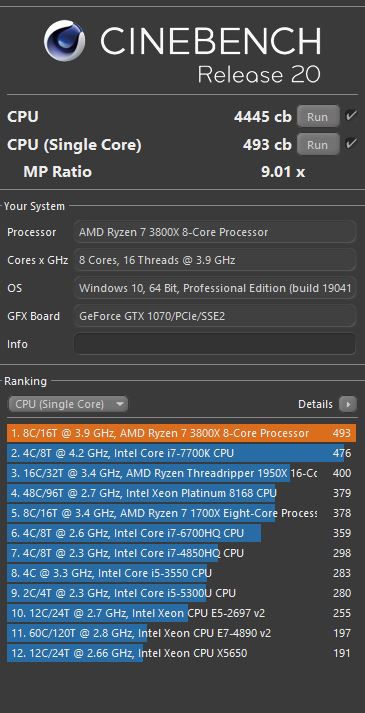
Single threaded performance is impressive
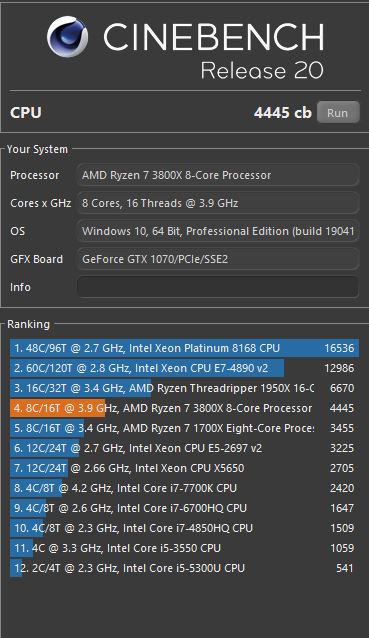
You need more cores if you want to beat this AMD Ryzen 7 3800X. Not bad for the Wraith cooler right?
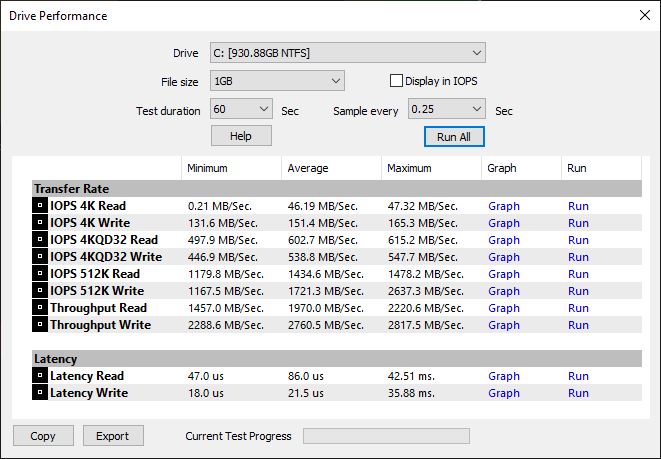
NVME benchmark
The transfer rates weren’t quite at the 3470MB/s as indicated on the box, but still fairly impressive.
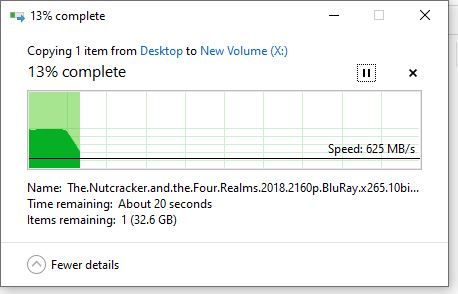
NVMe to RAID write performance
A RAID array needn’t be considered as slower than an average SSD hard drive, not when you can squeeze 560MB/s write performance to the array.
excluding the first two or so GB, write performance slops down to the maximum the RAID array (disk performance) can handle.
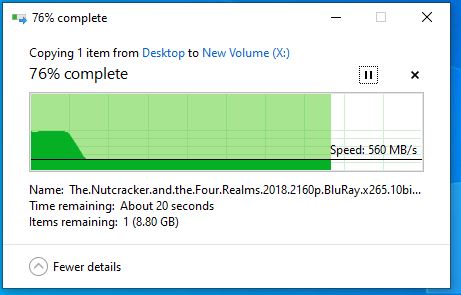
A very steady straight line represents plenty of throughput to the cache and the disk writes at a steady maximum capable speed. 560MB/s is on par with SSD write performance.
Of course, if the file you are writing is smaller than the cache then performance is flash speeds of just under 2GB/s.
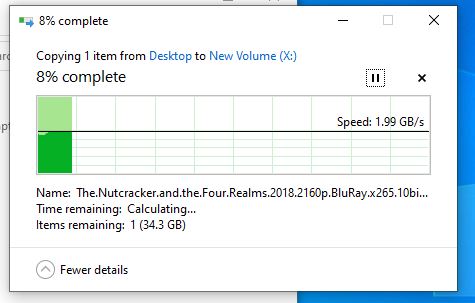
NVMe read to RAID/Disk cache performance allows for 2GB/s write performance. Legit. A 2GB file writes in less than a second.
This array is configured with a 128K stripe/block size with write-back enabled. Cant complain with those speeds; which were on par with the Samsung EVO 830 series!
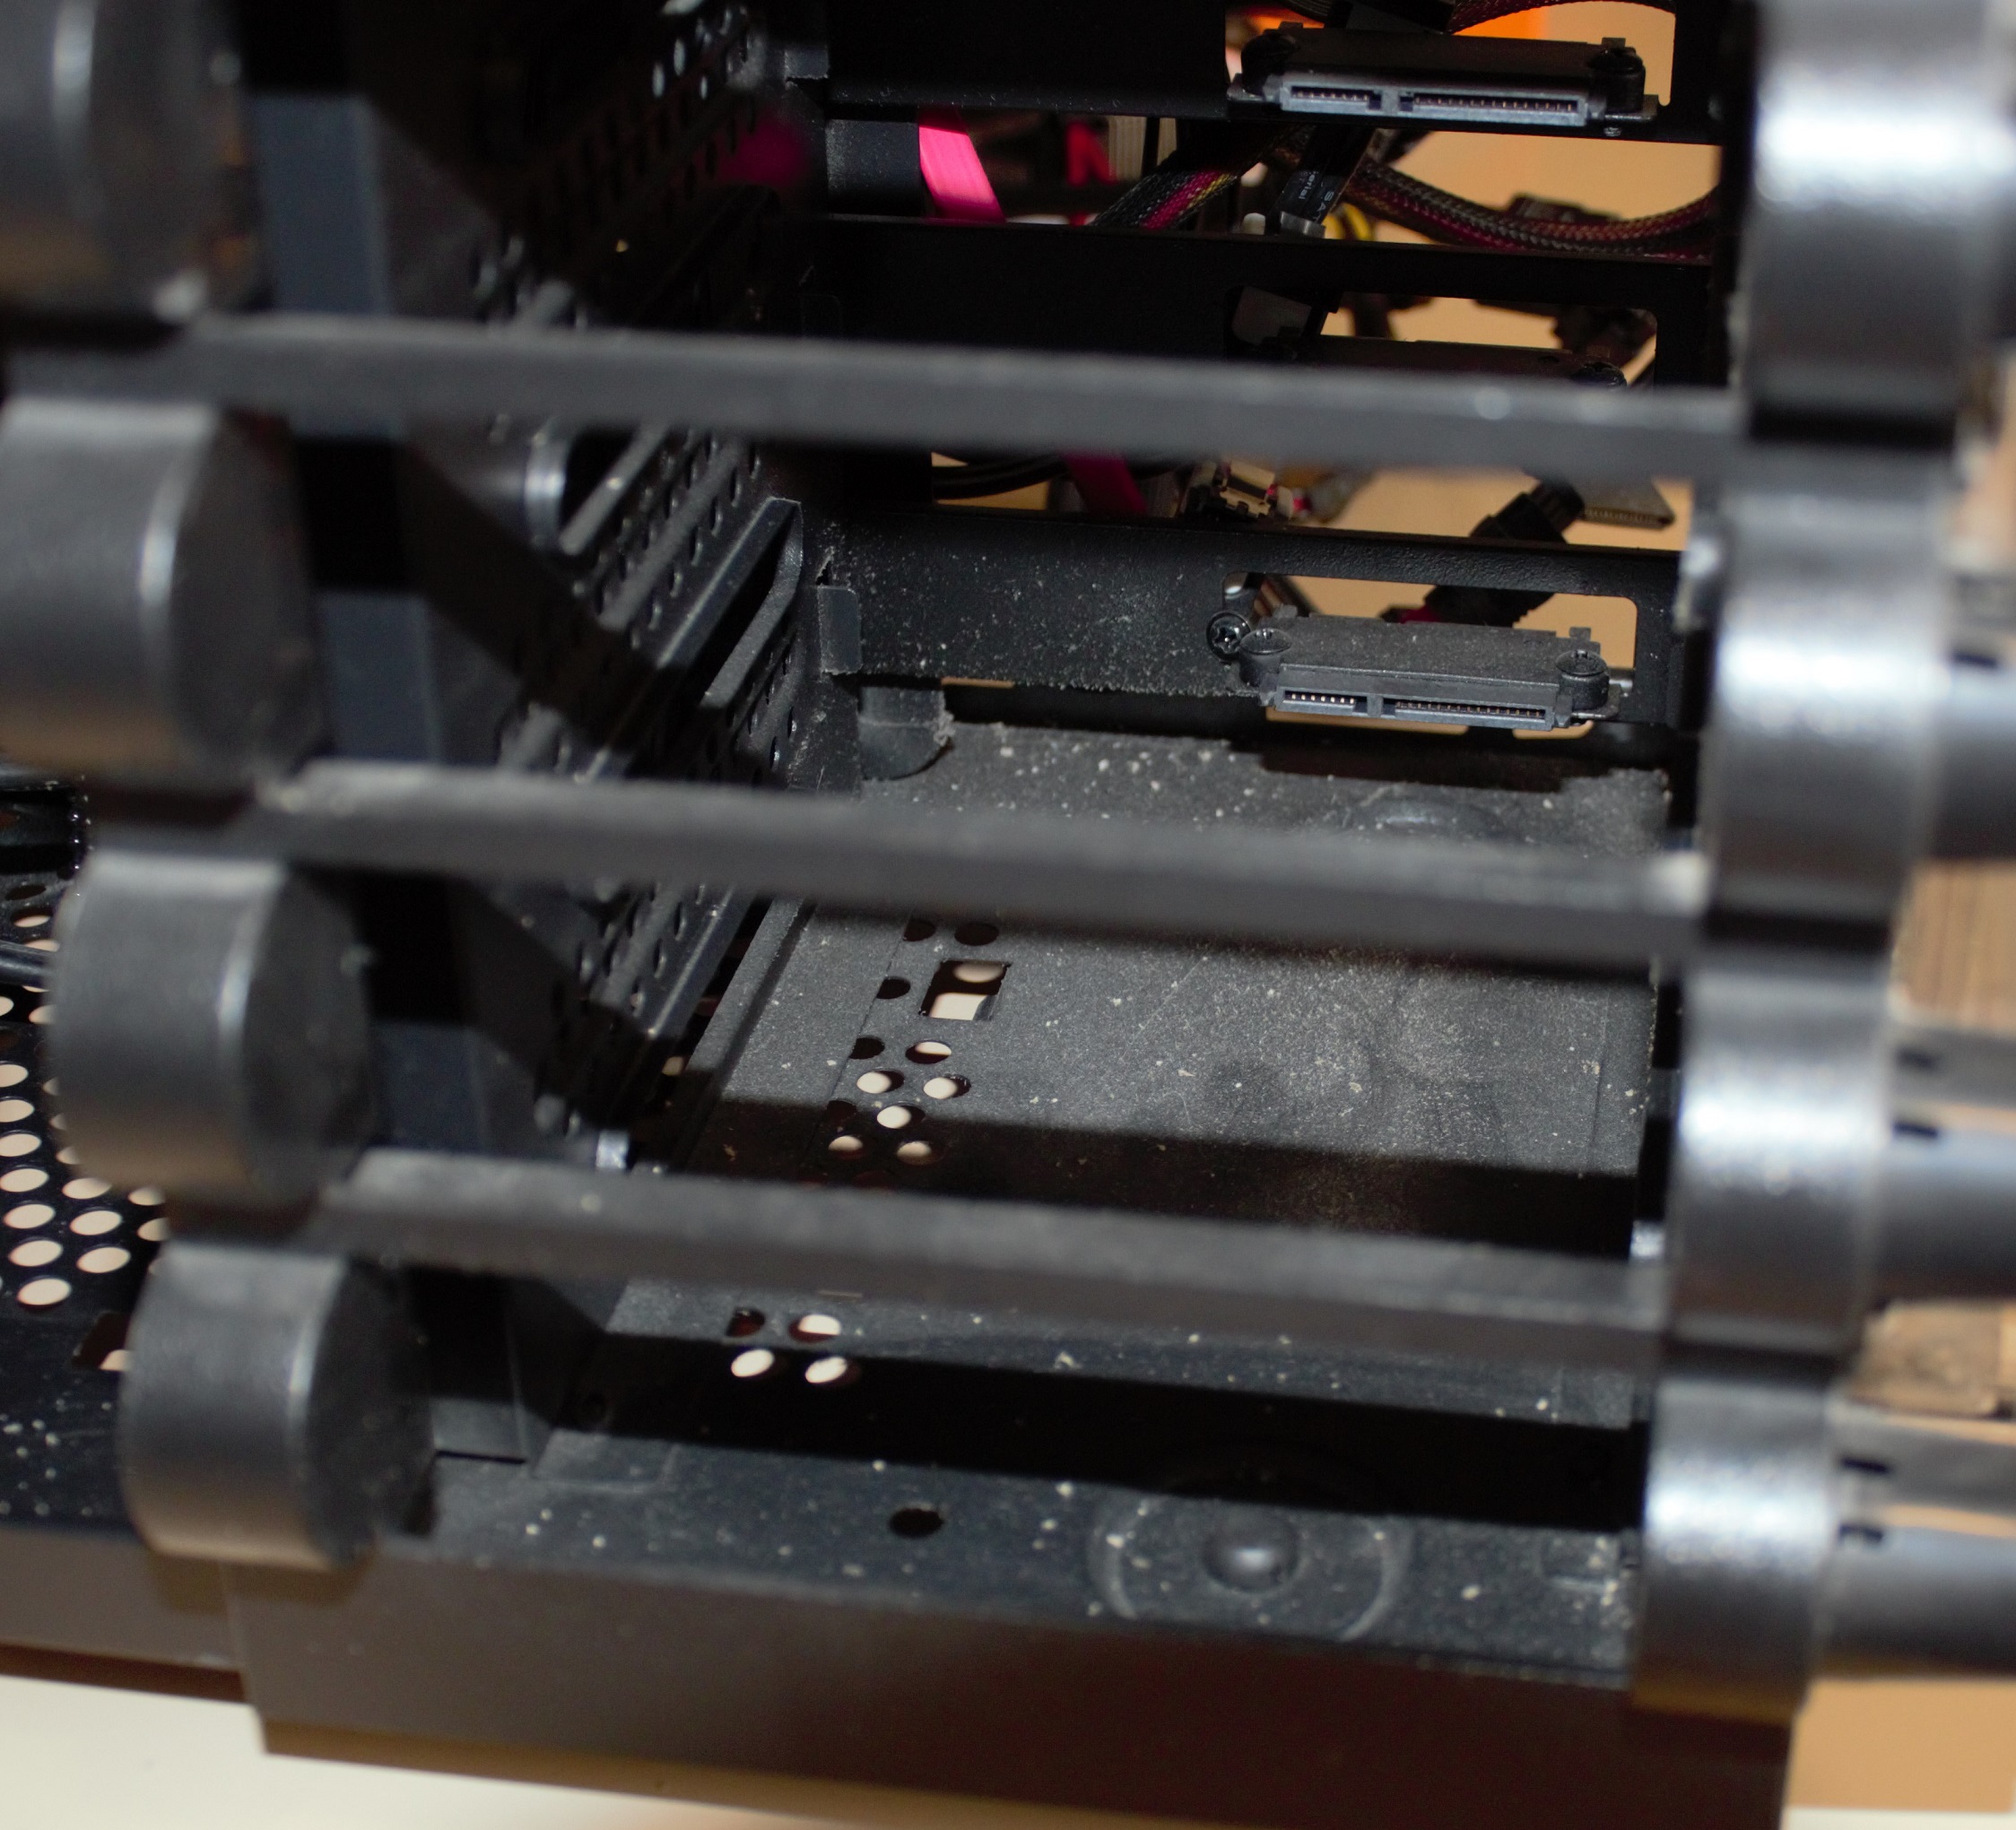
A good case is recommended for RAID disks. Being able to swap a disk is useful but not at all needed.
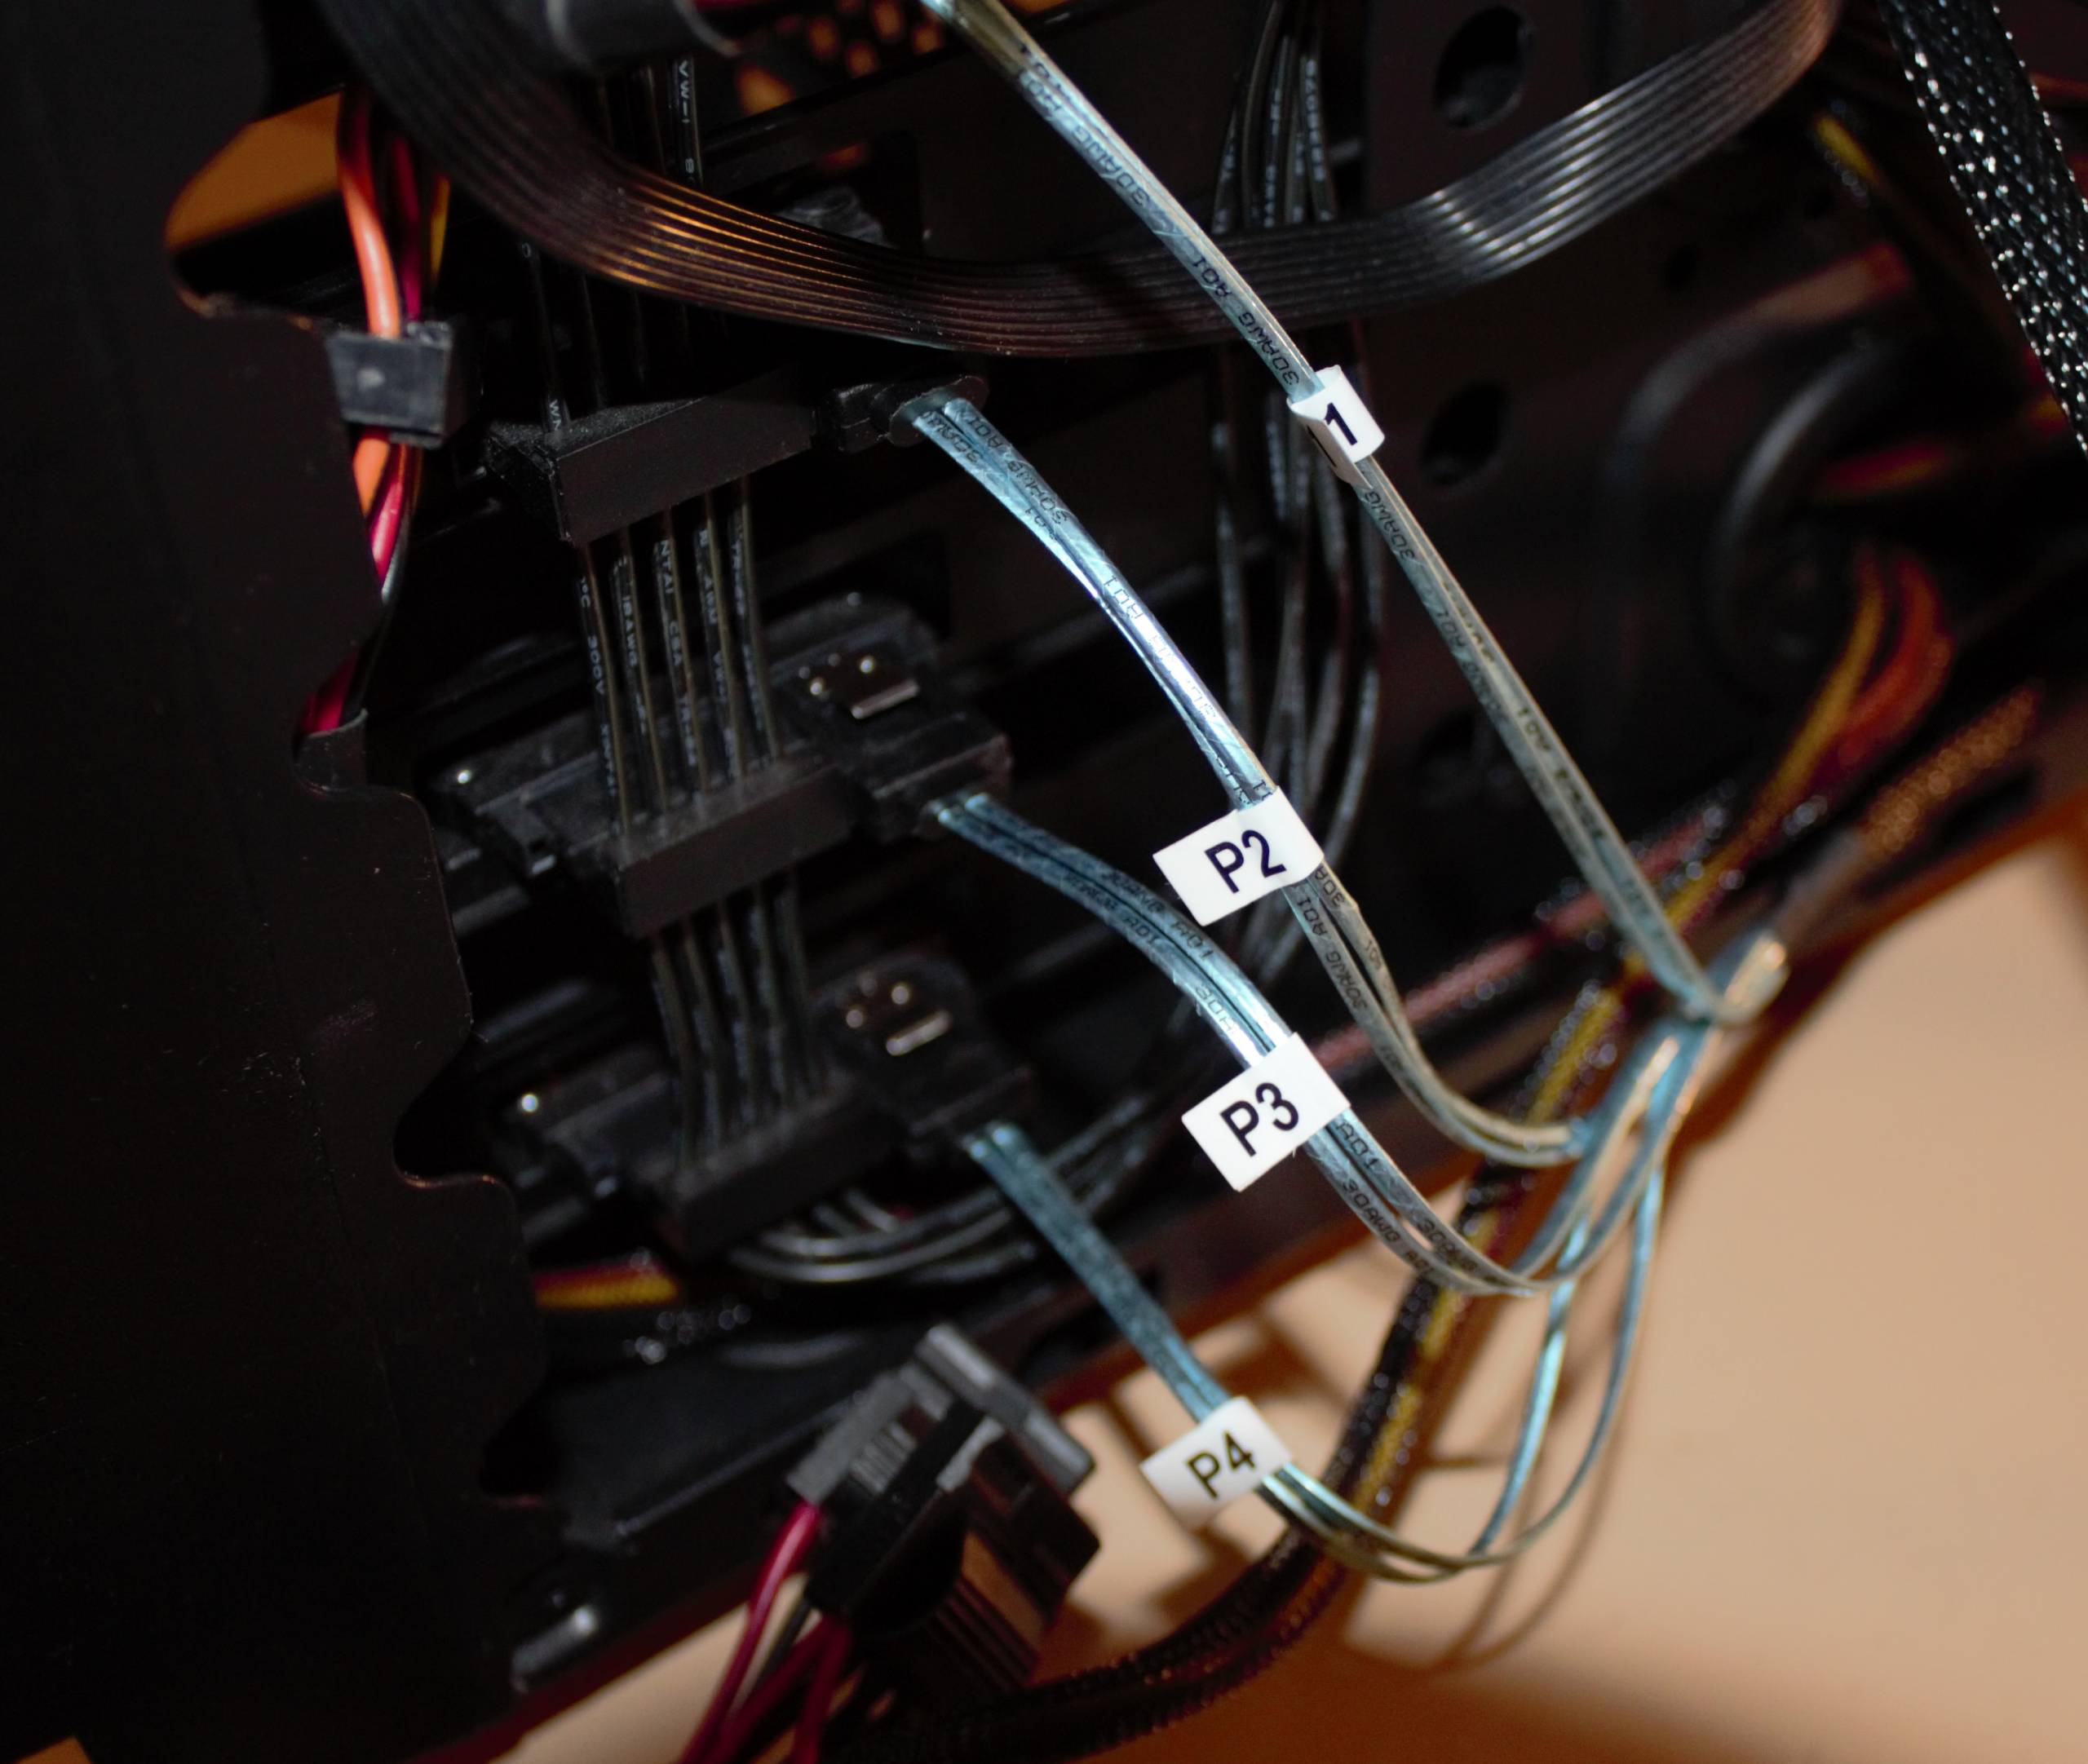
The cable was pre-filled. Sometimes you can just cry.
Overcoming problems
Heat is a problem that needs to be sorted out immediately. It was clear from this experiment that the conditions were not ideal for continued use with the Wraith cooler – which is perfectly reasonable. Whilst returning the Wraith cooler to the neighbor and consequently digging through a box; a Deep Cool GAMMAXX GT was found and in an unquestionable act of charity was passed along.
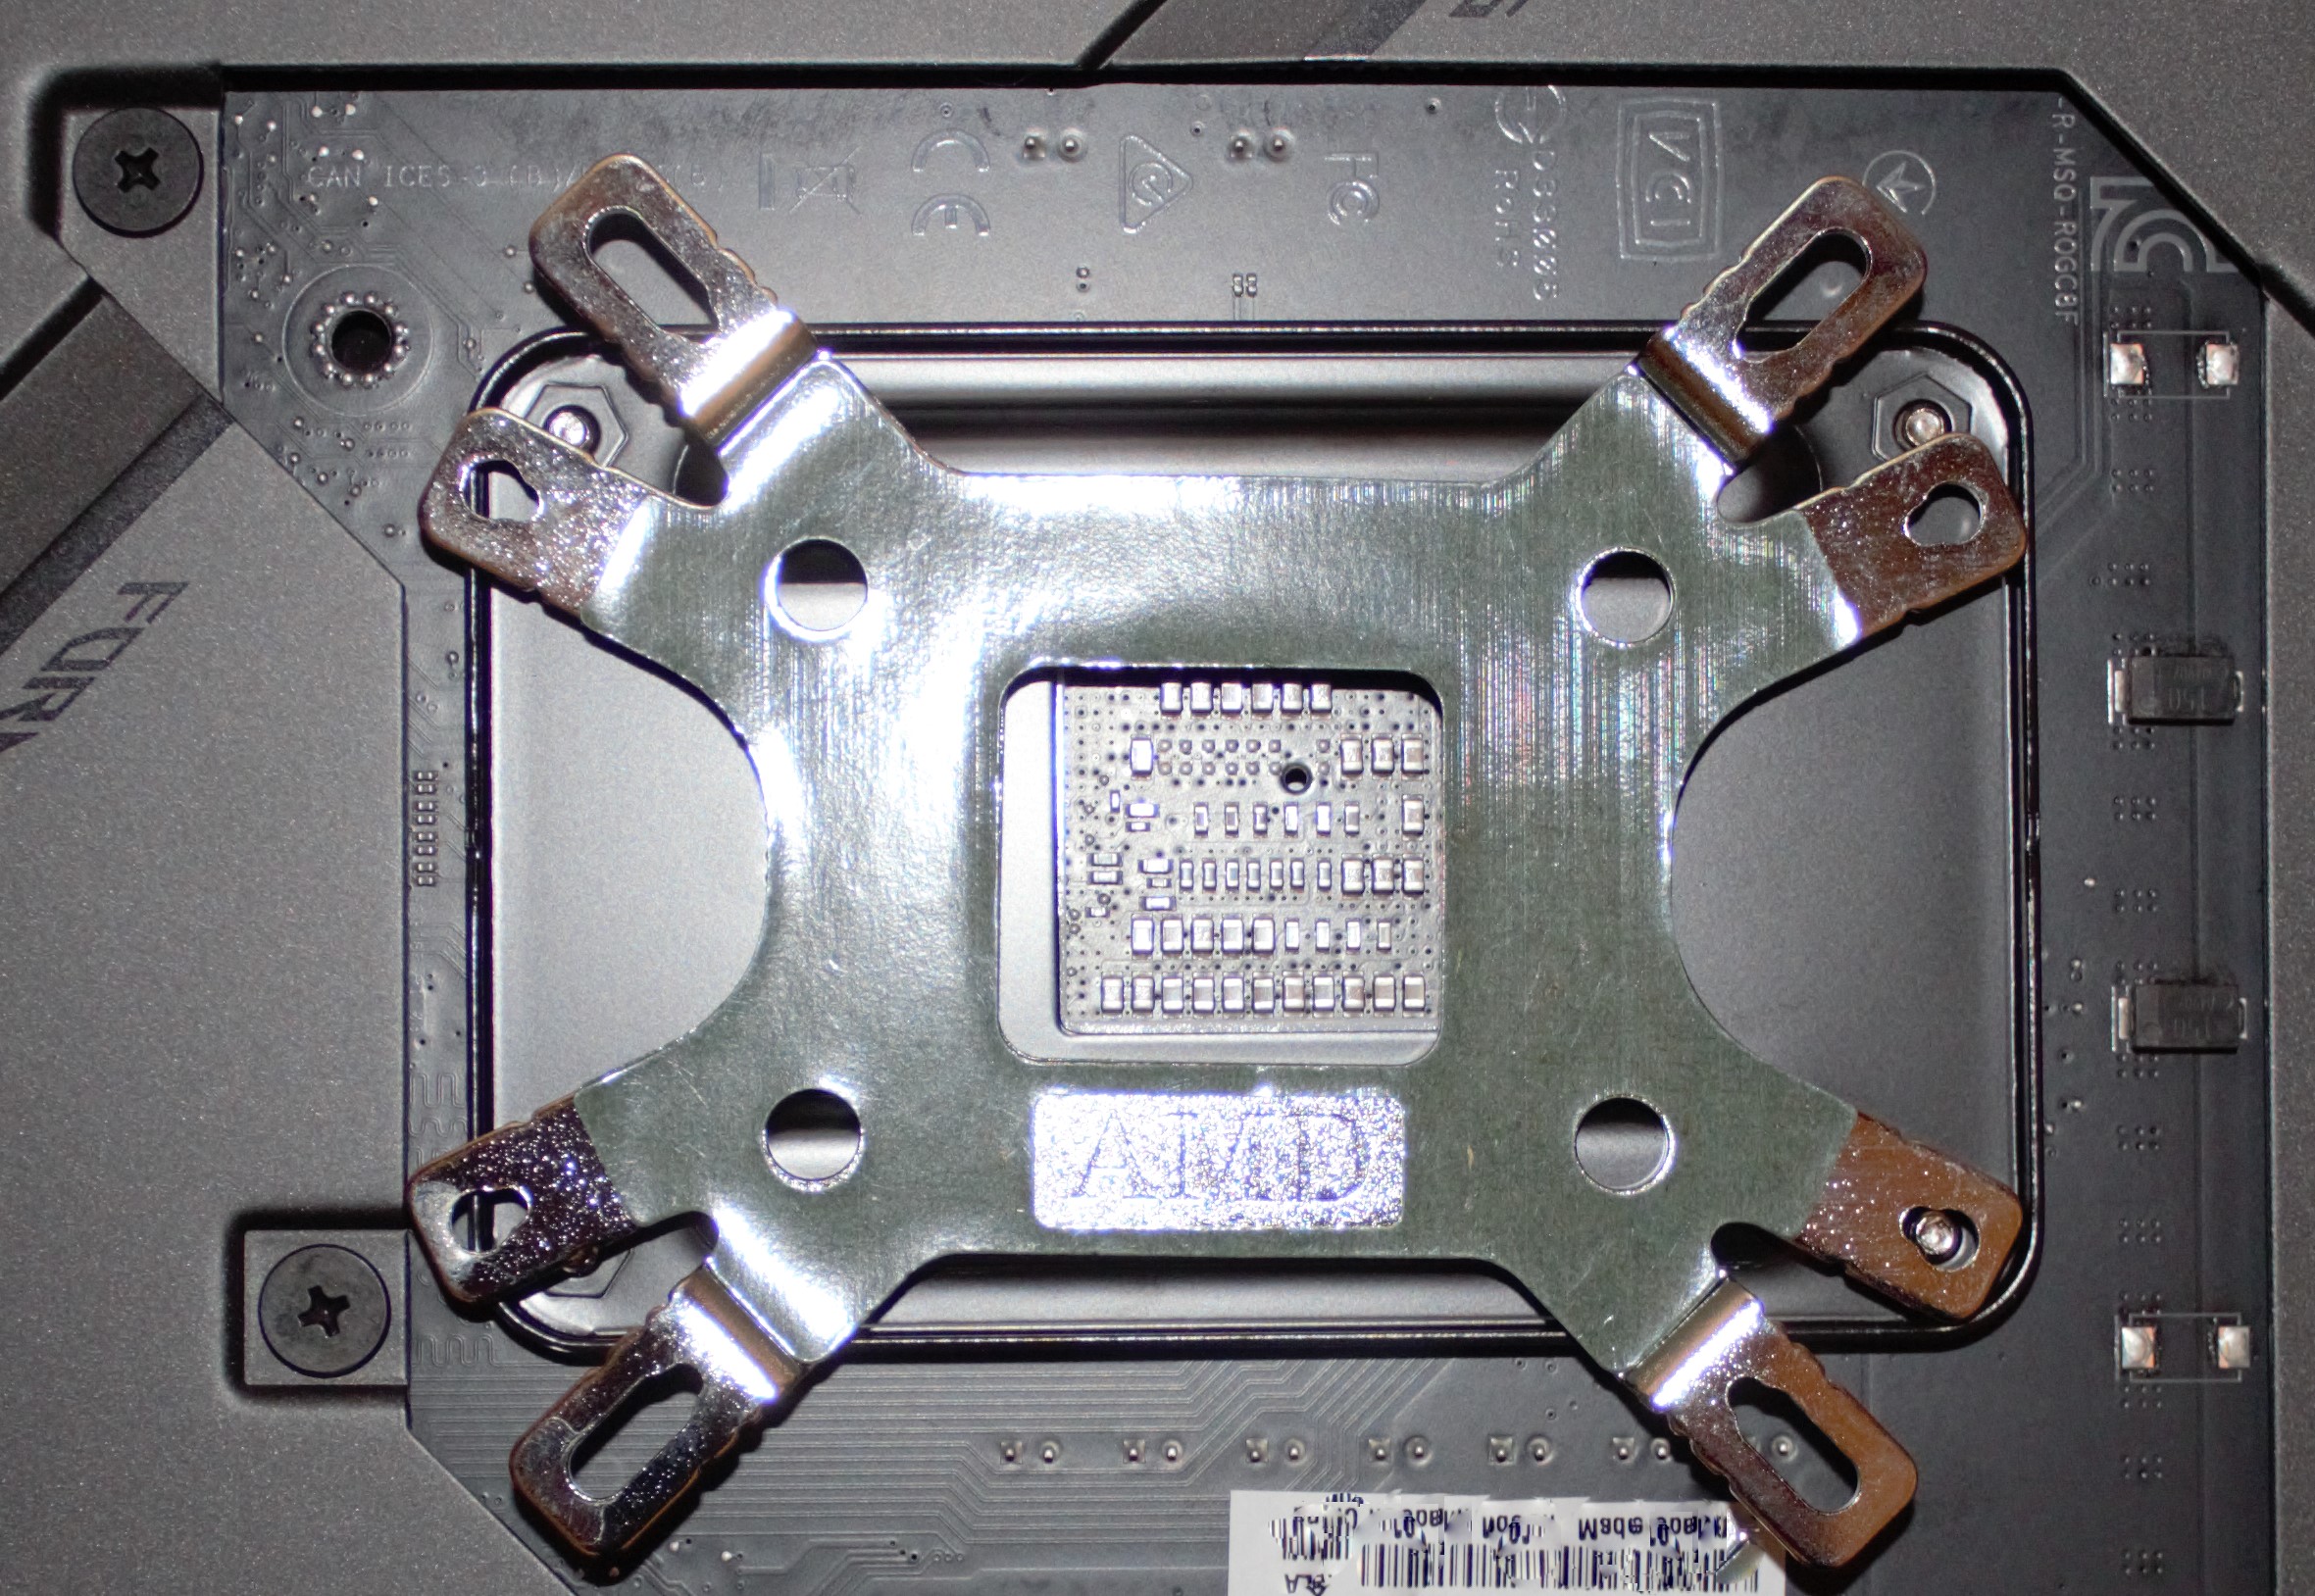
Installing it was annoying due to the bottom plate falling out whilst mounting, luckily changing mounts is easier with a bit of blue tape holding it in place.
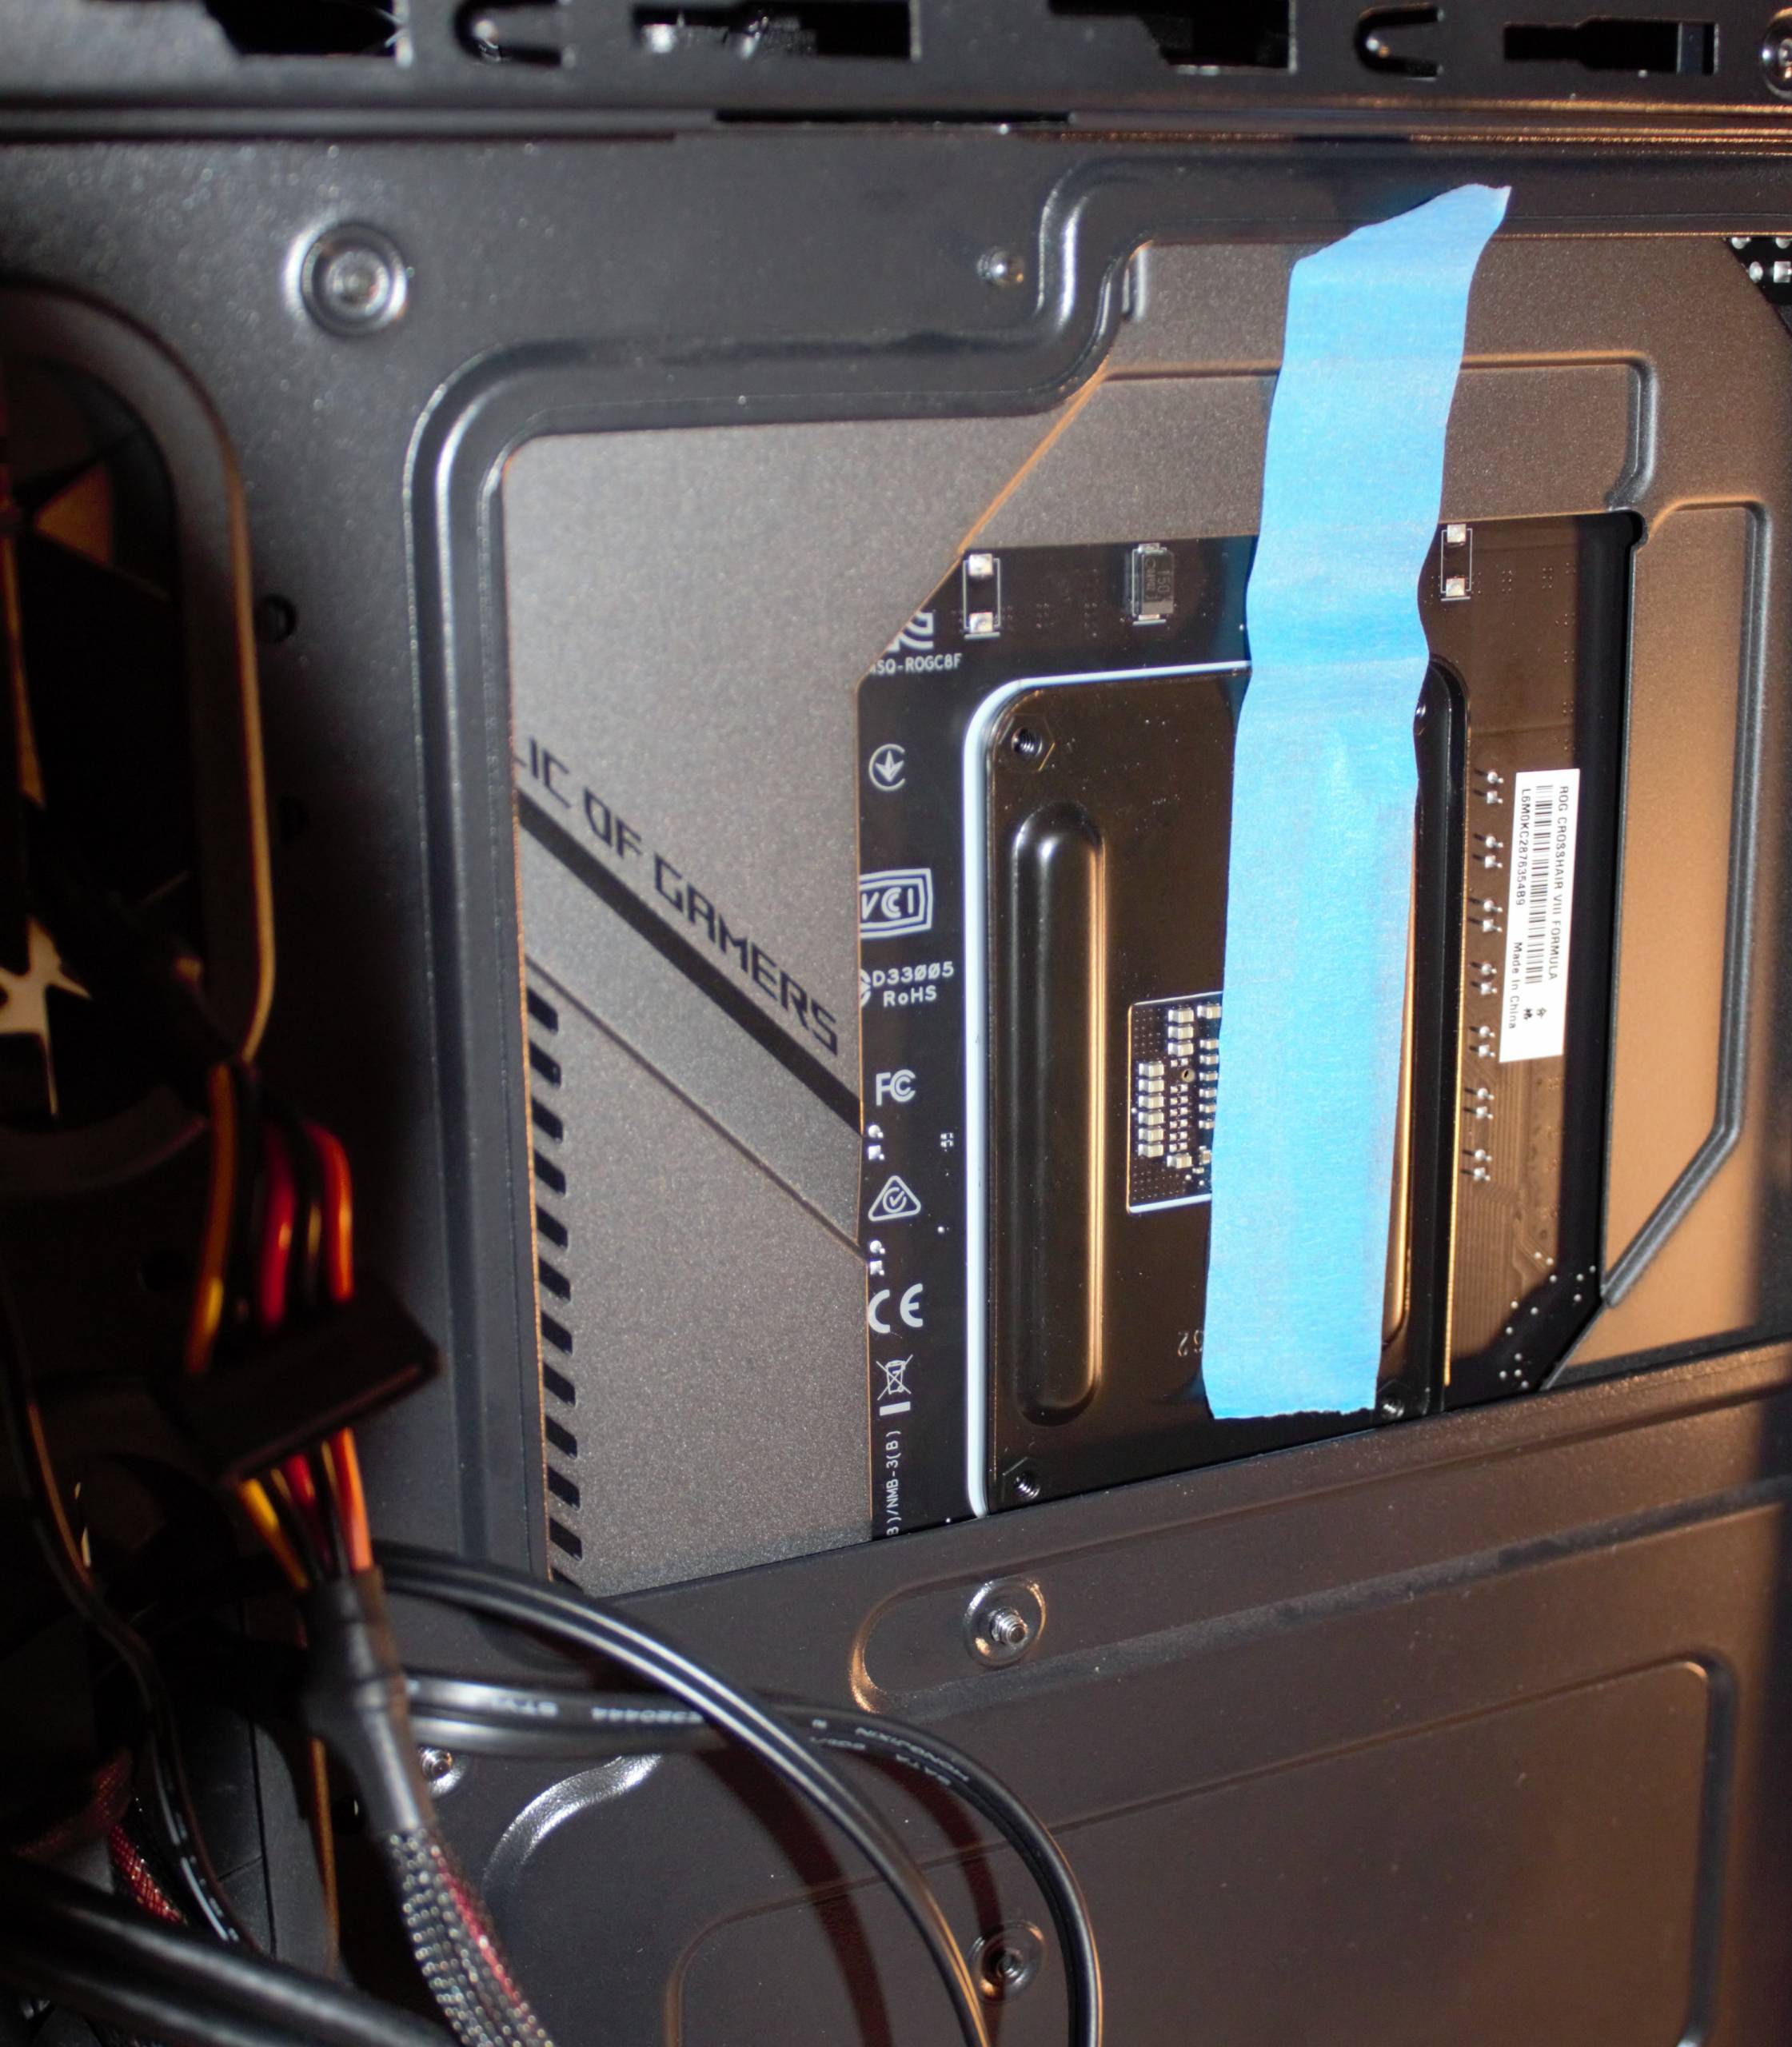
After failing to mount the Cooler Master AIO, this trick helped with reinstalling the AMD mount.
Needless to say, that the temperatures under load is considerably more favorable with a more powerful cooler.
But the RAID card was in fact a fearful experience. Under windows there are instances of drivers that cause blue screens on boot and sure enough this was the experience. Skipping a long story, it was in the end a driver issue and replacing the driver resolved it. But it could have also been a catastrophe and unsolvable. What would the alternative have been? Simple, change to Ubuntu and call it a day.
At midnight, assistance is sometimes required when changing CPU coolers.
Evaluating the build
The system is alive!
This build’s objective was to build a faster more powerful machine that met or exceeded the functionality of the previous system.
The build was restricted to a very tight and limited budget, where saving as much money as possible but not by sacrificing any requirements was mandatory.
This system needs to perform well for at least another 5-8 years with perhaps one planned video card upgrade during that time. Pairing the AMD X570 chipset with the AMD Ryzen 7 3800X has ensured that the system will be a PCI-E 4.0 capable system, which offers the most value for money.
Knowing that this system can utilise the full bandwidth of a new PCI-E 4.0 devices also reaffirms that on this occasion, choosing AMD was indeed the best choice.
Although building a new machine is typically a mostly enjoyable experience, there was a regrettably disappointing experience dealing with ASUS’s support team. Yet no regrets on the choice of motherboard all the same.
About the Author
Scott De Lacy Scott has a professional IT background spanning over 18 years, is an hobbyist electronics designer, talented musician, holds qualifications as a trainer and experience in emergency and community services sectors. He reviews Movies, PC and XBOX One games, and hardware.
Related Posts
D-Link A/NZ launches two new 5G Wi‑Fi 6 mobile hotspots for faster and more flexible connectivity anywhere →

Razer Launches The Hammerhead V3 X Hyperspeed For Xbox And PlayStation →

OPPO Reno16 Series: Your New Content Sidekick →