
QNAP TS-677: Review (Hardware)
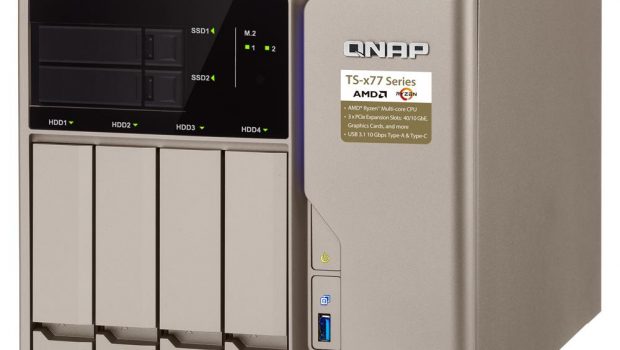
Introducing the QNAP-TS677 NAS
QNAP have released a new series of AMD Ryzen based NAS systems, which is a big departure from their previous Intel and ARM processor based models.
For the uninitiated, QNAP release Enterprise, Small/Medium business and, SOHO/home models. Typically QNAP release 2, 4, 6, 8 and 12 bay variants, depending on the specific model in question. The first number in a product number indicates the number of drives and the remaining is its series, for example; this model is the TS-677 which means it’s the 6-bay variant of the 77 series. The hardware specifications typically do not change between the variants so they are referred to as the TS-x77 series.
You may as well check out the promotional video to get more acquainted.
The TS-x77 series is a Small/Medium business model and is released in 6, 8 and 12 bay variants and therefore as the hardware is mostly the same across all three, you can expect the same performance from each. However, there are some notable differences between the TS-677 and its 8 and 12 bay counterparts. For instance they contain an LCD display and menu button which allows you to manually set and view the IP address and perform interactive shutdowns, which is an often undervalued feature.
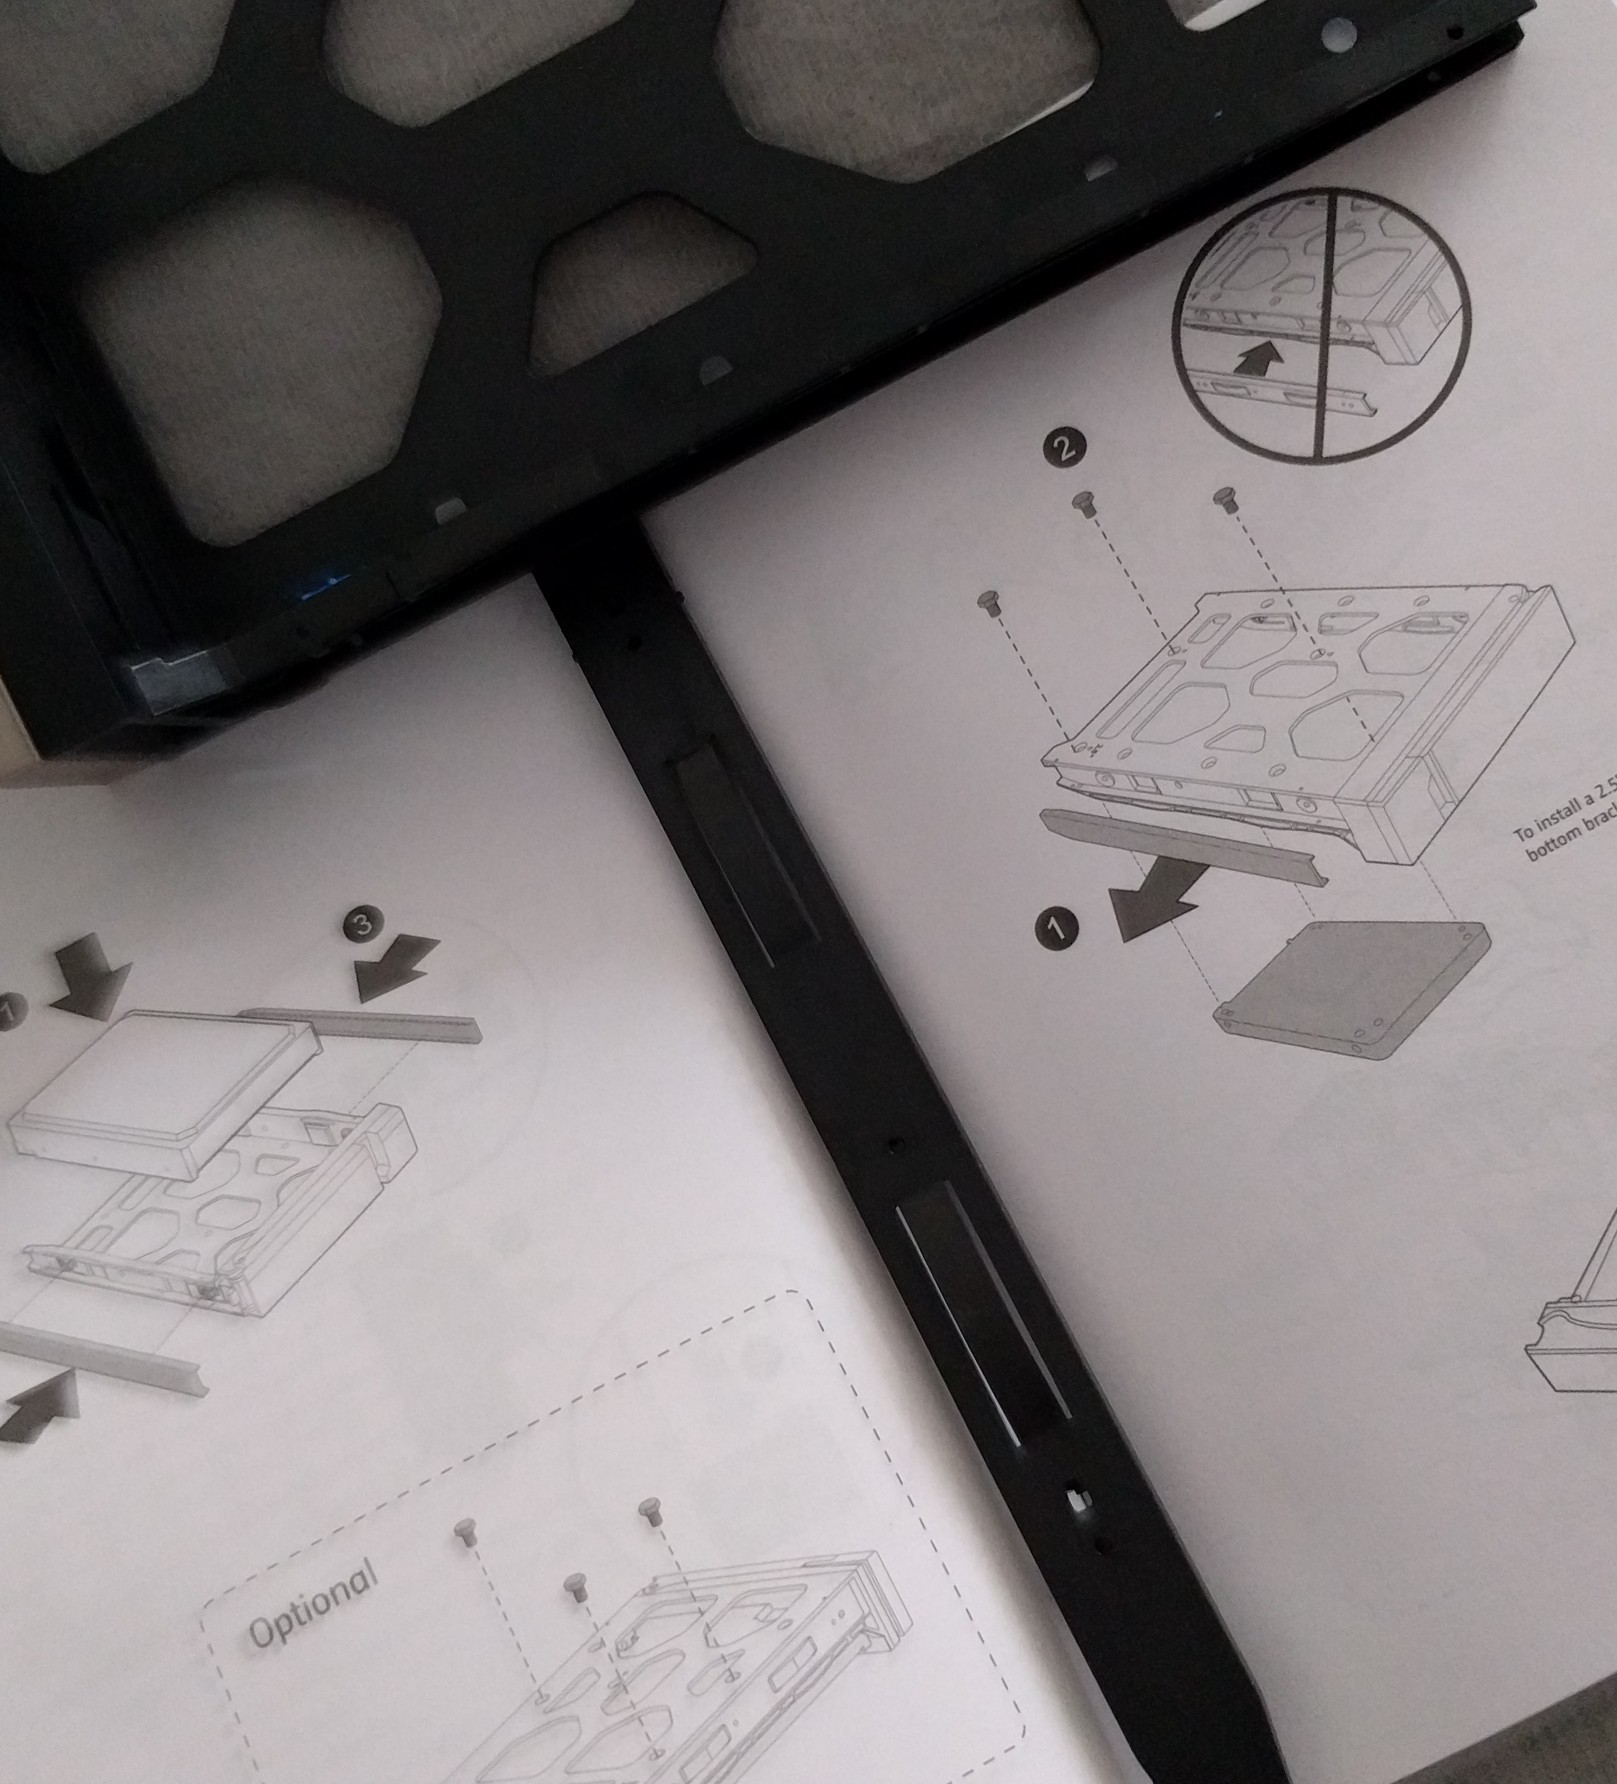
These new range of QNAP NAS’s have made the inclusion of two M2 slots and two or in the case of the 12 bay four slots for SSD/2.5” HDD bay’s. This means that you can install SSD drives for caching or use them as part of your storage pools in all kinds of configurations. For that matter, you could install 2.5” drives in 3.5” bay’s with the appropriate adaptor brackets. For the full specifications, refer to QNAP’s website
At this point it is important to ask, how do these QNAP NAS units compare to their predecessors, particularly from a design point of view? Have there been any improvements upon the design, thermal management, and performance?
Unboxing and first impressions
First, a look at the unboxing and façade’
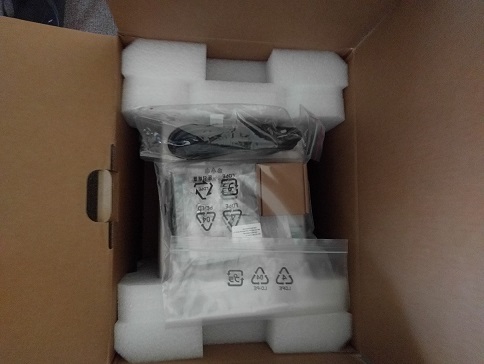
Unboxing the QNAP. Wrapped in plastic, suspended in foam. Cables and inclusions bagged neatly.
The front façade’ is rather elegant and practical. However to the right with the QNAP logo is a panel that you would be reasonably sure is removable or perhaps a door to further components or access. This is not the case and it purely aesthetic. It serves only to recess the power button and quick copy port and create an interesting partial covering for the LED strip, more on that later.
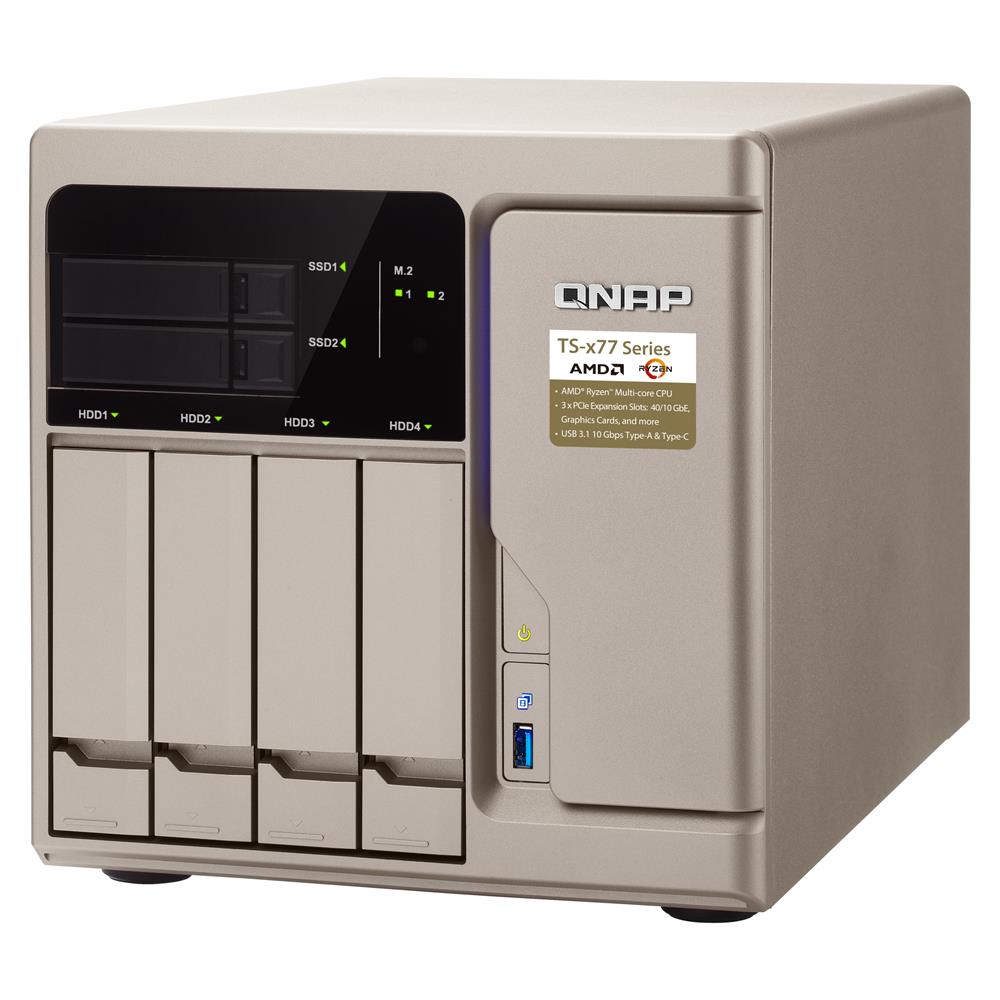
Its cool, but its not a doorway to heaven!
The rear I/O is well distributed, and USB 3.0 heavy. The great thing is the vertical row of USB ports, so those chunky flash drives and WiFi dongles can actually be connected unmolested by its neighboring device. Somebody at QNAP was listening.
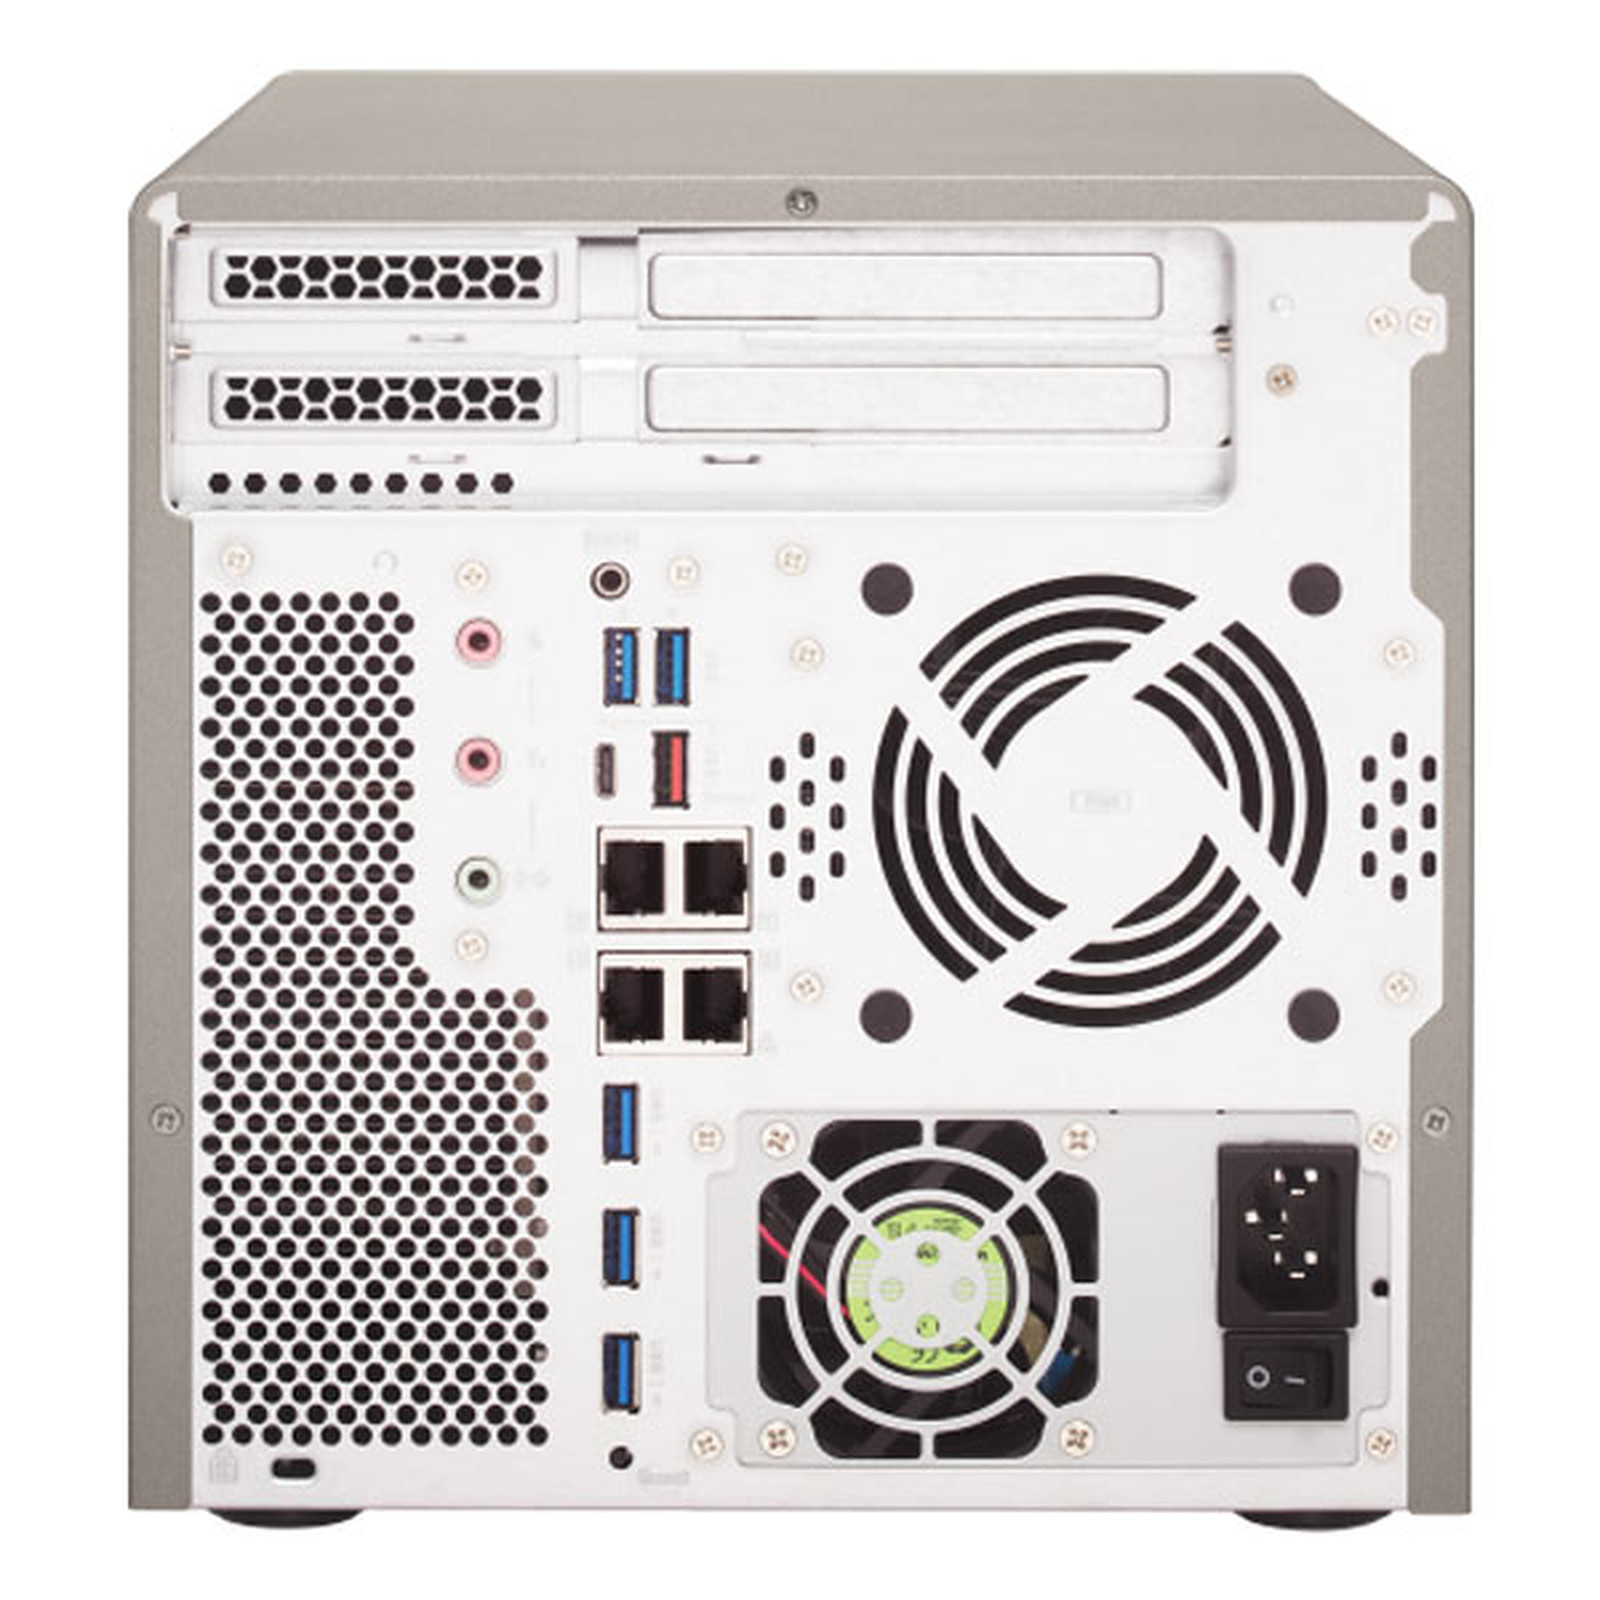
Notice the 2x MIC 3.5, 1x speaker Jacks. 4x Gb NIC ports, USB 3.0 ports and USB-C and 10Gb/s USB 3.1
Drive installation
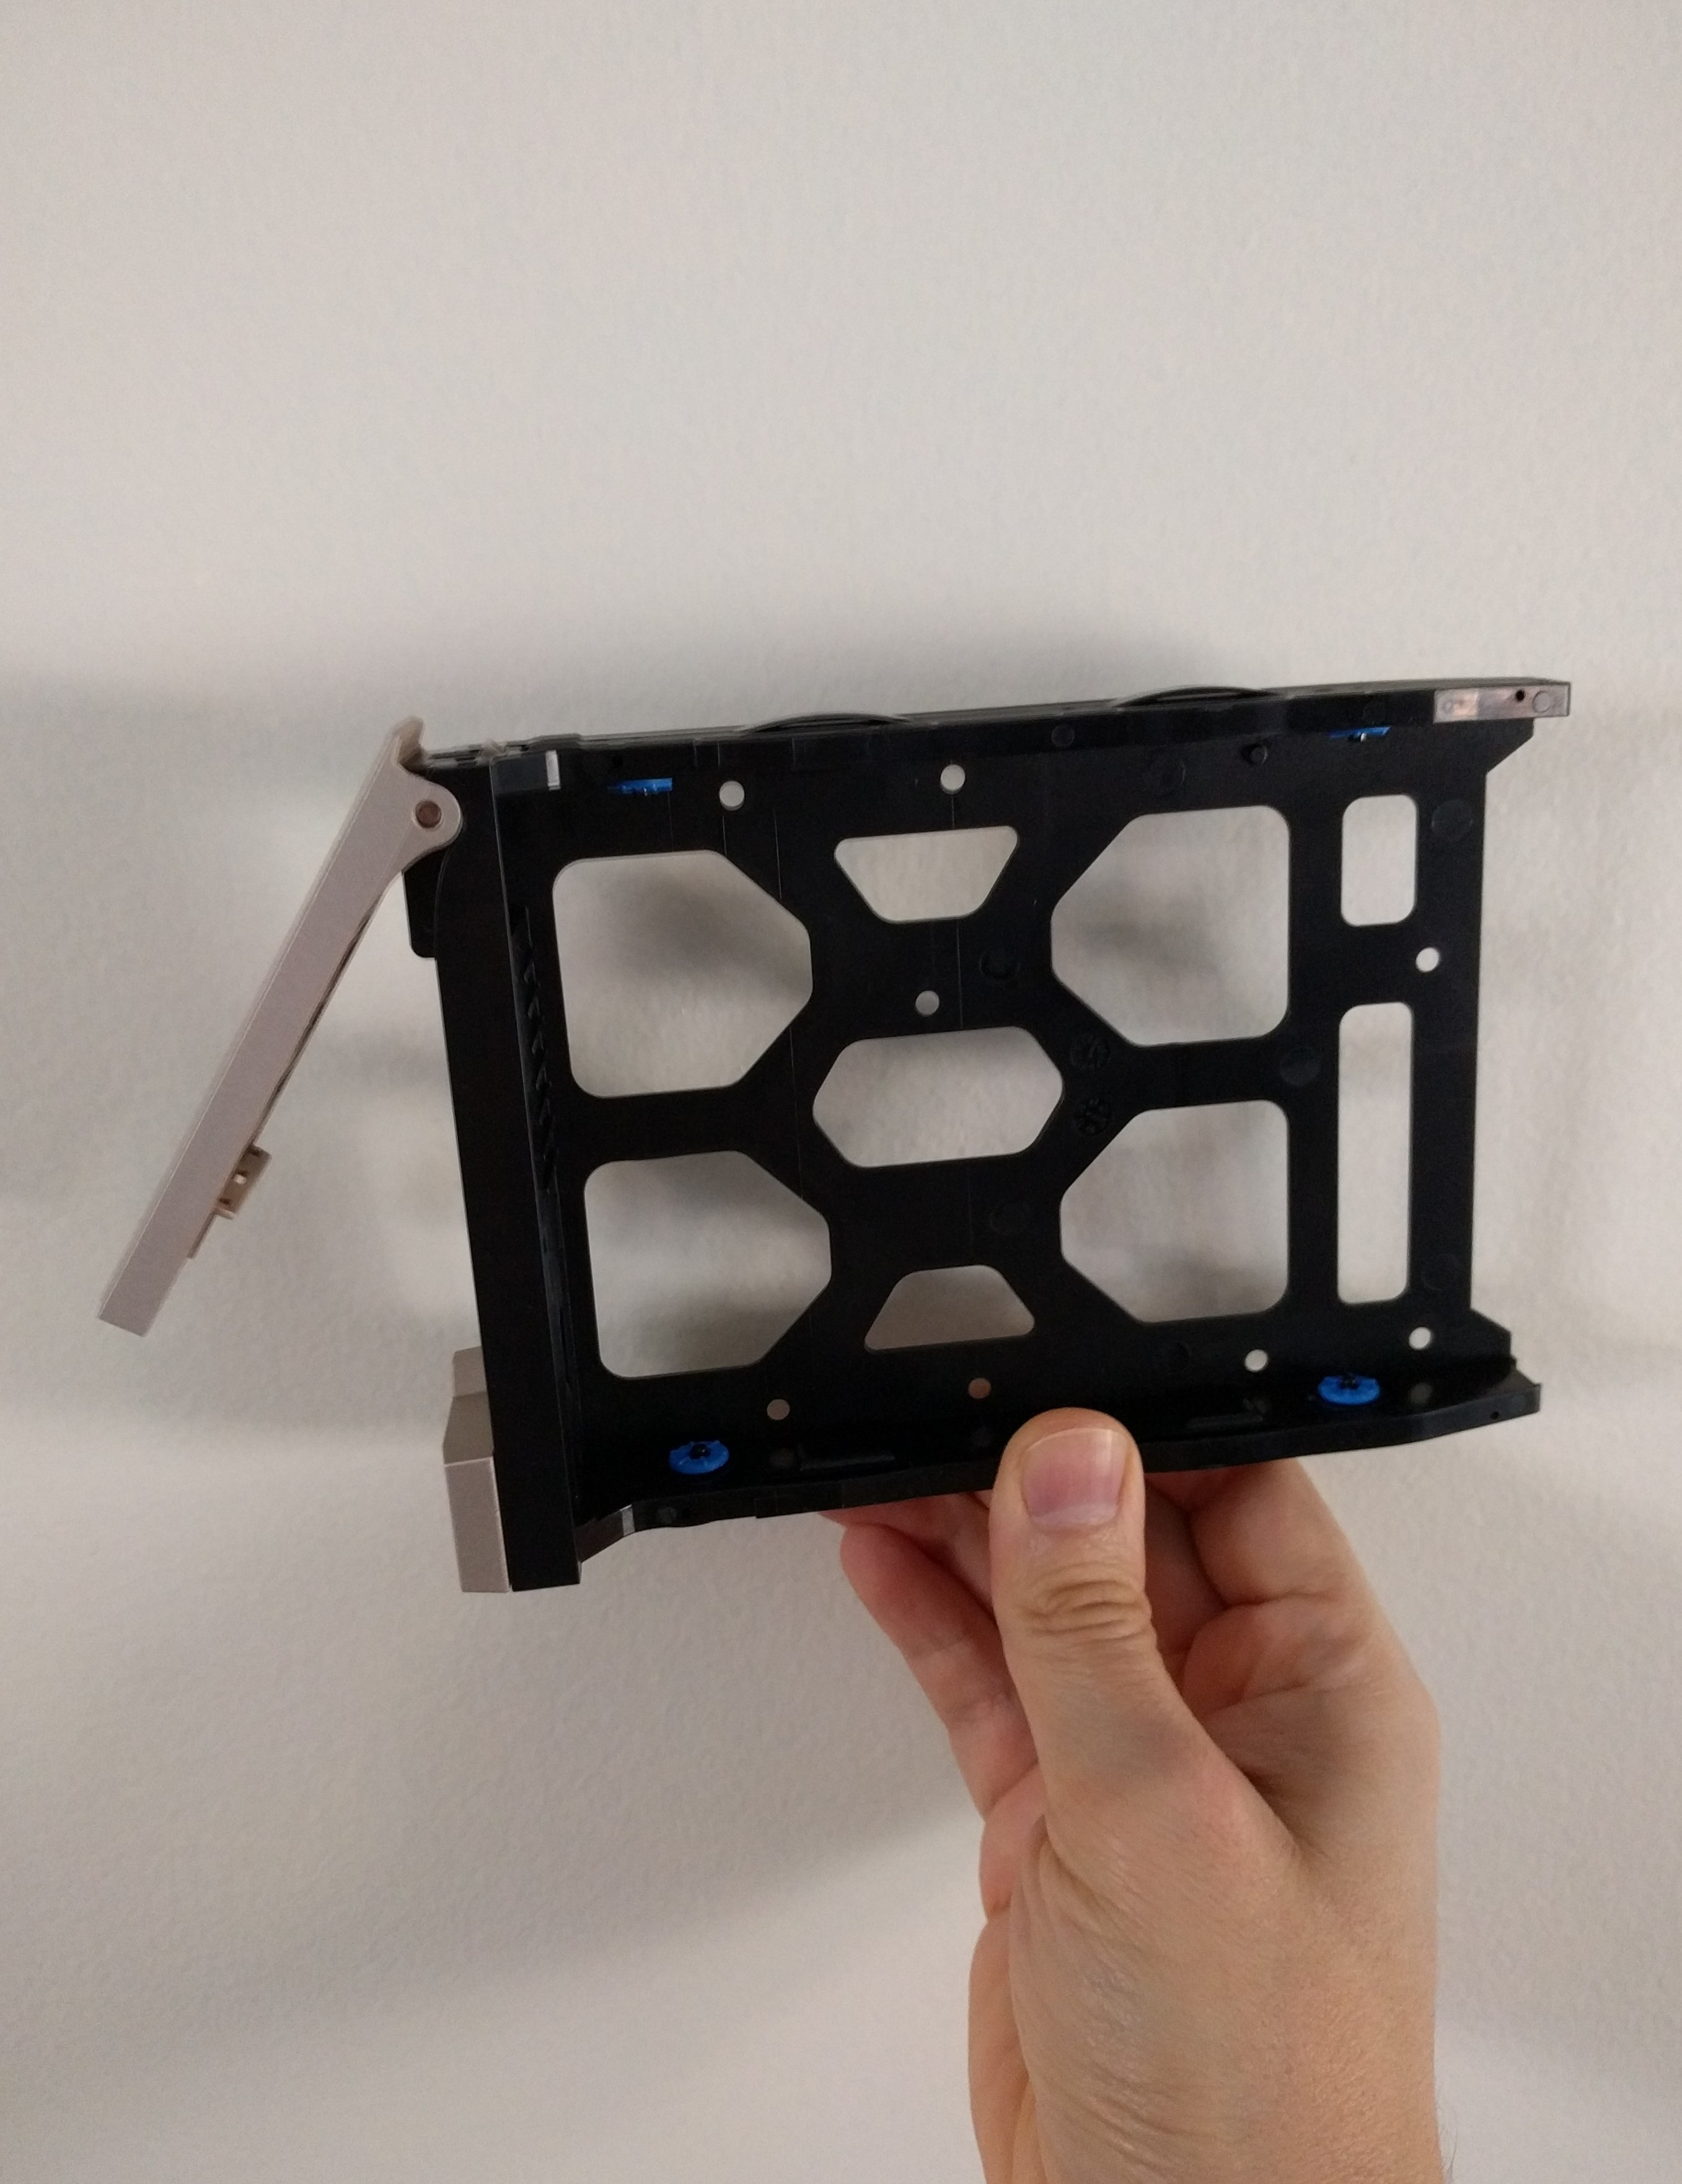
A good measure of a great design is how well it can be setup and how easy it is to install. Specifically, being able to install the hard drives in a tool-less way is a great leap forward from previous designs and deserves special note, especially given the level of detail that has gone into it. You can now remove a drive tray from the NAS and in the case of the 3.5” bay’s, simply remove the snap lock tabs, insert the drives and click them back in place and insert the tray back into the NAS. No more screws, but QNAP do still provide them.
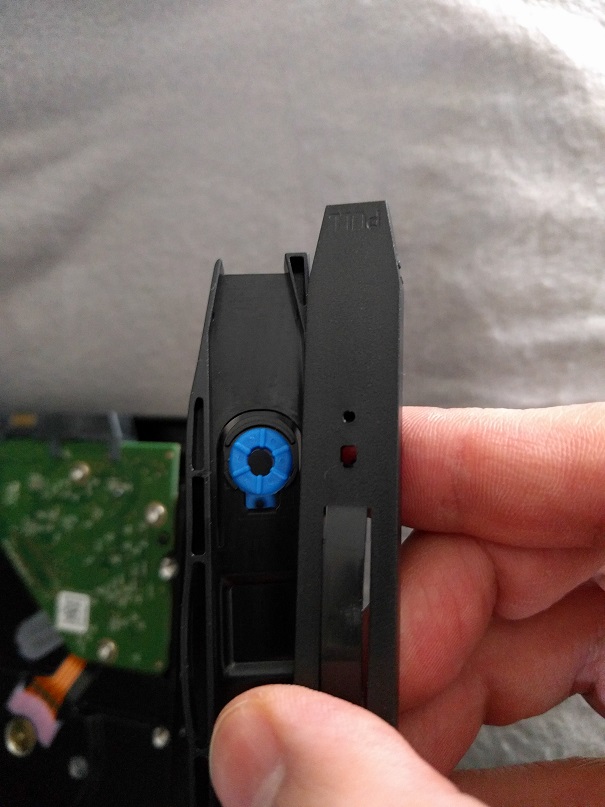
Of course, this was not instantly apparent, especially to somebody who is very familiar with the previous models going back to the TS-x12. It should be quite forgivable for any experienced person to be taken a-back and have to consult the quick start guide to realise there is now a locking/clamping mechanism in play. A minor 30 second detour for several minutes of fumbling around with screws saved. Notice also, the inbuilt rubber anti-vibration washers (blue) on the screw holes. Even high RPM drives would be dampened with these bad boys. Although photos wont translate, they feel rather high quality and unlikely to deteriorate.
The 2.5” bays are more straight-forward, you press the disk inside the tray, allowing it to flex and snap-lock in place. To remove you press the drive and flex tray a little to release.
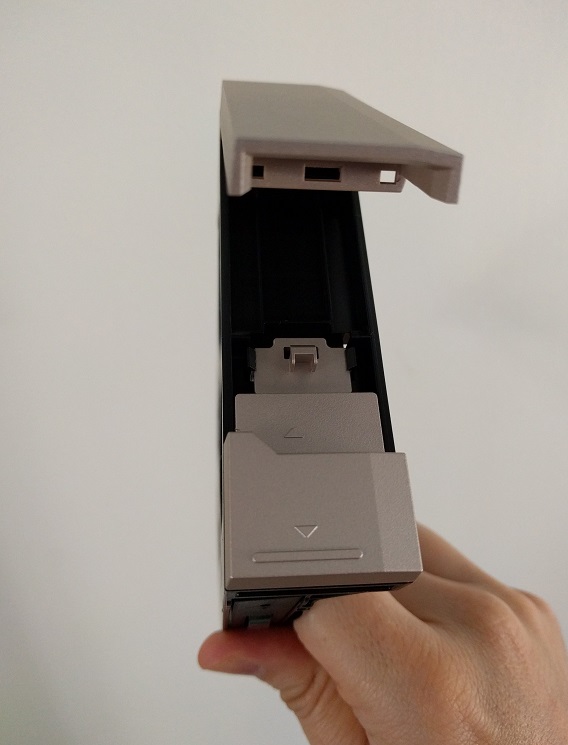
Removing the 2.5” and 3.5” trays requires actioning the lock tabs. For the 2.5” the lock tab is a flick tab left/right and a button press to extend the removal lever. The 3.5” have vertical lock tabs that you slide up/down to lock/unlock. Extending the arm is done by manually pulling on the bottom of the arm
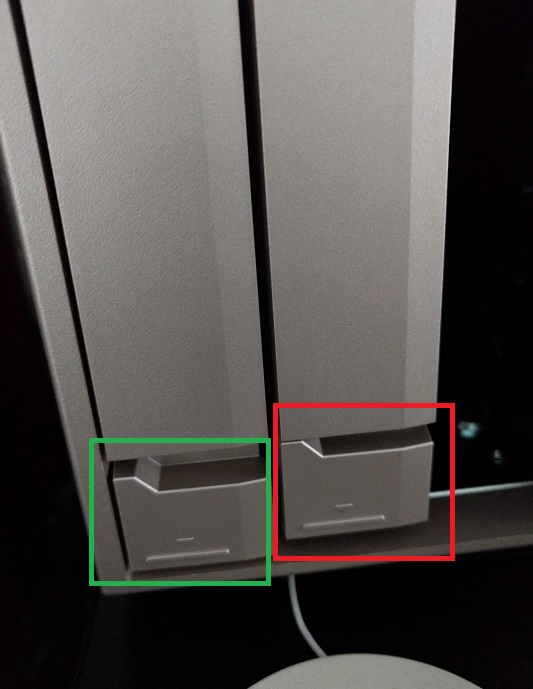
Green unlocked position, Red the locked position.
This is different to previous models of QNAP and the suspicion is that these mechanisms not only prevent accidental release, but also form part of the anti-vibration measures. Suffice to say that with 3.5” drives installed in the 4 main bays, you won’t hear any serious vibration noise whatsoever.
Inside
Inside is also a serious upgrade in design. Firstly the inner framing support is far stronger and superior to previous models, there is stronger framing and absolutely no chance of warping or flexing, particularly important not just for the case but for the PCB’s that are attached. Bravo.
The components are split in to two areas with the inner framing forming an “H”. The power supply, PCI-Express slots and hard disks reside on one side with the power supply having superb inbuilt cooling and the back plate has a large cooling fan to cycle air from the front of the disks and out the back. The mainboard housing the CPU, RAM, PCI slots and CMOS clock battery are on the opposite side.
Thermally there are some big changes too, obviously the AMD Ryzen CPU demands some respect and needs a decent size heatsink. The heatsink has a nice size copper pipe in the middle too and is mounted with fins splayed parallel to the adjacent cooling fan to allow the RAM and M2 combination cooler to cater for cooling the CPU as well. In fact the custom designed cowling houses two Xtreme BD129733LB 12V cooling fans, which has been carefully designed to sweep air along the RAM and M2 devices (if installed), as well as push air through the CPU heat sink and PCI cards (if installed). The entire back panel is opened up to finally push the hot air out the back. Overall a very neat and straight forward design.
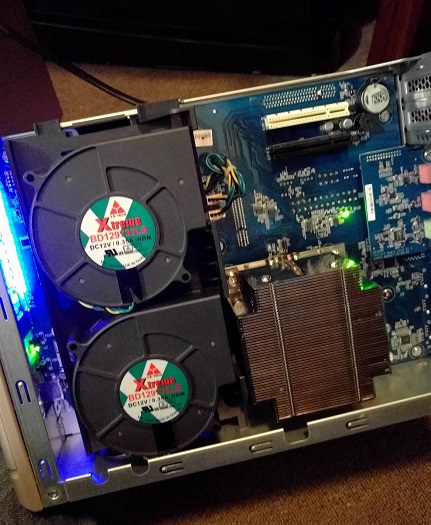
LED Strip on left (front bezel), 2x Xtreme coolers, Large CPU heatsink (Middle), CMOS coin battery (Top-Right), Sound card expansion board (Mid-right)
And it is with this we re-examine the front panel and bezel mentioned earlier. After all the air has to come from somewhere and indeed it does. Air flows from the bezel on the front as its trailing edge along the LED has a discrete air vent. It is a nice design aesthetically because you don’t look at the NAS and think “yuck what an ugly air vent”. You also don’t cover it up mistakenly.
Interestingly and of note, is the audio expansion board. Instead of the audio board being part of the mainboard and its I/O shield it’s actually separate and by virtue, replaceable. It means that if it fails, it can be replaced, or perhaps may have an upgradeable replacement that can be installed. Currently it provides 3.5mm audio jacks but this could conceivably be changed. The board is labelled as TVS-X77 which the astute may notice the similar models as TVS-xxx in the QNAP range that also contains a video card. It is likely that the audio capabilities won’t differ between the ranges of models that include this feature.
Installing/changing components
Opening up the QNAP is same as any other QNAP model and involves removing in this case, 3 screws. The panel slides off easily. It also goes back on easily too.
The first thing you may notice aside from the large heatsink is that the CMOS battery is located underneath the PCI slots, just next to the built-in speaker. This means that if you do install additional video cards or other devices in these slots, you must remove them in order to change the battery. This of course will make the changeover take longer. Shame it wasn’t near the CPU or somewhere less intrusive.
PCI and PCI-Express cards are a straight forward installation, remove the back I/O panel and slot it in. In terms of options there are PCI-Express M2 cards and Network expansion boards available, but you most likely to install video cards in these, some of which may require a higher wattage power supply so be mindful of this and refer to QNAP’s compatibility page.
In order to install additional RAM or the M2 devices, you will need to remove the cooler cowling. This is actually very easy to do and the instructions are in the user guide. 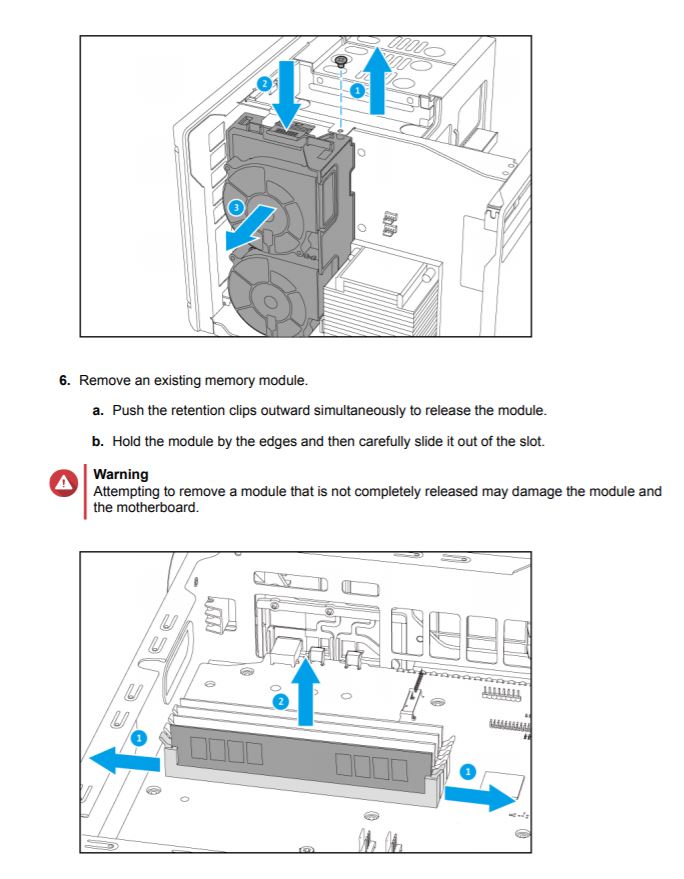
First you would unplug the two fans from the mainboard and remove the screw along the center bar. Near this screw is a long tab that you grab and leaver the entire cover off. With the RAM exposed it’s all traditional installation, ensuring that you respect the user guide with RAM placement depending on the combo being used. The ram included with the TS-677 8GB is 2x ADATA AD4U2400W4G17-BSSE, which is DDR4/2400 RAM, nice and fast but they do not contain heatsink coolers, but they do have pretty fanned out pins. Upgrading the RAM to some high end RAM with coolers could be an option.
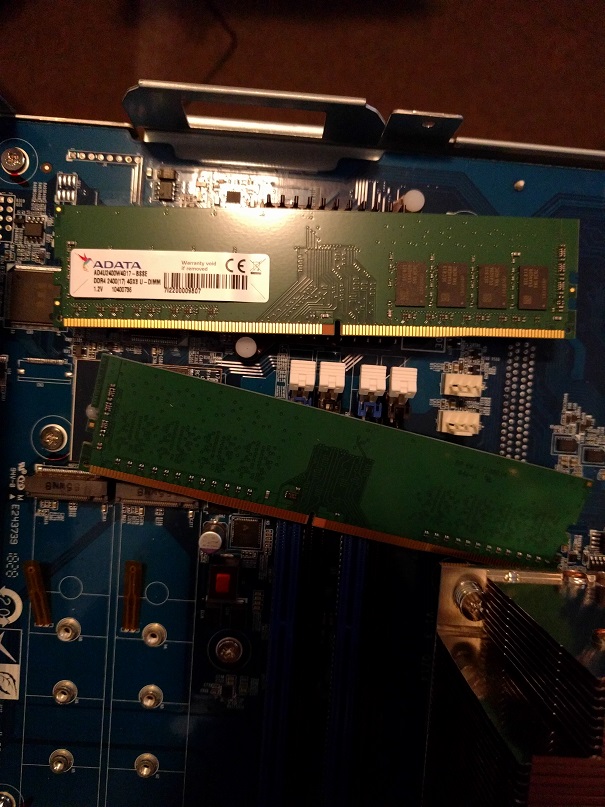
M2 slots on bottom left, 4x DDR4 RAM slots to the right
The M2 slots are also exposed and can be installed and mounted. QNAP actually provide two M2 heatsinks as standard in the box. Given the heat these can generate and the use of the cooling fan and measured clearance, it would be wise to utilise these even if your M2 disks shipped with their own.
Cleaning components
Although it takes time for dust to build up, it’s possible to speculate the need to clean the NAS and how easy this may be. Dust is likely to gather eventually in the front bezel/case along the LED and air inlet. Dust is also likely to gather on the inside and outside of the power supply and around the ram cooler and absolutely likely along the side of the CPU heatsink that faces the airflow. But how much is ‘some’, well that depends on the environment and the fan speeds. For most people, it may take a couple of years before cleaning beyond running the vacuum over the exposed grills is necessary. The fans are controlled by the QTS OS which can be individually set to “SMART FAN” or you can manually dial in some monstrous carnage of air flow. Either way, it is safe to say that with some compressed air or let’s be honest, the vacuum hose, you can easily remove the dual cooler and clean it, clean the heatsink and clean the system case fan and front bezel inside and out with minimal effort.
The blue LED strip
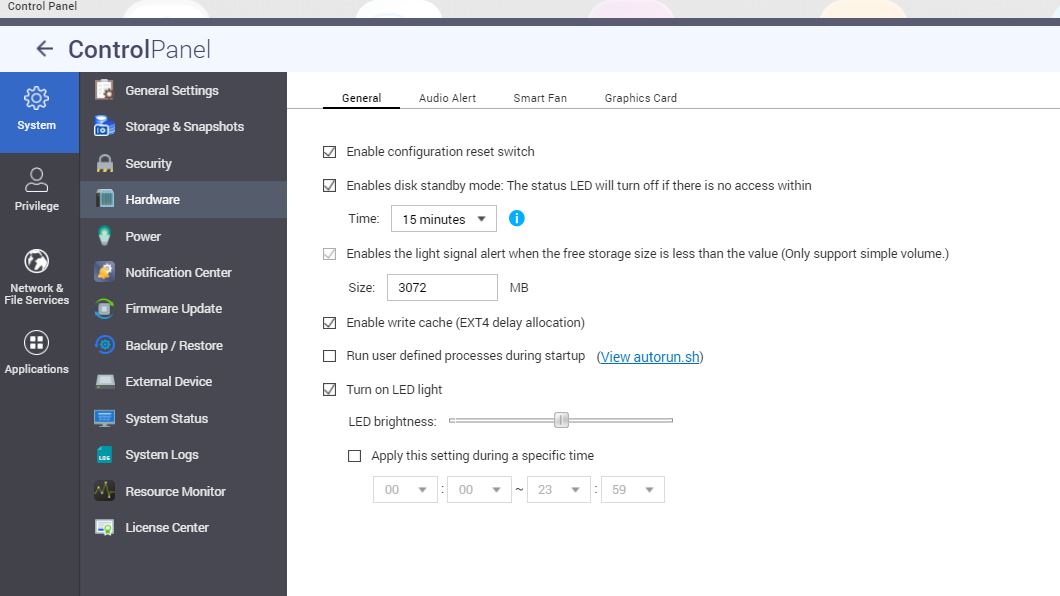
Blue is a colour that is high visibility at day and night. This can be a great thing or a bad thing depending on the intended application. It is also an interesting contrast compared to the yellow LED indicator lights of the disks. The good news is that you can actually disable the light entirely in the QTS OS > Hardware > General tab. The bad news is that the option allows for this to be an adjustable brightness during a scheduled time, this feature simply does not work for the TS-677. Any adjustment you make will apply 100% of the time. You can however adjust the brightness level of all lights down to ~20-25% before you eliminate the HDD, M1 and M2 LED indicator lights. It is a shame that these are not independent controls, but this might be addressed in a future QTS update.
Voice system
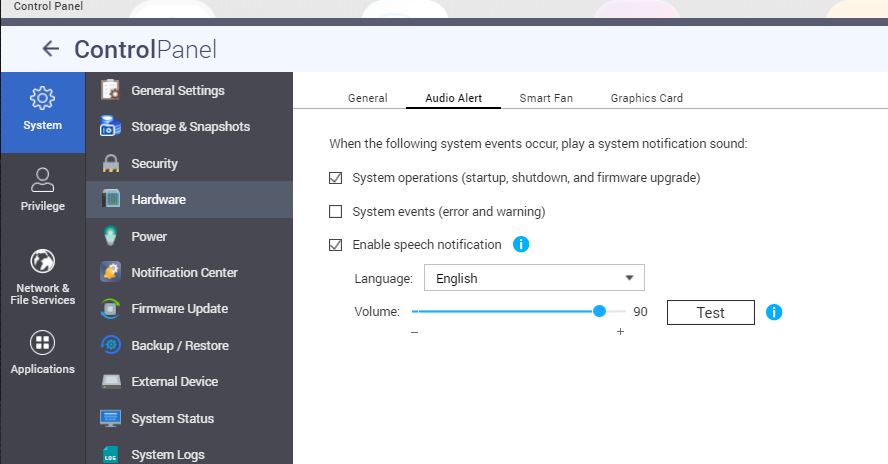
A new and exciting feature is that the NAS speaks to you. That built-in speaker near the PCI-Express slot is actually quite loud. Of course, you only hear beeps until you install the hard disks, but once you do, QTS has built in recorded voices in English and Chinese, telling you when the NAS has successfully booted up, or under certain fail conditions. Without the LCD, you may not know what your QNAP is doing. This audible alert is actually rather a nice touch. Clearly the audio is in the OS, which means it’s a bunch of files in the filesystem. If these are stored in non-read-only area its possible they can be replaced, so perhaps these audio files can be customised. In any case, this feature can be disabled entirely and its volume can be reduced to about 50% before it is inaudible.
Verdict
This QNAP is definitely a better designed, better built machine, compared to some of its former models. The dual fan cooling system for the RAM, M2 and CPU devices is clearly an innovation that is actually a step forward and as mentioned before is easily removed and cleanable.
With the machine running with “Smart Fan” settings enabled, low end disk access every hour or so for several days, the hard drive/power supply side is actually rather cool. The case itself is cool to the touch on the left side and barely warm air can be felt on the back. On the right side, things are a bit different. Warm air can be felt coming out of the large grill and the case is warm to the touch with the heat concentrated directly where the heatsink is located. This isn’t necessarily a bad thing, the heat is reasonable and CPU’s generate heat. The CPU utilisation during this period (based on observations) did not exceed 10%. This may mean that some fine tuning of the fan controls may be required if the system is going to be under heavy usage.
The airflow can be felt at the front as you wave a hand across. You can feel the pull of air around the blue LED strip and you can feel an even stronger flow in-between the hard disks. So you can be assured that air is flowing over the disks PCB and casing cooling those delicate components. The design flaw here is that less air can flow next to the LED strip; there is limited surface area, limited perforation and objects in its path to the coolers. When the CPU/RAM cooler is running at low RPM, not enough volume of air is moving to push the heat out of the CPU heatsink. At 100% the air flow is perfectly sufficient and you really can feel the cool air rush in near the LED strip and the hot air rush out the back.
A quick glance at the Smart Fan settings when switching to manual, places the fan’s RPM at around 20-25%. Approx. 3-5 minutes at 100% is enough to level out the temperature and cool it down comparatively to the other side of the NAS, with the outer case becoming cool to touch. The smart FAN settings are not tuned to counteract the reduced airflow, but that being said it’s not that bad. Systems engineers should absolutely max out the FAN settings if installing in corporate server rooms etc.
Overall, this is a bit of a fail. The front panel should have been designed to allow for more airflow, and the Smart Fan throttle should be further tuned to maintain the CPU at a much cooler settings. The system is quiet though.
The stand out features by far is the disk trays snap lock designs. Installing disks in a NAS, replacing failed disks, all of these things take much less time when you do not require tools. But the anti-vibration reduces noise and vibration damage and that is a big win for this model.
In the next few reviews, we will examine the TS-667’s performance, speeds and some key features.
About the Author
Scott De Lacy Scott has a professional IT background spanning over 18 years, is an hobbyist electronics designer, talented musician, holds qualifications as a trainer and experience in emergency and community services sectors. He reviews Movies, PC and XBOX One games, and hardware.
Related Posts

Baseus S1 Pro 3K Outdoor Dual Camera Kit Review →

Nintendo Switch 2 … Belkin has you covered, literally! (NS2 Belkin Review) →

Razer Wolverine V3 Pro Controller Review →